Neo Lighter
cod.
NA.LT.4_A01
1. Download the app
Download the free Casambi App directly from
the AppStore or the Google Play
For all the functionality of the Casambi App
download the Short User Guide from the
Casambi website
https://casambi.com/static/datasheets/Short-
user-guide.pdf
2. Open the App
Before you open the app be carefull about this
points:
-
the Bluetooth need to be
ON
on your
smartphone or tablet
-
have done all the updates of the operating
system;
-
have installed and configured a Casambi
device or a PLH Dimmer or PLH Jellyfish
-
have created a ‘
Network
’
3. Add the device
To add the Neo Lighter on your network you need
to have installed a Casambi enabled lighting
fixture, a PLH Dimmer or a PLH Jellyfish.
Refer to the specific manual for the installation of
those devices.
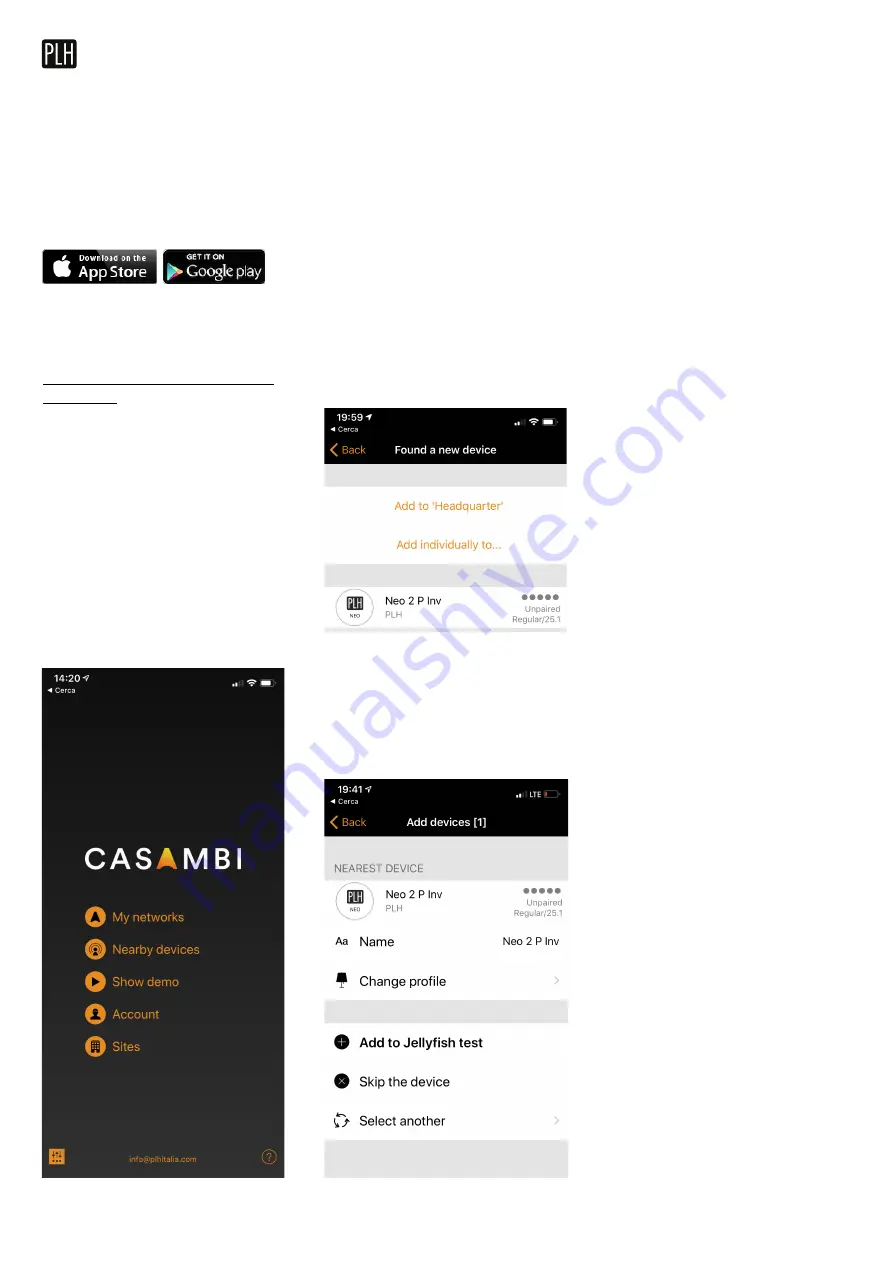
After you open the Casambi App on your
Smartphone,
take pressed
the main button
of the Neo Lighter and a window ‘Found a new
device’ will appear.
Then click on
Add individually to…
, change
the Name of your Neo Lighter, and add to your
new network.
Release the button only at the end of the
process.
Take in mind that by default the pro
fi
le is
provided with the Neo 2 P Inv.
But are available 3 different profile:
-
Neo 2 P
Will be possible to set up only the click and
the shake to different functions or scenario:
rotation clockwise will dimm UP and counter
clockwise will dimm DOWN the main
scenario or light associated to the main
push button
-
Neo 2 P Inv
Will be possible to set up only the click and
the shake to different functions or scenario:
rotation clockwise will dimm DOWN and
counter clockwise will dimm UP the main
scenario or light associated to the main
push button
-
Neo 4 P
Will be possible to set up 4 different
functions or scenario for every command,
main push button, rotate clockwise and
counter clockwise and shake
If you want to change it, select the new profile
from the ‘
Change profile
’ option. Will be
possible to change it again later following the
steps at point 5
Don’t forget to always press the main
button or the Neo Lighter will fall in sleep
and break the communication.
4. Assign input functionality
To assign and change the preferences of the
Neo Lighter go on
More / Switches
and select
your Neo Lighter
Depending to the profile you choose you will
have 2 or 4 presets.
From the beginning all the input will be ‘Not in
use’.
Tap to select
to change the functionality.
You can control any Casambi devices or
scenarios.
To control the Jellyfish output click on ‘Control
an element’ and select then the right output
To control a PLH Dimmer click on ‘Control a
Luminaire’.
Refer to the Casambi App Manual for any
further study.
© 2019 - epic srl - All rights reserved
Page | 5
4


