English
34
The belt may require periodic tracking adjustment
depending on use and walking/running characteristics.
Some users will affect tracking differently. Expect to
make adjustments as required to center the tread-
belt. Adjustments will become less of a maintenance
concern as the belt is used. Proper belt tracking is an
owner responsibility common with all treadmills.
NOTE
•
Damage to the running belt because of
incorrect running-belt adjustments is not
covered by the products warranty.
Troubleshooting
Despite continuous quality control, defects and
malfunctions caused by individual components may
occur in the equipment. In most cases it’s
unnecessary to take the whole device in for repair, as
it’s usually sufficient to replace the defective part.
If the equipment does not function properly during
use, contact your Tunturi dealer immediately. Always
give the model and serial number of your equipment.
Please state also the nature of the problem,
conditions of use and purchase date.
If you require spare parts, always give the model,
serial number of your equipment and the spare part
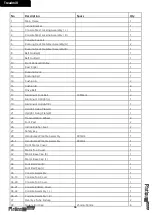
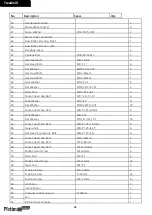
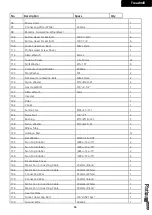
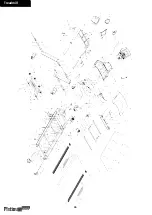
number for the part you need. The spare part list is at
the back of this manual. Use only spare parts
mentioned in the spare part list.
Transport and storage
WARNING
•
Carry and move the equipment with at least
two persons.
•
Remain standing in front of the equipment
on each side and take a sturdy grip at
the handlebars. Tilt the front of the
equipment so as to lift the rear of the
equipment on the
wheels. Move the equipment and carefully
put the equipment down. Place the
equipment on a protective base to prevent
damage to the floor surface.
•
Move the equipment carefully over uneven
surfaces. Do not move the equipment
upstairs using the wheels, but carry the
equipment by the handlebars.
•
Store the equipment in a dry place with
as little temperature variation as possible.
Summary of Contents for PRO Treadmill 3.0
Page 2: ......
Page 3: ...Treadmill 3 A...
Page 4: ...Treadmill 4 B 1 1 1 1 1 1 1 1 1 1 1 STEP 3 TOOLS STEP 2 STEP 1 STEP 4 1 User manual 1...
Page 5: ...Treadmill 5 C STEP 3 STEP 2 STEP 1 STEP 4 TOOLS D 0...
Page 7: ...Treadmill 7 D 2 117 3 5 x 12L 7pcs Sheet metal screw STEP 3 STEP 2 STEP 1 STEP 4 B C F D G E...
Page 8: ...Treadmill STEP 4 TOOLS 8 TOOLS...
Page 9: ...Treadmill 9 D 3A D 3A 4 3 108 108 M8x12L Socket head cap bolt 6pcs STEP 3 STEP 2 STEP 1...
Page 11: ...Treadmill 11 D 4 73 32 73 73 M5x12L Phillips head screw 4pcs STEP 3 STEP 2 STEP 1...
Page 12: ......
Page 13: ...Treadmill 11 E 01 E 02...
Page 14: ...Treadmill 12 E 3 E 07 E 4 E 08 E 5 E 09 E 6 E 10...
Page 15: ...Treadmill 13 E 11 E 15 E 12 E 16 E 13 E 17 E 14 E 18...
Page 16: ...Treadmill 14 E 19 E 23 E 20 E 24 E 21 E 25 E 22 E 26...
Page 17: ...15 Treadmill E 27 E 31 E 28 E 32 E 29 E 33 E 30 E 34...
Page 18: ...16 Treadmill E 35 E 39 E 36 E 40 E 37 E 41 E 38 E 42...
Page 19: ...17 Treadmill E 43 E 47 E 44 E 48 E 45 E 49 E 46 E 50...
Page 20: ...Treadmill 18 E 51 E 55 E 52 E 56 E 53 E 57 E 54 E 58...
Page 49: ......
Page 52: ...Treadmill 36...
Page 53: ......
Page 54: ......
Page 55: ......

