
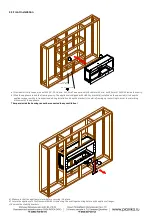
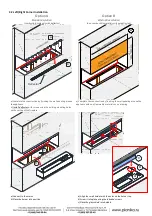
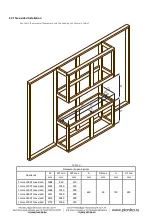
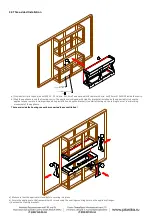
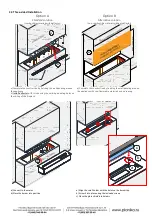
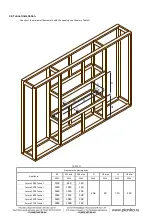

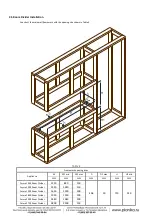
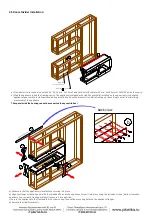

3.5 Room Divider Installation
21
d
c
a
d
b
back view
b
d
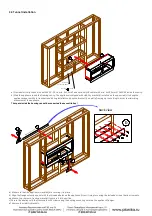
a) Provide electricity connection with 230 V, 50 Hz, min. 3x1,5mm
2
and optional SHS cables with min. 4x0,25 mm2/ AWG 23 inside the cavity.
b) Slide the appliance inside the framing cavity. The appliance is shipped with stability bracket(s) installed on the open side(s) to keep the
appliance square while in transport and during installation. Keep the bracket(s) on while framing up the setting to assist in minimizing
movement of the appliance.
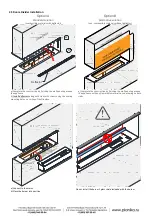
The space inside the housing cannot be connected to any ventilation !
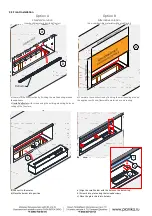
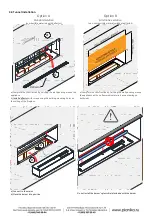
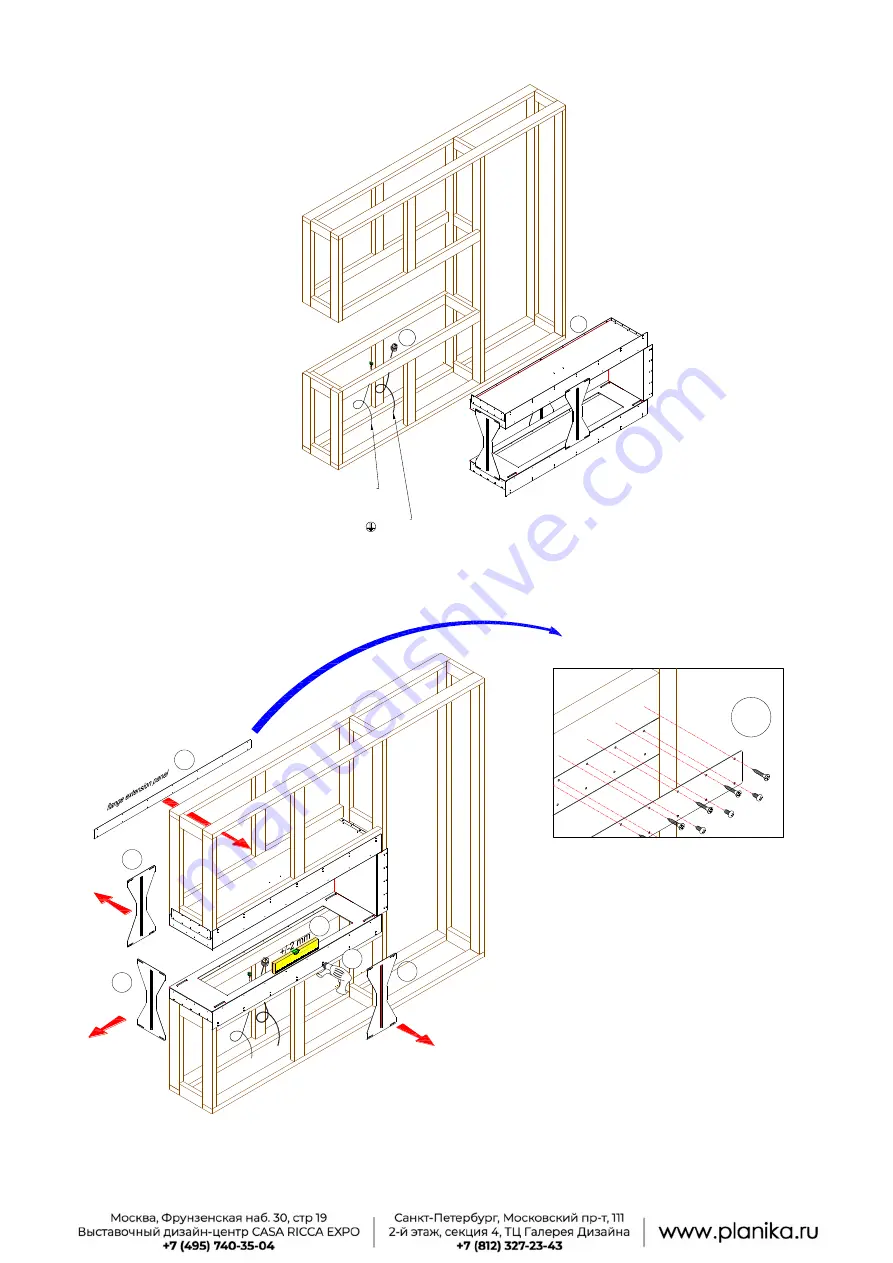
a) Make sure that the appliance is level before securing it in place.
b) Align the flange extension panel with the threaded holes on the appliance. Screw it into place using the included screws (bottom row onto
appliance, top row onto framing material) to secure it into position.
c) Secure the appliance to the framework with screws using the existing mounting holes on the appliance flanges.
d) Remove the stability brackets.
Optional SHS,
min. 4x0,25 mm
2
AWG 23
230 V, 50 Hz, min. 3x1,5 mm
2
PE
b
a


