background image

8

Chapter 3 Basic Configuration

3.1. WEB Configuration Access

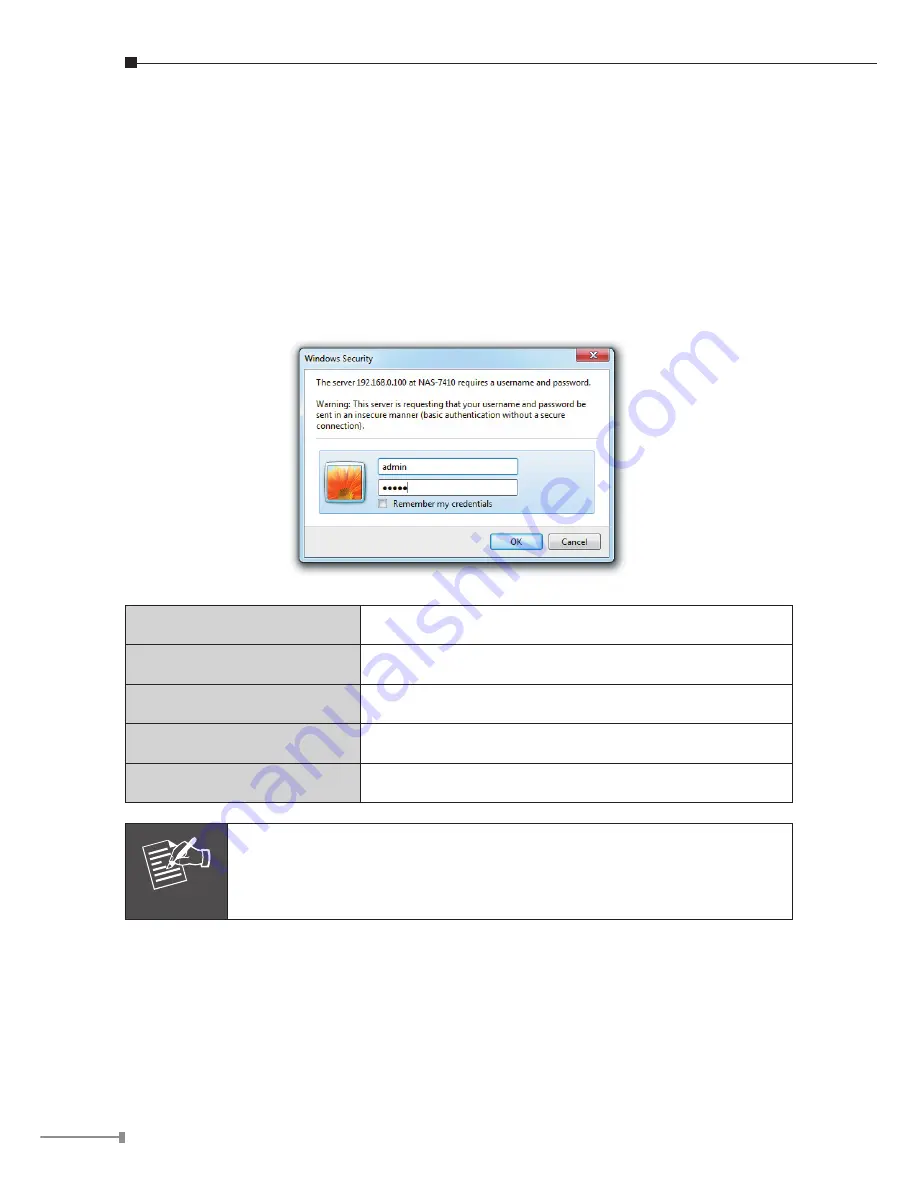
The NAS-7410 provides GUI (Web based, Graphical User Interface) for management 
and  administration.  The  default  IP  address  of  NAS  server  is  192.168.0.100.  You 
may  now  open  your  web  browser,  and  insert  http://192.168.0.100  in  the  address 
bar  of  your  web  browser  to  login  web  configuration  page.  The  NAS  server  will 
prompt  for  login  username  /  password.  Please  enter:  admin  /  admin  to  continue 
the NAS Server administration.

Default DHCP Client

Off

Default IP Address

192.168.0.100

Default Login User Name

admin

Default Login Password

admin

Search Tools 

NAS Finder

Note

If  the  networked  device’s  default  IP  Address  (192.168.0.100)  is 
already  used  by  another  device,  the  other  device  must  be  turned 
off  until  the  device  is  allocated  a  new  IP  Address  during  configura-
tion.

Summary of Contents for NAS-7410

Page 1: ...NAS 7410 Quick Installation Guide Version 1 0 ...

Page 2: ...e Contents 3 1 1 NAS 7410 Included Items 3 1 2 Physical Details 3 Chapter 2 Installing and Starting NAS system 6 Chapter 3 Basic Configuration 8 3 1 WEB Configuration Access 8 3 2 HDD Formation and RAID Setting 9 Further Information 10 ...

Page 3: ...l 2 5 inch HDD Screw x 16 l l 3 5 inch HDD Screw x 12 l l Console Connector x 1 l l User s Manual CD x 1 l l Quick Installation Guide x 1 l l Note If any of the above items are missing please contact your dealer immediately 1 2 Physical Details Dimensions 200 x 320 x 210 W x D x H Weight 5 1 kg gross weight ...

Page 4: ...r Button Press the button to start the NAS Reset Button This button is used to restore all the factory default settings USB Socket Connect to UPS and external HDD FAT FAT32 NTFS LED Color Description Power Blue On Power on Off Power off HDD Activity Red HDD is being accessed ...

Page 5: ...ternal hard drive case COM Connect to UPS LAN Jack LAN1 These RJ 45 ports support auto negotiating Gigabit Etherent interface That allows your system to be connected to an Internet Access device e g router cable modem or ADSL modem over a CAT 5 twisted pair Ethernet cable LAN Jack LAN2 USB Socket Connect to UPS and external HDD FAT FAT32 NTFS VGA Future Feature Service Future Feature ...

Page 6: ... well as the NAS 7410 Instruction on how to startup the NAS server by setting up the basic configuration through the Admin Home page or provided software tool PLANET NAS Finder which is also outlined in this chapter Installing the Hard Disk Drive 1 Release the HDD tray by pulling the lock to the right 2 Pull the HDD tray out of the case ...

Page 7: ...7 3 Place the HDD in the tray by unscrewing and screwing it 4 Put the HDD tray back to the case 5 Push the tray door back to the case to secure it ...

Page 8: ... browser to login web configuration page The NAS server will prompt for login username password Please enter admin admin to continue the NAS Server administration Default DHCP Client Off Default IP Address 192 168 0 100 Default Login User Name admin Default Login Password admin Search Tools NAS Finder Note If the networked device s default IP Address 192 168 0 100 is already used by another device...

Page 9: ... before any setting 1 Go to Volume Create to configure the server Volume Name and Volume Type 2 Please press the Volume Type to create RAID after selecting Free Disk and check Apply to be automatically formatted 3 After the format is completed you can access the storage of the RAID NAS server ...

Page 10: ...10 Further Information This guide is used to help you startup your NAS 7410 settings It is also recommended to check the user manual CD ROM for more details of the system and user configuration ...

Page 11: ...This page is intentionally left blank ...

Page 12: ...This page is intentionally left blank ...

Reviews: