720P IR Dome PoE IP Camera
ICA-4150
Description of I/O cabling:
Interface
Description
DC Power
The input power is 12V DC, 6W (max.)
RJ45
(LAN Socket, PoE )
Connecting to PC or Hub/Switch
For connection to 10BASE-T Ethernet or 100BASE-TX Fast
Ethernet cabling, this Ethernet port built auto-negotiation
protocol can detect or negotiate the transmission speed of
the network automatically. Please use CAT-5 cable to
connect the Network Camera to a 100Mbps Fast Ethernet
network switch or hub.
ONLY use one power source, either from DC or
from 802.3af Power over Ethernet.
2.2 Hardware Installation
1. Place the Camera on the ceiling or fix it onto wall
Use three screws to fix the Network Camera onto the ceiling or wall.
2. Plug an Ethernet cable into the Camera
Connect an Ethernet cable to the LAN socket located on the Network Camera’s bottom and
attach it to the network.
3.
Connecting the external power supply to Camera
Connect the power adapter to the DC power jack of the IP Camera.
4.
Done
2.3 Initial Utility Installation
This chapter shows how to quickly set up your IP camera. The camera is with the default
settings. However to help you find the networked camera quickly, the windows utility PLANET
IP Wizard II can search the cameras in the network that can help you to configure some basic
settings before you start advanced management and monitoring.
1. Insert the bundled CD into the CD-ROM drive to launch the auto-run program. Once
completed, a welcome menu screen will appear.
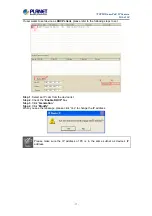
2. Click the “IP Finder II” hyperlink and a dialog box will appear as shown below:
If the welcome screen does not appear, click “Start” at the taskbar. Then,
select “Run” and type “D:\Utility\IP Finder II\setup.exe”, assuming D is your
CD-ROM drive.
- 12 -


