Planet Networking & Communication ICA-W3250V Quick Installation Manual Download Page 7

6.  For the waterproof reason, if you install a Micro SD card, please turn and lock the screws on the 

Micro SD card lid tightly and make sure it’s sealed.

Screw them tightly

Note

Be aware the waterproof rubber, improper placement or missing the rubber will cause 

seal malfunction.

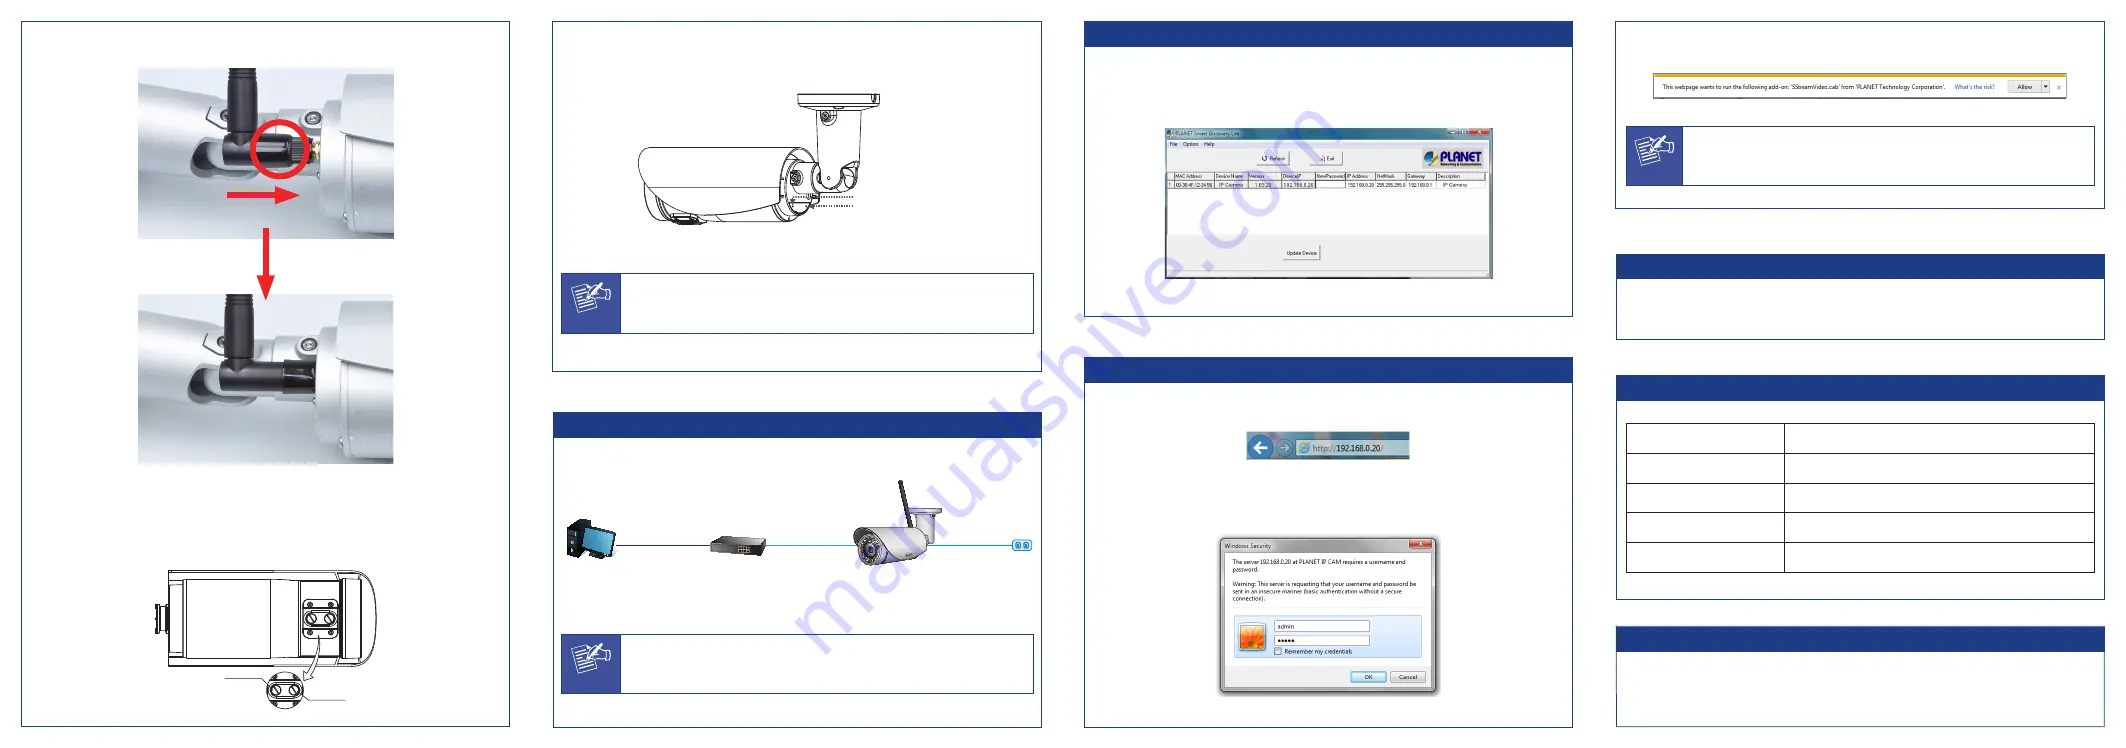
Step 3: Connecting Network and AC Adapter Power

User PC

(192.168.0.X)

Ethernet Switch

ICA-W3250V

Note

Use the power adapter shipped with the unit to ensure correct functionality.

Step 4: Running Installer Utility to Locate the IP Camera

 Insert the CD-ROM supplied in the product package and the CD will automatically run the 

installation. If not, please click the Smart Discovery Lite utility hyperlink to install.

  After the camera utility is launched, all cameras found in your local area network will be displayed.

Step 5: Opening the Dialog Box for Further Configuration

  Select the IP Camera you want to configure and input its IP address into the browser search bar.

  The IP Camera will be connected via Web browser automatically; the IP Camera will prompt for 

logon user name and password. Please enter 

admin

 as the default user name and password.

b.  Push the 

Rubber Cover

 until it could totally cover the antenna connector. It is helpful to prevent 

water.

3.  Plug the Ethernet cable into RJ45 connector (LAN port).
4.  Connect Video BNC connector to a TV set if necessary (to check camera viewing angle and focus).
5.  This IP camera is equipped with an external vari-focal lens controller. Please adjust “ZOOM” and then 

“FOCUS” as shown in the following picture until the image gets clear.

ZOOM

FOCUS

  When  the  device  is  logged  on  for  the  first  time,  the  browser  will  prompt  a  message;  please  click 

“Allow”

 to install controls.

Note

If IE9 or higher version browser is used, it is suggested that the PLANET camera Web 

link should be added as a trusted site.

Step 6: (Option) Wireless Connection

 If you want connect the camera to the Wi-Fi AP, please refer the Chapter 3. Web-based 

Management of user manual.

Appendix A: Default Setting

Default DHCP Client

On

Default IP Address

192.168.0.20 – if DHCP does not exist in the network

Default Login User Name

admin

Default Login Password

admin

Search Tools

Smart Discovery Lite

Further Configuration

For detailed configuration, please check user’s manual on the bundled CD.

If you have any other question, please contact the dealer where you purchased this product or you can 

contact PLANET directly at the following email address: [email protected]

Summary of Contents for ICA-W3250V

Page 1: ...eaker to the network camera This is for voice alert and two way audio Audio in Pink Connect a microphone to the network camera Ethernet RJ45 Connect to PC or hub switch For connecting to 10BASE T Ethernet or 100BASE TX Fast Ethernet cable this Ethernet port built N Way protocol can detect or negotiate the transmission speed of the network automatically Please use CAT 5 cable to connect the Network...

Page 2: ...eaker to the network camera This is for voice alert and two way audio Audio in Pink Connect a microphone to the network camera Ethernet RJ45 Connect to PC or hub switch For connecting to 10BASE T Ethernet or 100BASE TX Fast Ethernet cable this Ethernet port built N Way protocol can detect or negotiate the transmission speed of the network automatically Please use CAT 5 cable to connect the Network...

Page 3: ...eaker to the network camera This is for voice alert and two way audio Audio in Pink Connect a microphone to the network camera Ethernet RJ45 Connect to PC or hub switch For connecting to 10BASE T Ethernet or 100BASE TX Fast Ethernet cable this Ethernet port built N Way protocol can detect or negotiate the transmission speed of the network automatically Please use CAT 5 cable to connect the Network...

Page 4: ...b Push the Rubber Cover until it could totally cover the antenna connector It is helpful to prevent water 3 Plug the Ethernet cable into RJ45 connector LAN port 4 Connect Video BNC connector to a TV set if necessary to check camera viewing angle and focus 5 This IP camera is equipped with an external vari focal lens controller Please adjust ZOOM and then FOCUS as shown in the following picture unt...

Page 5: ...b Push the Rubber Cover until it could totally cover the antenna connector It is helpful to prevent water 3 Plug the Ethernet cable into RJ45 connector LAN port 4 Connect Video BNC connector to a TV set if necessary to check camera viewing angle and focus 5 This IP camera is equipped with an external vari focal lens controller Please adjust ZOOM and then FOCUS as shown in the following picture unt...

Page 6: ...b Push the Rubber Cover until it could totally cover the antenna connector It is helpful to prevent water 3 Plug the Ethernet cable into RJ45 connector LAN port 4 Connect Video BNC connector to a TV set if necessary to check camera viewing angle and focus 5 This IP camera is equipped with an external vari focal lens controller Please adjust ZOOM and then FOCUS as shown in the following picture unt...

Page 7: ...b Push the Rubber Cover until it could totally cover the antenna connector It is helpful to prevent water 3 Plug the Ethernet cable into RJ45 connector LAN port 4 Connect Video BNC connector to a TV set if necessary to check camera viewing angle and focus 5 This IP camera is equipped with an external vari focal lens controller Please adjust ZOOM and then FOCUS as shown in the following picture unt...

Page 8: ...eaker to the network camera This is for voice alert and two way audio Audio in Pink Connect a microphone to the network camera Ethernet RJ45 Connect to PC or hub switch For connecting to 10BASE T Ethernet or 100BASE TX Fast Ethernet cable this Ethernet port built N Way protocol can detect or negotiate the transmission speed of the network automatically Please use CAT 5 cable to connect the Network...

Reviews: