background image

Operating the ep46L/ ep55L

18

ep46L/ep55L User Manual

Note: 

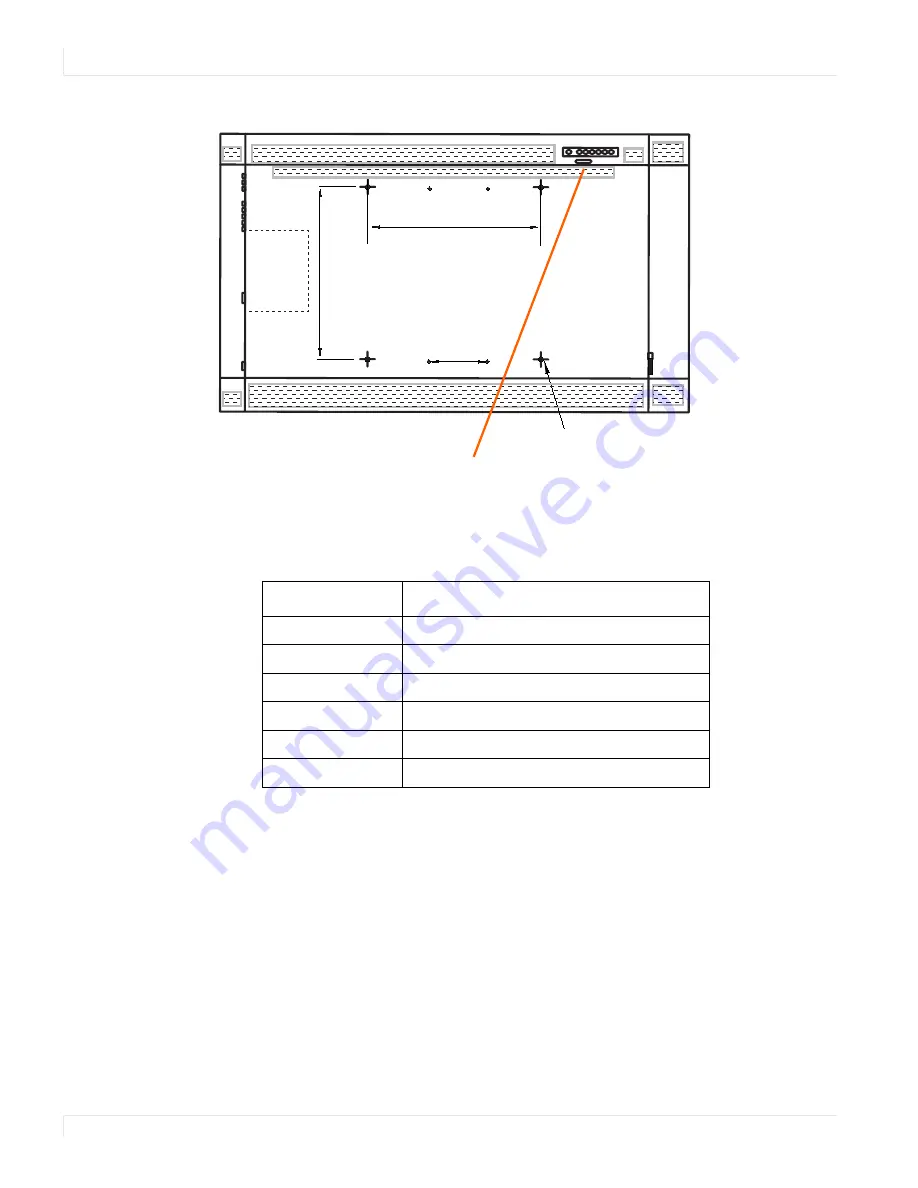
The LED turns completely off when in the “off” mode, regardless of whether the 

ep46L/ep55L is on or off.

LED On

Power Status

Condition

Green

Power on

Blinking Orange

No signal

Orange

Sleep mode (Standby mode)

Power saving mode

Off

AC off

Power off 

8X M8 THREADED INSERT

15.7”

400mm

15.7”

400mm

7.9”

200mm

Optional

HD-SDI

Power ON standby indicator,
Remote control receiver

Summary of Contents for ep46L

Page 1: ...ep46L ep55L User Guide...

Page 2: ...s or omissions contained herein or for incidental or consequential damages in connection with the furnishing performance or use of this material Warranty and Service Plans Planar warranty and service...

Page 3: ...opean Union Disposal Information 5 Normal Usage Guidelines 6 VESA Mounts General Description 6 Cleaning the ep46L ep55L 7 Package Contents 8 Unpacking the ep46L ep55L 8 Contents of the Accessory Kit 1...

Page 4: ...ep46L ep55L On 23 Turning the ep46L ep55L Off 23 Adjusting the Volume 23 Selecting the Input Source 24 PIP Mode 25 PIP Screen Table 27 OSD Menu Functions 28 Graphics Mode 28 Video Mode 31 OSD Menus 3...

Page 5: ...Status 55 Load Default Setting 55 Firmware Update and Boot Loader Upgrade 56 TCP Mode UDP Mode and UART 57 SMTP 57 Reset Device 58 Signal Compatibility 59 Specifications 61 Troubleshooting 63 Accessi...

Page 6: ...iv ep46L ep55L User Manual...

Page 7: ...ep46L ep55L has a native HD 1920 x 1080 resolution and both accept a wide range of input pictures from VGA to 1080p Additional features of the Planar ep46L and ep55L include ambient light control a w...

Page 8: ...n a wall the wall must be strong enough to hold it The ep46L display weighs 53lbs 24kg and the ep55L display weighs 64lbs 29kg Simply mounting it to wallboard or wall paneling won t be adequate or saf...

Page 9: ...from being walked on or pinched particularly at plugs convenience receptacles and the point where they exit from any of the ep46L ep55L displays 10 Only use the attachments accessories specified by t...

Page 10: ...changing video patterns or images However LCDs can experience temporary image retention when recommended usage guidelines are not followed What is Temporary Image Retention Temporary image retention T...

Page 11: ...roduktes entstehen k nnen zu vermeiden und entsorgen Sie dieses Produkt ordnungsgem Recycling hilft nat rliche Rohstoffe einzusparen Dieses Symbol ist nur innerhalb der europ ischen Gemeinschaft g lti...

Page 12: ...ture at the top of the wall is predicted to be above the specified ambient temperature for the panel Cooling may be done behind the displays and depending on the wall configuration it may be helpful t...

Page 13: ...re to do so may result in electrical shock or damage Keep the following points in mind when cleaning the surface of the ep46L ep55L When the surface of the ep46L ep55L becomes dirty wipe the surface l...

Page 14: ...pallets depending on the number of displays shipped The ep46L ep55L is packed using foam to protect it during shipping Before unpacking the ep46L ep55L prepare a stable level and clean surface near a...

Page 15: ...ep55L User Manual 9 2 Remove the top shipping foam accessory bag and packing list Item Description Quantity 1 LCD panel 1 2 Carton 1 3 Foam Cushion Top 1 4 Foam Cushion Bottom 1 5 Polyurethane Bag 1 6...

Page 16: ...ents of the Accessory Kit 10 ep46L ep55L User Manual Contents of the Accessory Kit Part Picture Quantity VGA Cable D sub 1 USB Drive 1 Power cord 1 IR extender cable 1 OSD Remote AAA batteries include...

Page 17: ...Dimensions ep46L ep55L User Manual 11 Dimensions ep46L B Front The dimensions are in millimeters unless otherwise noted 22 7 576 0mm 42 2 1072 3mm 40 2 1021 5mm 46 0 1168 4mm 24 7 627 1mm...

Page 18: ...unless otherwise noted Standard Inputs Optional HD SDI Inputs 8X M8THREADED INSERT 15 7 400mm 15 7 400mm 7 9 200mm Optional HD SDI LAN DisplayPort HDMI 1 HDMI 2 VGA DVI D Touch USB PC Audio In IR Ext...

Page 19: ...5L Front The dimensions are in millimeters unless otherwise noted front side 55 0 1397 0mm 49 8 1265 8mm 48 0 1213 6mm 29 0 736 6mm 26 9 684 4mm 1 8 46 2mm 1 0 27 2mm 1 0 27 2 mm 1387 0mm 47 6 1209 0m...

Page 20: ...ep46L ep55L User Manual ep55L Rear The dimensions are in millimeters unless otherwise noted 15 7 400 0mm 19 2 488 4mm 18 3 466 0mm 15 7 400 0mm 4X M8 THREADED INSERT 15 7 400mm 5 5 140mm 9 4 240mm Op...

Page 21: ...ou May Need LCD screen cleaner or LCD wipes available at most electronics stores At least two very strong people to help lift units into place Plan Your Installation You should have a detailed plan of...

Page 22: ...ouch USB PC Audio In IR Extender Line Out COMPONENT RS232C Audio In S Video Video Audio In Name Connector RS232C input x 1 D Sub 9 pin LAN input x 1 RJ45 DisplayPort x 1 DisplayPort HDMI 1 input x 1 H...

Page 23: ...6L ep55L OSD Keypad Buttons Key Descriptions Power Power on Power off Source Source selection toggle Menu Right Increase value Menu Left Decrease value Menu Up Menu Down Menu Exit Menu Exit 8X M8THREA...

Page 24: ...gardless of whether the ep46L ep55L is on or off LED On Power Status Condition Green Power on Blinking Orange No signal Orange Sleep mode Standby mode Power saving mode Off AC off Power off 8X M8THREA...

Page 25: ...is moved to the top This will allow for proper ventilation Then select the OSD rotation of landscape or portrait on the OSD menu MAIN MENU BASIC SETTINGS OSD ROTATION Look for the sticker on the back...

Page 26: ...Using the Remote Control 20 ep46L ep55L User Manual Using the Remote Control 1 2 3 4 5 6 7 8 9 10 11 12...

Page 27: ...cts the HD SDI source 1 6 PIP Turns the PIP feature on and off S V Selects the S Video source HD SDI 2 Selects the HD SDI source 2 7 SWAP Swaps the main source sub source picture 8 P SOURCE Selects th...

Page 28: ...whether you locked or unlocked the menu you will see one of the following messages on the screen Changing the Remote Control Battery CONTRAST Adjusts the contrast AUTO Synchronizes the ep46L ep55L to...

Page 29: ...panel in a standby mode To turn off power completely turn the AC switch to O or disconnect the AC power cord from the power outlet Note If there is no signal for a certain period of time the LCD pane...

Page 30: ...2 Press the source button on the ep46L ep55L s keypad Use the arrow buttons to select one of the following input sources and press ENTER VGA HDMI 1 HDMI 2 DVI DISPLAYPORT COMPOSITE VIDEO S VIDEO COMPO...

Page 31: ...d source button VGA HDMI 1 HDMI 2 COMP VIDEO composite or S V s video 2 Turn on PIP Using the remote press PIP 3 To select the PIP subsource Using the remote press P SOURCE and use the arrow buttons t...

Page 32: ...ource and the subsource Using the remote press AUDIO 7 For additional PIP functionality press MENU and navigate to the DISPLAY SETTINGS menu Use the arrow buttons to navigate to the desired PIP featur...

Page 33: ...ayed MAIN PIP PIP VGA HDMI 1 HDMI 2 DVI Display Port Video Composite S Video Component HD SDI 1 HD SDI 2 M a i n VGA Yes Yes Yes Yes Yes Yes Yes Yes Yes HDMI 1 Yes Yes Yes Yes Yes Yes Yes HDMI 2 Yes Y...

Page 34: ...6500K 7500K 9300K User Red Gain Select the Red Gain 128 384 Green Gain Select the Green Gain 128 384 Blue Gain Select the Blue Gain 128 384 Red Offset Select the Red Offset 50 50 Green Offset Select...

Page 35: ...Treble Adjust the Treble volume 0 20 Balance Adjust the balance of the screen 0 20 HDMI Audio Input Audio input Control HDMI PC Basic Settings OSD Transparent Adjust the OSD transparent function 0 100...

Page 36: ...Setup Enable Network Enable the network feature Yes No Dynamic IP Enable the Dynamic IP mode Disable Enable Static IP Address Set the static IP address 255 255 255 255 0 0 0 0 Subnet Mask Set the sub...

Page 37: ...n 128 384 Green Gain Select the Green Gain 128 384 Blue Gain Select the Blue Gain 128 384 Red Offset Select the Red Offset 50 50 Green Offset Select the Green Offset 50 50 Blue Offset Select the Blue...

Page 38: ...io Input Audio input control HDMI PC Basic Settings OSD Transparent Adjust the OSD transparent function 0 100 OSD Location Adjust the OSD location OSD Zoom Adjust the OSD size Disable in portrait type...

Page 39: ...amic IP Enable the Dynamic IP mode Disable Enable Static IP Address Set the static IP address 255 255 255 255 0 0 0 0 Subnet Mask Set the subnet mask 255 255 255 255 0 0 0 0 Gateway Set the gateway ad...

Page 40: ...OSD Menus 34 ep46L ep55L User Manual OSD Menus Image Settings Display Settings Main PIP...

Page 41: ...Audio Settings ep46L ep55L User Manual 35 Audio Settings Basic Settings...

Page 42: ...Advanced Settings 36 ep46L ep55L User Manual Advanced Settings Network Settings...

Page 43: ...s Navigating Through the Menus 1 With the power on press MENU The IMAGE SETTINGS menu appears 2 Within the menu use and ENTER to navigate through the menus and adjust options 3 Press MENU to return to...

Page 44: ...picture Press or select the desired level and press ENTER Range 0 100 Default 50 Contrast Increases or decreases the contrast of the picture Press or select the desired level and press ENTER Range 0...

Page 45: ...Default 9300K Red Gain Set Color Temperature to User Mode to adjust this setting Range 128 384 Default 256 Green Gain Set Color Temperature to User Mode to adjust this setting Range 128 384 Default 25...

Page 46: ...r to select the following options Options Full screen Pillar Box Letter Box Native Default Full screen Zoom Range 0 10 Default 0 Auto Scan Range On Off Default On Select Source Options HDMI 1 HDMI 2 S...

Page 47: ...t Default Bottom Right Aspect Ratio Options Full screen Pillar Box Letter Box Default Full screen Side by Side Scale Submenu Options Zoom In Zoom Out Main PIP Default and Return Auto Scan Options On O...

Page 48: ...ones bass Press or select the desired level and press ENTER Range 0 20 Default 10 Treble Adjust the high tones treble Press or select the desired level and press ENTER Range 0 20 Default 10 Balance Ad...

Page 49: ...the menu transparency Press or to select the desired level and press ENTER Range 0 100 Default 0 OSD Location Adjust the menu location on the ep46L ep55L Up Down Left Right OSD Zoom Options On Off Def...

Page 50: ...minutes Default Off Power LED LED on rear of display shows powered on off or standby mode Options On Off Real Time Clock Set the date and switch the alarm on and off Use to adjust these options Real...

Page 51: ...ature does not continually reacquire the signal It only does so each time you select this option Options No Yes Default No Image Position Adjust the image location VGA Mode only Options Up Down Left R...

Page 52: ...ht control Options Off DCR Light Sensor Default Off Ethernet Setup Configure Network settings See Web Service on page 52 for more information Lamp Saver Lamp Saver On The backlight will go into sleep...

Page 53: ...shown in the STATIC IP ADDRESS SUBNET MASK GATEWAY and DNS ADD lines Static IP Address Set the static IP address when the DYNAMIC IP line is disabled or view it when the DYNAMIC IP line is enabled Ra...

Page 54: ...ing software like Microsoft Paint b The white in the left green box has to be the brightest white DNS Address Set the DNS address when the DYNAMIC IP line is disabled or view it when the DYNAMIC IP li...

Page 55: ...has to be the darkest black 3 After the correct image is displayed click Yes to begin ADC calibration 4 During the calibration process the following message will appear to notify you to wait for the c...

Page 56: ...System Status Menu 50 ep46L ep55L User Manual System Status Menu This read only menu provides information about the active sources and the latest firmware version...

Page 57: ...table shows the default settings for the LCD Item Default Power switch Off Scheme User Brightness 50 Sharpness 12 Backlight 80 Contrast 50 Color temperature 9300K Source auto detection Off OSD langua...

Page 58: ...the web service and can skip this section Login When you direct your browser to the network IP address of the ep46L ep55L you are prompted to login as shown here The default ID is admin and the defaul...

Page 59: ...Login ep46L ep55L User Manual 53 When you first login you will see the System Status page as shown here...

Page 60: ...and password for login to the web service System IP Configuration You can view and or change the network settings here However for best results we recommend that you use the on screen display menus as...

Page 61: ...k interface Nickname Enter a device tag up to 12 characters This tag will appear in email alerts which help you identify the source of the alert Load Default Setting 1 Click the LOAD button to return...

Page 62: ...ade In most cases you will not need to update firmware for the network interface If you do contact Planar s Technical Support Department See Accessing Planar s Technical Support Website on page 64 for...

Page 63: ...User Manual 57 TCP Mode UDP Mode and UART For normal operation you will not need to change any settings on these pages If you do need to change information Planar s Technical Support Department will...

Page 64: ...LE box and enter a username and password Mail to Enter the destination email addresses Separate multiple addresses with a semi colon Mail from Enter the email address from which you want to send alert...

Page 65: ...0 004 65 O O O O 56 476 70 069 75 O O O O 60 023 75 029 78 75 O O O O 68 677 84 997 94 5 O O O O WXGA1360 x 768 47 712 60 015 85 5 O O O O 1280 x 720 44 444 59 98 64 O O O O 44 772 59 86 74 5 O O O O...

Page 66: ...80 66 587 59 93 138 5 O O O O WUXA 1920 x 1200 74 038 59 95 154 O O O O SDTV NTSC 15 734 29 97 13 5 480i O O 487i PAL 15 625 25 13 5 576i O O 576i EDTV 480p 31 5 60 27 03 O O O O 576p 31 25 50 27 O O...

Page 67: ...tive Connectors Display port HDMI x 2 SDI x 2 VGA DVI PC Audio in IR Extender Line Out Component w audio S Video Video composite w audio Scan Rate Horizontal 23 92 KHz Vertical 49 86 Hz Performance Au...

Page 68: ...7 H x 2 8 D 108 1cm W x 64 35cm H x 4 9cm D 50 W x 29 H x 2 8 D 127cm W x 73 6cm H x 7 1cm D Net Weight ep46L B ep55L 53lbs 24kg 64lbs 29kg Gross Weight w packing ep46L B ep55L 64lbs 29kg 79lbs 36kg E...

Page 69: ...ure the correct source is selected Make sure the main power switch is turned ON Check that the source equipment is operating correctly Make sure the input signal is compatible with this display The im...

Page 70: ...and user manuals Downloading Additional Documentation and Firmware Some of the other documents for the ep46L ep55L which are or will be available from the Technical Support Department website are lis...

Page 71: ...ding Utility Software 1 Go to http partners planarcontrolroom com 2 Enter your login and password information 3 Navigate to the section that contains software updates and then look for ep46L B ep55L 4...

Page 72: ...A11 Safety of IT Equipment The Technical Construction File required by this Directive is maintained at the corporate headquarters of Planar Systems Inc 1195 NW Compton Drive Beaverton OR 97006 Note Th...

Page 73: ...lt setting loading in web service 55 dimensions 11 display settings menu 34 40 E exemptions for product use 8 G graphics mode menus 28 H HD SDI board installing 17 I image settings menu 34 38 input so...

Page 74: ...ng use 4 selecting input source 24 service plans ii settings default 51 signal compatibility 59 signal source input 16 SMTP setup page 57 specifications 61 supported timings 59 system ip configuration...

Reviews: