Boomilever Adapter User Guide 57760 V0511
Materials Included
• Boom-I-Lever vertical test wall
• Mounting hardware
• 2 support brackets
Items Required (not included)
• Phillips screwdriver
• 11/32" nut driver
• Drill with 3/16" drill bit
Installing the Boom-I-Lever
If the structure tester has predrilled holes to install
the Boom-I-Lever:
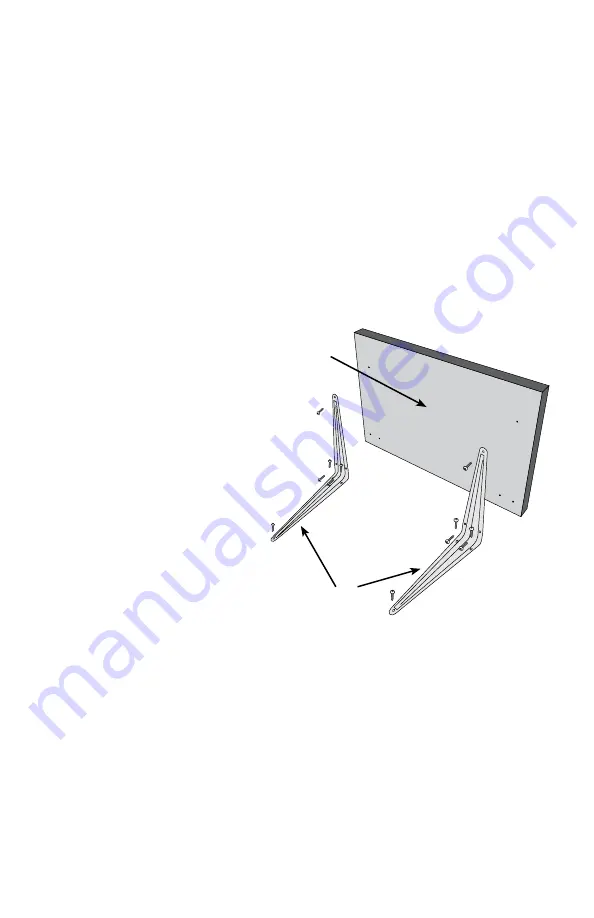
1. Use screws to attach the
short side of the support
brackets to the predrilled
holes in the Boom-I-Lever
vertical test wall (Figure 1).
2. Place the test wall upright
on the structure tester
and align the holes in
the long side of the
support brackets with the
predrilled holes in the
structure tester tabletop.
Attach the test wall to the
structure tester tabletop
with screws.
If the structure tester does not have predrilled holes to install
the Boom-I-Lever:
The test wall should be mounted on one of the two sides that have
predrilled holes for the aluminum bridge span blocks. The table legs on
these two sides are closer together, so the table is less likely to tip over
when weight is placed on either of these ends.
It is recommended that the test wall be positioned 5-1/2" from the
edge of the tabletop. This allows the Boom-I-Lever to be used with
cantilevers 40 centimeters or more in length.
Test Wall
Support Brackets
Figure 1


