


En
23
Part
names
and
functions
3 Press the [MENU (UTILITY)] button.
[
LIST MENU
] is displayed.
4 Use the rotary selector to select and enter [TAGLIST
MENU].
[
TAGLIST MENU
] is displayed.
5 Use the rotary selector to select and enter [REMOVE
ALL TRACKS].
6 Use the rotary selector to select and enter [OK].
Transforming the tag list into a playlist
Tracks collected in tag lists can be converted into playlists.
!
Converted playlists are displayed as items in the [
PLAYLIST
]
category.
1 Press the [TAG LIST] button.
The tag list is displayed.
2 Use the rotary selector to select and enter [USB1] or
[USB2].
A tag list in the selected USB device is displayed.
3 Press the [MENU (UTILITY)] button.
[
LIST MENU
] is displayed.
4 Use the rotary selector to select and enter [TAGLIST
MENU].
[
TAGLIST MENU
] is displayed.
5 Use the rotary selector to select and enter [CREATE
PLAYLIST].
6 Use the rotary selector to select and enter [OK].
The contents of the tag list are converted into a playlist with the name
[
TAG LIST XXX
].
!
If no rekordbox library information is stored on the USB device, the
tag list cannot be converted into a playlist.
!
When tag lists include both tracks being managed with rekordbox
and tracks not being managed with rekordbox, only the tracks being
managed with rekordbox are converted into playlists.
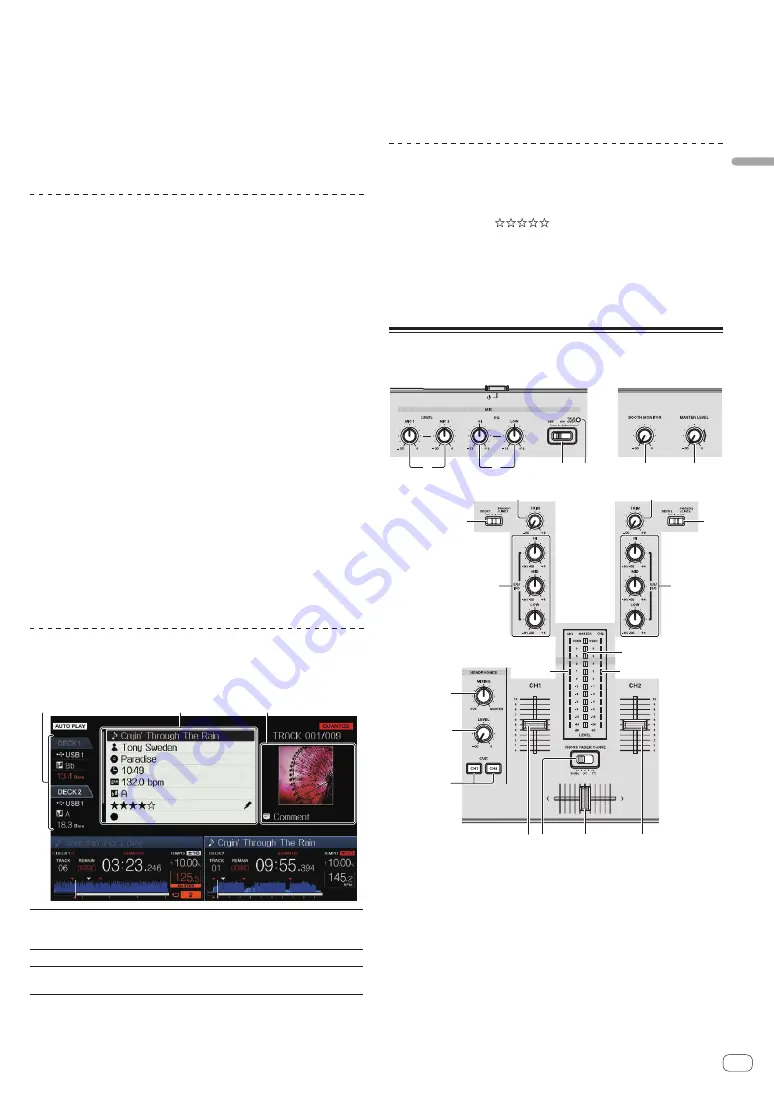
Displaying the details of the currently
loaded track
The details of the currently loaded track can be checked.
1
3
2
1
Deck information
display
This indicates the [
DECK
] where the track of which
information is displayed is loaded, and the location of the
loaded track.
2
Track details
This displays detailed information on the loaded tracks.
3
Jacket photo and
comment
The jacket photo and comment about the loaded track are
displayed.
1 Load a track.
2 At the normal playback screen, press the [INFO]
button.
The track’s details are displayed.
!
Use [
DECK1/2
] button to select the [
DECK
] on which you want to see
the track information.
Changing track ratings
The tracks’ ratings can be changed.
1 Select the rating displayed in the detailed information
(display example:
).
2 Press the rotary selector for over 1 second, then turn
the rotary selector clockwise or counterclockwise.
The rating of the loaded track is changed.
!
[
DECK
] of the track to be edited can be selected by using the
[
DECK1/2
] button.
Mixer section
5
3 4
6
7
7
f
f
g
h
1
2
8
8
9
9
a
b
c
d
e
e
1
MIC1, 2 LEVEL controls
Adjusts the audio level input to the [
MIC
] terminal.
=
Using a microphone
(p. 24 )
2
MIC EQ (HI, LOW) controls
This adjusts the microphone’s sound quality.
=
Using a microphone
(p. 24 )
3
MIC (OFF, ON, TALK OVER) selector switch
Turns the microphone on/off.
=
Using a microphone
(p. 24 )


