Connecting your equipment
03
21
En
Selecting the Speaker system
The f
r
ont height te
r
minals can be used fo
r
f
r
ont wide and
S
p
eake
r
B connections, in addition to fo
r
the f
r
ont height
s
p
eake
r
s. Also, the su
rr
ound back te
r
minals can be used
fo
r
bi-am
p
ing and ZONE 2 connections, in addition to fo
r
the su
rr
ound back s
p
eake
r
s. Make this setting acco
r
ding
to the a
pp
lication.
Front height setup
*Default setting
1
Connect a pair of speakers to the front height
speaker terminals.
See
Standard surround connection
on
p
age 19.
2
If necessary, select ‘Normal(SB/FH)’ from the
Speaker System menu.
See
Speaker system setting
on
p
age 79 to do this.
Front wide setup
1
Connect a pair of speakers to the front height
speaker terminals.
See
Standard surround connection
on
p
age 19.
2
Select ‘Normal(SB/FW)’ from the Speaker System
menu.
See
Speaker system setting
on
p
age 79 to do this.
Speaker B setup
You can listen to ste
r
eo
p
layback in anothe
r
r
oom.
1
Connect a pair of speakers to the front height
speaker terminals.
See
Standard surround connection
on
p
age 19.
2
Select ‘Speaker B’ from the Speaker System menu.
See
Speaker system setting
on
p
age 79 to do this.
Bi-Amping setup
Bi-am
p
ing connection of the f
r
ont s
p
eake
r
s fo
r
high
sound quality with 5.1-channel su
rr
ound sound.
1
Connect bi-amp compatible speakers to the front
and surround back speaker terminals.
See
Bi-amping your speakers
on
p
age 20.
2
Select ‘Front Bi-Amp’ from the Speaker System
menu.
See
Speaker system setting
on
p
age 79 to do this.
ZONE 2 setup
With these connections you can simultaneously enjoy
5.1-channel su
rr
ound sound in the main zone with ste
r
eo
p
layback on anothe
r
com
p
onent in ZONE 2.
1
Connect a pair of speakers to the surround back
speaker terminals.
See
Standard surround connection
on
p
age 19.
2
Select ‘ZONE 2’ from the Speaker System menu.
See
Speaker system setting
on
p
age 79 to do this.
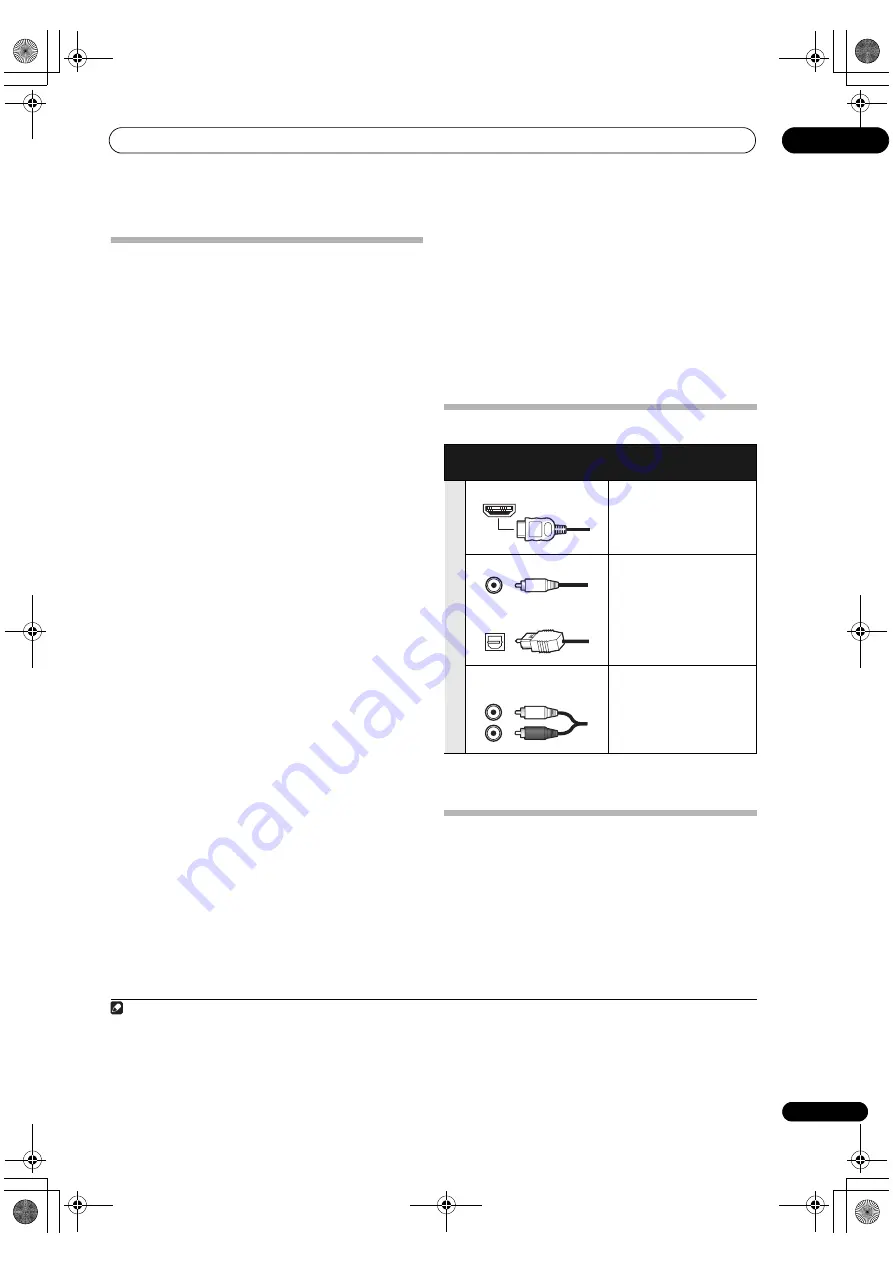
About the audio connection
• With an HDMI cable, video and audio signals can be
t
r
ansfe
rr
ed in high quality ove
r
a single cable.
About the video converter
The video conve
r
te
r
ensu
r
es that all video sou
r
ces a
r
e
out
p
ut th
r
ough all of the
MONITOR VIDEO OUT
jacks.
The only exce
p
tion is HDMI: since this
r
esolution cannot
be downsam
p
led, you must connect you
r
monito
r
/TV to
the
r
eceive
r
’s HDMI video out
p
uts when connecting this
video sou
r
ce.
1
Types of cables and
terminals
Transferable audio
signals
Sou
n
d sig
n
al
pr
io
r
ity
HDMI
HD audio
Digital (Coaxial)
Conventional digital audio
Digital (O
p
tical)
RCA (Analog)
(White/Red)
Conventional analog audio
Note
1 • If the video signal does not a
pp
ea
r
on you
r
TV, t
r
y adjusting the
r
esolution settings on you
r
com
p
onent o
r
dis
p
lay. Note that some
com
p
onents (such as video game units) have
r
esolutions that may not be conve
r
ted. In this case, t
r
y switching Digital Video Conve
r
sion (in
Setting the Video options
on
p
age 57)
OFF
.
• The signal in
p
ut
r
esolutions that can be conve
r
ted f
r
om the com
p
onent video in
p
ut fo
r
the HDMI out
p
ut a
r
e 480i/576i, 480
p
/576
p
, 720
p
and
1080i. 1080
p
signals cannot be conve
r
ted.
• Only signals with an in
p
ut
r
esolution of 480i/576i can be conve
r
ted f
r
om the com
p
onent video in
p
ut fo
r
the com
p
osite
MONITOR OUT
te
r
minals.
VSX-1120_UXJCB.book 21 ページ 2010年3月10日 水曜日 午後2時2分


