background image

5


Initial Setup

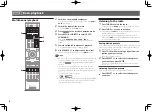
Before you start

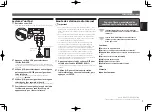
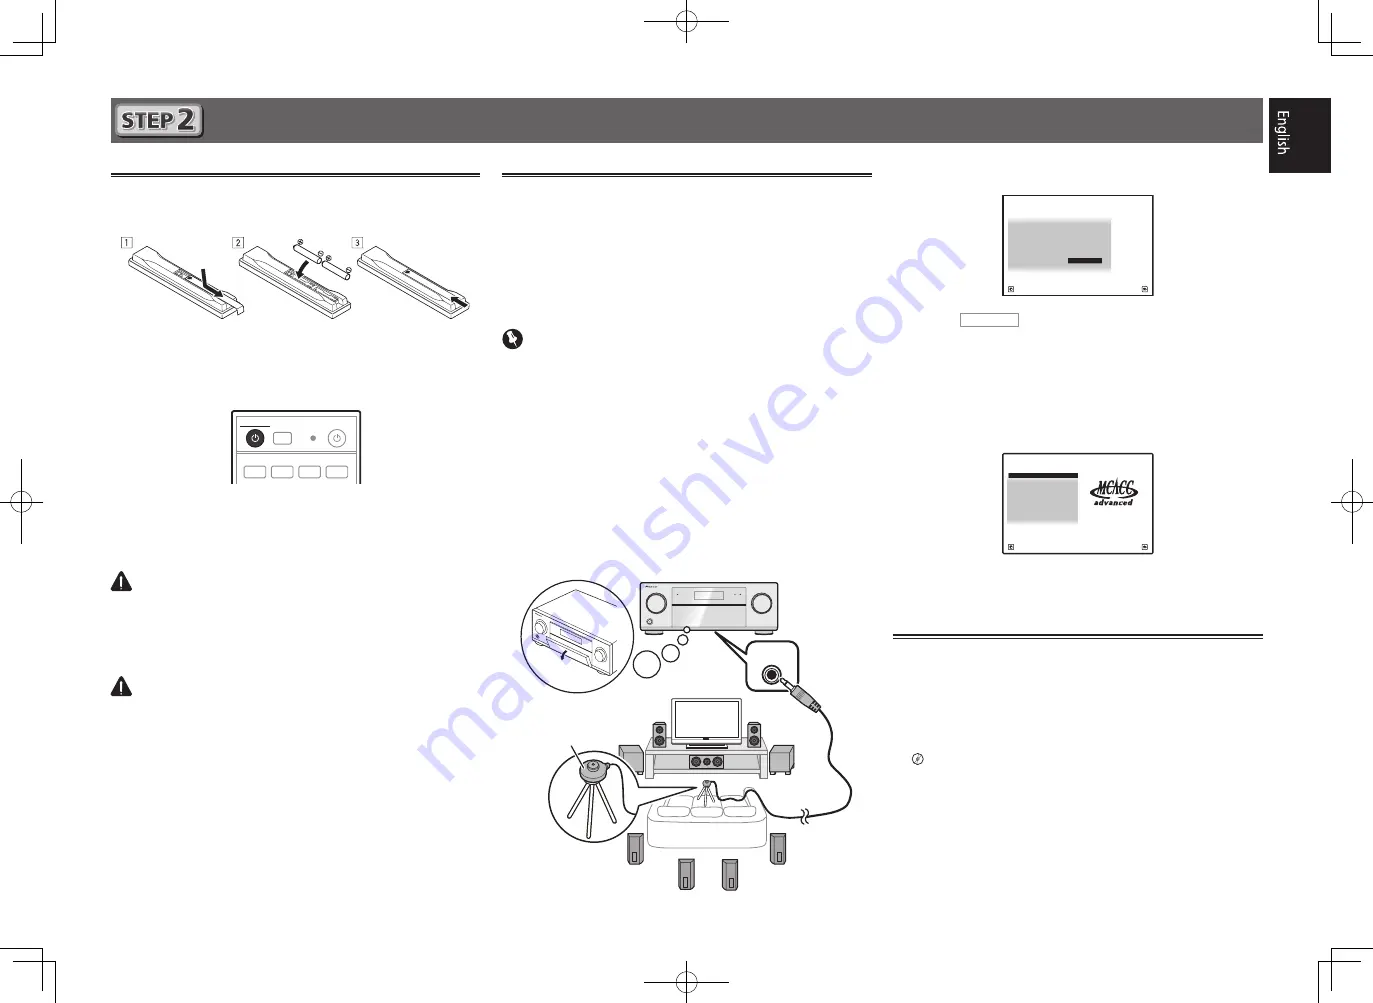
Put the batteries in the remote control.

The batteries included with the unit are to check initial 

operations; they may not last over a long period. We 

recommend using alkaline batteries that have a longer life.

Switch on the receiver and your TV.

RCU SETUP

SOURCE

RECEIVER

ALL ZONE STBY

DISCRETE ON

BDR

BD

DVD

DVR

HDMI

Switch the TV input so that it connects to the 
receiver.

Turn the subwoofer on and turn up the volume.

 WARNING


• Do not use or store batteries in direct sunlight or other 

excessively hot place, such as inside a car or near a heater. 
This can cause batteries to leak, overheat, explode or catch 
fire. It can also reduce the life or performance of batteries.

 CAUTION


• When disposing of used batteries, please comply with 

governmental regulations or environmental public institu-
tion’s rules that apply in your country/area.

Automatically setting up for 

surround sound (MCACC)

The Auto Multi-Channel Acoustic Calibration (MCACC) setup 
uses the supplied setup microphone to measure and analyze 
the test tone that is outputted by the speakers. This setup 
enables automatic high precision measuring and settings; 
utilizing it will create an optimum user listening environment.

 Important


• Measure in a quiet environment.


• If you have a tripod, use it to place the microphone so 

that it’s about ear level at your normal listening position. 
Otherwise, place the microphone at ear level using a table 
or a chair.


• Accurate measurements may not be possible if there are 

obstacles between the speakers and the listening position 
(microphone).


• When measuring, step away from the listening position, 

and operate using the remote control from the external 
side of all the speakers.

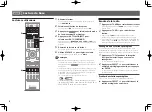
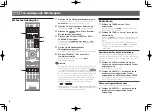
Connect the supplied setup microphone.

MCACC

SETUP MIC

The 

Full Auto MCACC

 screen appears on your TV.

Speaker System 

:  9.1ch FH/FW

1a.Full Auto MCACC

A/V RECEIVER

Exit

Return


START

EQ Type 

:  SYMMETRY

MCACC 

: M1.MEMORY 1

THX Speaker 

NO

Press 

RECEIVER

 on the remote control, then 

press the ENTER button.


• Automatic measuring will start.


• Measuring will take about 3 to 12 minutes.

Follow the instructions on-screen.


• Automatic setting is complete when the Home Menu 

screen appears.

1. Advanced MCACC

2. MCACC Data Check

3. Data Management

4. System Setup

5. Network Information

6. Operation Mode Setup

Exit

Return

HOME MENU

A/V RECEIVER

Make sure the setup microphone is 
disconnected.

Canceling the Auto Power Down

If no operation is performed for a certain amount of time with 
no audio or video signal being input, the receiver’s power turns 
off automatically. The automatic power-off timer is set to 30 
minutes under factory settings, and the timing can be changed 
or the power-off function switched off altogether.  

l  

“Auto Power Down”

Tripod

Microphone

Summary of Contents for sc-lx56

Page 1: ...основным подключениям и операциям для упрощенного использования ресивера Подробное описание ресивера см в Инструкции по эксплуатации содержащихся на поставляемом CD ROM Remote Control Télécommande Fernbedienung Telecomando Afstandsbediening Mando a distancia Пульт дистанционного управления Setup microphone Microphone de configuration Mikrofon für die Einstellung Impostazione microfono Microfoon vo...

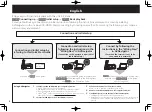
Page 2: ...nstalling AVNavigator in the included CD ROM Start connecting by choosing one method from among the following in accordance with your play environment AVNavigator AVNavigator Quick Start Guide 11 Load the included CD ROM into your computer s CD drive The CD ROM s top menu screen appears AVNavigator can be used with Microsoft Windows XP Vista 7 The supported browser is Microsoft Internet Explorer 8...

Page 3: ...n terminal 1 2 3 10 mm CAUTION Before making or changing connections switch off the power and disconnect the power cord from the AC outlet These speaker terminals carry HAZARDOUS LIVE voltage To prevent the risk of electric shock when connecting or disconnecting the speaker cables disconnect the power cord before touching any uninsulated parts SL L R SR SBL SBR SW 2 SW 1 C Subwoofer 1 SW Subwoofer...

Page 4: ... for ventilation to improve heat radiation at least 20 cm at top 10 cm at rear and 20 cm at each side WARNING Slots and openings in the cabinet are provided for ventilation to ensure reliable operation of the product and to protect it from overheating To prevent fire hazard the openings should never be blocked or covered with items such as newspapers table cloths curtains or by operating the equip...

Page 5: ... a tripod use it to place the microphone so that it s about ear level at your normal listening position Otherwise place the microphone at ear level using a table or a chair Accurate measurements may not be possible if there are obstacles between the speakers and the listening position microphone When measuring step away from the listening position and operate using the remote control from the exte...

Page 6: ...e control to operate that device To operate the receiver first press RECEIVER then press the appropriate button to operate The receiver s remote control can be used to operate not only the receiver but also a variety of other devices including an iPod USB device a Blu ray Disc player a TV etc Ex Playing a Blu ray Disc player BD It will take about 1 minute to be able to use the NETWORK internet rad...

Page 7: ... at what you want to play then press to start playback Listening to Internet radio stations Important When using a broadband Internet connection a contract with an Internet service provider is required For more details contact your nearest Internet service provider To listen to Internet radio stations you must have high speed broadband Internet access With a 56 K or ISDN modem you may not enjoy th...

Page 8: ...lé pour que certaines fonc tions de l AVNavigator puissent être utilisées Pour plus d informations consultez la section http www adobe com downloads 22 Cliquez sur Install AVNavigator depuis le menu principal du CD ROM Utilisation de l AVNavigator 33 Suivez les instructions apparaissant à l écran pour installer l application Lorsque Finish est sélectionné l installation est terminée 44 Retirez le ...

Page 9: ...surez vous aussi que les bornes positives et négatives sur le récepteur correspondent à celles des enceintes 11 Torsadez les fils ensemble 22 Dévissez la borne et insérez la partie dénudée des fils 33 Serrez la borne 1 2 3 10 mm ATTENTION Avant de réaliser ou de modifier des liaisons éteignez les appareils et débranchez le cordon d alimentation de la prise électrique Ces bornes d enceintes sont so...

Page 10: ...ntation de temps en temps Si vous le trouvez abîmé demandez à votre service après vente Pioneer le plus proche de le remplacer Raccordement suite Raccordement des antennes ANTENNA AMLOOP FMUNBAL75 2 1 ANTENNA AMLOOP FMUNBAL75 Raccordement au réseau par l inter face LAN LAN 10 100 LAN 10 100 WAN 3 2 1 LAN Téléviseur compatible HDMI DVI Si votre téléviseur ne prend pas en charge la fonction HDMI de ...

Page 11: ...être faites dans un environnement calme Positionnez le microphone sur un trépied si vous en avez un pour qu il se trouve à hauteur d oreilles en position d écoute normale Sinon positionnez le microphone à hauteur d oreille en le posant sur une table ou sur une chaise Il ne sera pas possible d obtenir des mesures précises s il y a des obstacles entre les enceintes et la position d écoute microphone...

Page 12: ...sur RECEIVER puis appuyez sur la touche appropriée La télécommande du récepteur peut être utilisée pour agir non seulement sur le récepteur mais aussi sur d autres dispositifs comme un appareil iPod USB un lecteur de disque Blu ray un téléviseur etc Ex Lecture d un lecteur de disque Blu ray BD Il faut attendre environ 1 minute avant de pouvoir utiliser les fonctions NETWORK radio Internet etc iPod...

Page 13: ... navigation jusqu à atteindre les éléments que vous souhaitez lire puis appuyez sur pour lancer la lecture Ecoute des stations radio Internet Important Pour utiliser une connexion Internet à haut débit il faut être abonné à un fournisseur de service Internet Pour le détail contactez le fournisseur de service Internet le plus proche Pour écouter les stations radio Internet vous devez avoir un accès...

Page 14: ...lliert sein damit bestimmte Funktionen in AVNavigator verwendet werden können Für Einzelheiten besuchen Sie http www adobe com downloads 22 Klicken Sie auf Installieren von AVNavigator aus dem Topmenü der CD ROM Verwendung von AVNavigator 33 Befolgen Sie die Anweisungen auf der Bildschirmansicht zur Installation Wenn Finish gewählt ist ist die Installation fertig gestellt 44 Nehmen Sie die mitgeli...

Page 15: ...icher dass die positiven negativen Lautsprecheranschlüsse am Receiver den entsprechenden Anschlüssen der Lautsprecher entsprechen 11 Drehen Sie freiliegende Drahtstränge zusammen 22 Lösen Sie die Klemme und setzen Sie den freiliegenden Draht ein 33 Ziehen Sie die Klemme fest 1 2 3 10 mm AUHTUNG Bevor Sie Verbindungen herstellen oder ändern schalten Sie bitte die Stromversorgung aus und ziehen Sie ...

Page 16: ...feststellen wenden Sie sich zwecks eines Austauschs an einen von Pioneer autorisierten unabhängigen Kundendienst Anschließen Fortsetzung Anschluss der Antennen ANTENNA AMLOOP FMUNBAL75 2 1 ANTENNA AMLOOP FMUNBAL75 Herstellen der Verbindung zum Netzwerk über die LAN Schnittstelle LAN 10 100 LAN 10 100 WAN 3 2 1 LAN VORSICHTSHINWEIS ZUR BELÜFTUNG Bei der Aufstellung dieses Gerätes muss für einen aus...

Page 17: ...n einer leisen Umgebung aus Wenn ein Stativ zur Verfügung steht stellen Sie das Mikrofon bitte in der Höhe auf die Ihrer Hörposition entspricht Wenn nicht stellen Sie das Mikrofon in Ohrhöhe auf einen Tisch oder Stuhl Genaue Messung kann unmöglich sein wenn sich Hindernisse zwischen den Lautsprechern und der Hörposition Mikrofon befinden Treten Sie bei der Messung von der Hörposition zurück und fü...

Page 18: ...nen des Receivers drücken Sie zuerst RECEIVER und drücken Sie dann die geeignete Taste zur Bedienung Die Fernbedienung des Receivers kann verwendet werden um nicht nur den Receiver sondern auch eine Reihe anderer Geräte zu steuern einschließlich ein iPod USB Gerät einen Blu ray Disc Player ein Fernsehgerät usw Beisp Wiedergabe von einem Blu ray Disc Player BD Es dauert etwa 1 Minute bevor der Ansc...

Page 19: ...e durchsuchen z B Alben Mit gelangen Sie zu den vorhergehenden nächsten Ebenen 55 Fahren Sie mit dem Durchsuchen fort bis Sie die gewünschte Musik gefunden haben und drücken Sie zum Wiedergeben Internet Radiosender hören Wichtig Bei Verwendung einer Broadband Internetverbindung müssen Sie einen Vertrag mit einem Internet Provider haben Für weitere Einzelheiten wenden Sie sich an Ihren Internet Pro...

Page 20: ...0 è necessario per alcune delle funzioni di AVNavigator Per dettagli vedere http www adobe com downloads 22 Fare clic su Install AVNavigator del menu principale del CD ROM Uso di AVNavigator 33 Seguire le istruzioni di installazione sullo schermo Quando Finish viene evidenziato l installazione è terminata 44 Togliere il CD ROM di accluso dall unità disco del computer 55 Fare clic su AVNavigator su...

Page 21: ...minale di sinistra L Controllare anche che i terminali positivo e negativo del ricevitore corrispondano a quelli dei diffusori 11 Attorcigliare fra loro i fili esposti 22 Allentare il terminale ed inserire il filo denudato 33 Stringere il terminale 1 2 3 10 mm ATTENZIONE Prima di effettuare o modificare i collegamenti disattivare l alimentazione e scollegare il cavo di alimentazione dalla presa a ...

Page 22: ... vicino centro di assistenza autorizzato Pioneer per la sostituzione Collegamenti continua Collegamento delle antenne ANTENNA AMLOOP FMUNBAL75 2 1 ANTENNA AMLOOP FMUNBAL75 Collegamento alla rete LAN via l interfaccia LAN LAN 10 100 LAN 10 100 WAN 3 2 1 LAN AVVERTENZA PER LA VENTILAZIONE Installare l apparecchio avendo cura di lasciare un certo spazio all intorno dello stesso per consentire una ade...

Page 23: ...nquillo Se è disponibile un treppiedi utilizzarlo per posizionare il microfono in modo che sia all altezza delle orecchie rispetto alla normale posizione di ascolto Altrimenti porre il microfono ad altezza degli orecchi usando un tavolo o una sedia La misurazione accurata potrebbe non essere possibile se fra i diffusori e la posizione di ascolto microfono ci sono ostacoli Durante la misurazione al...

Page 24: ... controllare un dispositivo passare ai dispositivi sottolineati Per azionare il ricevitore premere prima RECEIVER e poi il pulsante appropriato Il telecomando del ricevitore è utilizzabile anche per altri dispositivi ad esempio iPod dispositivi USB lettori Blu Ray Disc televisori ecc Ad es Riproduzione con un lettore Blu ray Disc BD L uso della RETE internet radio e simili di iPod USB o della ADAP...

Page 25: ...zzare 55 Continuare la ricerca finché non si raggiunge il brano che si desidera ascoltare quindi premere per avviare la riproduzione Ascolto di stazioni radio da Internet Importante Se si usa una connessione Internet a banda larga è necessario un contratto con un Internet provider Per dettagli entrare in contatto con l Internet provider più vicino L ascolto di stazioni radio da Internet richiede l...

Page 26: ...e functies in AVNavigator te kunnen gebruiken Zie http www adobe com downloads voor verdere informatie 22 Klik op Install AVNavigator van het CD ROM hoofdmenu Gebruiken van AVNavigator 33 Volg de aanwijzingen op het scherm om te installeren Wanneer Afsluiten Finish wordt geselecteerd is de installatie voltooid 44 Plaats de meegeleverde AVNavigator CD ROM in het CD station van de computer 55 Klik o...

Page 27: ...eve en negatieve aansluitingen op de receiver zijn verbonden met de corresponderende aansluitingen op de luidsprekers 11 Draai de losse kerndraadjes in elkaar 22 Draai de aansluitschroef los en steek de kerndraad naar binnen 33 Draai de aansluitschroef weer vast 1 2 3 10 mm WAARSCHUWING Voordat u aansluitingen maakt of wijzigt zet u het apparaat uit en haalt u de stekker van het netsnoer uit het s...

Page 28: ...tstelt neemt u contact op met een onafhankelijke door Pioneer erkende onderhoudsdienst voor een nieuw netsnoer Aansluitingen vervolg De antennes aansluiten ANTENNA AMLOOP FMUNBAL75 2 1 ANTENNA AMLOOP FMUNBAL75 Aansluiten op het netwerk via de LAN interface LAN 10 100 LAN 10 100 WAN 3 2 1 LAN BELANGRIJKE INFORMATIE BETREFFENDE DE VENTILATIE Let er bij het installeren van het apparaat op dat er vold...

Page 29: ... de gebruiker gecreëerd Belangrijk Meet in een stille omgeving Als u een statief hebt kunt u dit gebruiken om de microfoon ongeveer op oorhoogte te plaatsen op de normale luisterpositie Zet de microfoon anders op oorhoogte met behulp van een tafel of stoel Nauwkeurige metingen zijn wellicht niet mogelijk als er een obstakel is tussen de luidsprekers en de luisterpositie microfoon Ga bij het meten ...

Page 30: ... de receiver te bedienen drukt u eerst op RECEIVER en dan drukt u op de vereiste bedieningstoets De afstandsbediening van de receiver kan niet alleen worden gebruikt om de receiver te bedienen maar ook diverse andere apparaten waaronder een iPod USB apparaat een Blu ray disc speler een TV enz Bijv Afspelen van een Blu ray disc speler BD Nadat de stroom is ingeschakeld duurt het ongeveer 1 minuut v...

Page 31: ...naar internet radiozenders Belangrijk Wanneer u een breedband internetverbinding wilt gebruiken heeft u een overeenkomst met een internet service provider nodig Neem voor meer informatie contact op met uw plaatselijke internet service provider Om naar internet radiozenders te kunnen luisteren moet u breedband internet hebben met hoge snelheid Bij gebruik van een 56 K of ISDN modem is het vaak niet...

Page 32: ...ra usar algunas funciones de AVNavigator Para conocer detalles consulte http www adobe com downloads 22 Haga clic en Install AVNavigator desde el menú inicial del CD ROM Uso del AVNavigator 33 Siga las instrucciones que aparecen en la pantalla para hacer la instalación Cuando se selecciona Finish la instalación termina 44 Retire el CD ROM incluido de la unidad CD del ordenador 55 Haga clic en AVNa...

Page 33: ...quierdo L Asegúrese también de que los terminales positivo y negativo del receptor concuerden con los de los altavoces 11 Retuerza juntos los hilos del cable expuesto 22 Afloje el terminal e inserte el cable expuesto 33 Apriete el terminal 1 2 3 10 mm PRECAUCIÓN Antes de extablecer o modificar las conexiones desconecte la alimentación y desenchufe el cable de alimentación de la toma de corriente E...

Page 34: ...tación cada cierto tiempo Si observa que está dañado solicite un cable de repuesto en el servicio técnico Pioneer autorizado más cercano Conexiones continuación Conexión de antenas ANTENNA AMLOOP FMUNBAL75 2 1 ANTENNA AMLOOP FMUNBAL75 Conexión a la red mediante la interfaz LAN LAN 10 100 LAN 10 100 WAN 3 2 1 LAN Televisor compatible con HDMI DVI Si el televisor no soporta la función de canal de re...

Page 35: ... el micrófono de modo tal que quede a nivel del oído en la posición de audición normal En caso contrario sitúe el micrófono a nivel del oído utilizando una mesa o silla Si hay obstáculos entre los altavoces y la posición de audición micrófono puede que no sea posible tomar medidas precisas Cuando mida apártese de la posición de audición y opere utilizando el mando a distancia desde el lado externo...

Page 36: ...rimero RECEIVER y luego pulse el botón apropiado para operarlo El mando a distancia del receptor se puede utilizar para operar no sólo el receptor sino también una variedad de otros aparatos incluyendo un iPod USB un reproductor de discos Blu ray un televisor etc Ej Reproducción de un reproductor de discos Blu ray BD Desde el momento del encendido precisará alrededor de 1 minuto antes de poder uti...

Page 37: ... A continuación pulse para iniciar la reproducción Recepción de emisoras de radio de Internet Es necesario esperar aproximadamente un minuto desde que se conecta la alimentación hasta que finaliza el inicio Importante Cuando use una conexión de Internet de banda ancha necesitará firmar un contrato con un proveedor de servicios de Internet Para conocer más detalles contacte al proveedor de servicio...

Page 38: ...х функций AVNavigator требуется установить Adobe Flash Player 10 Подробнее см http www adobe com downloads 22 Щелкните по Install AVNavigator в главном меню CD ROM Использование AVNavigator 33 Для установки следуйте инструкциям на экране При выборе Finish установка завершается 44 Извлеките поставляемый CD ROM из CD дисковода компьютера 55 Щелкните по AVNavigator на рабочем столе и запустите AVNavi...

Page 39: ...оложительный и отрицательный терминалы на ресивере совпадают с терминалами на громкоговорителях 11 Скрутите оголенные жилы провода 22 Освободите терминал и вставьте оголенный провод 33 Закрутите терминал 1 2 3 10 mm ПРЕДУПРЕЖДЕНИЕ Перед выполнением или изменением подключений отключите питание и отсоедините кабель питания от розетки переменного тока Данные терминалы громкоговорителей содержат ОПАСН...

Page 40: ...ия электрическим током Периодически проверяйте кабель питания Если обнаружится его повреждение обратитесь в ближайший сервисный центр уполномоченный компанией Pioneer по поводу его замены Подключение продолжение Подключение антенн ANTENNA AMLOOP FMUNBAL75 2 1 ANTENNA AMLOOP FMUNBAL75 Подключение к сети через интерфейс LAN LAN 10 100 LAN 10 100 WAN 3 2 1 LAN ОБЯЗАТЕЛЬНАЯ ВЕНТИЛЯЦИЯ При установке ус...

Page 41: ...оздать оптимальную среду прослушивания для пользователя Важное предупреждение Выполняйте измерения соблюдая тишину Если у вас есть штатив используйте его для установки микрофона приблизительно на уровне уха на обычном месте слушателя В противном случае разместите микрофон на уровне уха на столе или стуле Наличие препятствий между громкоговорителями и местом слушателя микрофоном может препятствоват...

Page 42: ...ом Для управления ресивером сначала нажмите RECEIVER затем нажмите соответствующую кнопку для управления Пульт ДУ ресивера можно использовать для управления не только ресивером но также рядом других устройств как iPod устройство USB проигрыватель Blu ray Disc телевизор др Пример Воспроизведение на проигрывателе Blu ray Disc BD С момента включения питания требуется еще примерно 1 минута пока можно ...

Page 43: ...материал который необходимо воспроизвести затем нажмите для запуска воспроизведения Прослушивание Интернет радиостанций Важное предупреждение При использовании широкополосного подключения к Интернет в случае необходимости свяжитесь с провайдером Интернет услуги Подробнее свяжитесь с ближайшим провайдером Интернет услуги Для прослушивания Интернет радиостанций требуется высокоскоростной широкополос...

Page 44: ...8 ...

Page 45: ...9 ...

Page 46: ...10 ...

Page 47: ...k auf die R TTE Richtlinie 1999 5 EC Dichiarazione di conformità riguardante la Direttiva R TTE 1999 5 CE Conformiteitsverklaring met betrekking tot de R TTE richtlijn 1999 5 EG Declaración de conformidad con relación a la Directriz R TTE 1999 5 EC Декларация соответствия в отношении Директивы 1999 5 EC R TTE Português Čeština Eesti Magyar Latviešu valoda Lietuvių kalba Malti Slovenčina Slovenščin...

Page 48: ...щую продолжительность срока службы официально поставляемых на Российский рынок товаров Аудио и видеооборудование 7 лет Переносное аудиооборудование 6 лет Другое оборудование наушники микрофон и т д 5 лет Автомобильная электроника 6 лет D3 7 10 6_A1_Ru 2012 PIONEER CORPORATION All rights reserved 2012 PIONEER CORPORATION Tous droits de reproduction et de traduction réservés Printed in Imprimé http ...

Reviews: