background image

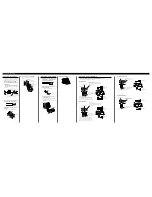
Connecting the Unit

Connecting the Power Terminal

• Always use the special red battery and ground

wire [RD-223], which is sold separately. Connect
the battery wire directly to the car battery positive 
terminal (+) and the ground wire to the car body.

1. Pass the battery wire from the

engine compartment to the interior
of the vehicle.

• After making all other connections to the 

amplifier, connect the battery wire terminal of
the amplifier to the positive (+) terminal of
the battery.

2. Twist the battery wire, ground wire

and system remote control wire.

3. Attach lugs to wire ends. Lugs not

supplied.

• Use pliers, etc., to crimp lugs to wires.

4. Connect the wires to the terminal.

• Fix the wires securely with the terminal

screws.

Fuse (30 A)

Engine
compart-
ment

Interior of
the vehicle

Drill a 14 mm
(1/2 inch) hole
into the vehicle
body.

Insert the O-ring rubber
grommet into the vehicle
body.

Twist

Positive terminal

GND terminal

Power terminal

Battery wire

System remote 
control terminal

System remote 
control wire

Ground wire

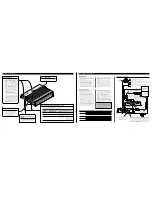
Connecting the Speaker Terminals

1. Expose the end of the speaker wires

using nippers or a cutter by about
10 mm (3/8 inch) and twist.

2. Attach lugs to speaker wire ends.

Lugs not supplied.

• Use pliers, etc., to crimp lugs to wires.

3. Connect the speaker wires to the

speaker terminals.

• Connect the speaker wires, passing them

through the terminal cover.

• Fix the speaker wires securely with the termi-

nal screws.

4. Push on the terminal cover.

10 mm

Twist

Speaker 
terminal

Terminal cover

Terminal screw

Speaker wire

Lug

Fuse (30 A)

Battery wire

Ground wire

Lug

Lug

Two-channel mode (stereo)

Two-channel mode (mono)

+

+

+

+≠

Connecting the Speakers and Input wires

The speaker output mode can be four-channel, three-channel (
mono) or two-channel (stereo, mono). Connect the speaker leads to suit the
mode according to the figures shown below.

Four-channel mode

Three-channel mode

+

+

+

+

+

+

+≠

Speaker wire

Input Select Switch
For two-channel input, slide this switch to
the left. For four-channel input, slide this
switch to the right.

RCA input jack A

(Left)
Speaker out A
(Right)

RCA input jack B

Connecting wires
with RCA plugs (sold
separately)

From car stereo (RCA output)
If only one input plug is used, such as when
the car stereo has only one output (RCA out-
put), connect the plug to RCA input jack A,
but do not connect a plug to RCA input jack B.

(Right)
Speaker out B
(Left)

Input Select Switch
For two-channel input, slide this switch to
the left. For four-channel input, slide this
switch to the right.

RCA input jack A

(Left)
Speaker out A
(Right)

RCA input jack B

Connecting wires
with RCA plugs (sold
separately)

From car stereo (RCA output)
If only one input plug is used, such as when
the car stereo has only one output (RCA out-
put), connect the plug to RCA input jack A,
but do not connect a plug to RCA input jack B.

Speaker out B
(Mono)

RCA input jack A

Speaker (Left)

Speaker (Right)

Connecting wire with RCA
plugs (sold separately)

From car stereo (RCA output)

Input Select Switch
Slide this switch to the left.

RCA input jack A

Speaker (Mono)

Speaker (Mono)

Connecting wire with RCA
plugs (sold separately)

From car stereo (RCA output)

Input Select Switch
Slide this switch to the left.

(3/8 inch)

Summary of Contents for GM-X564

Page 1: ...musical enjoyment Now it s time to consider how you can maximize the fun and excitement your equipment offers This manufacturer and the Electronic Industries Association s Consumer Electronics Group want you to get the most out of your equipment by playing it at a safe level One that lets the sound come through loud and clear without annoying blaring or distortion and most importantly without affe...

Page 2: ...set the gain controls for speaker outputs A and B to the same position When using with an RCA equipped car stereo standard output of 500 mV set to the NORMAL position When using with an RCA equipped Pioneer car stereo with max output of 4 V or more adjust level to match the car stereo output level Power Indicator The power indicator lights when the power is switched on Input Select Switch For two ...

Page 3: ...minal cover Terminal screw Speaker wire Lug Fuse 30 A Battery wire Ground wire Lug Lug Two channel mode stereo Two channel mode mono Connecting the Speakers and Input wires The speaker output mode can be four channel three channel stereo mono or two channel stereo mono Connect the speaker leads to suit the mode according to the figures shown below Four channel mode Three channel mode Speaker wire ...

Page 4: ...of the amplifier Protect all cables and important equipment such as fuel lines brake lines and electrical wiring from damage Install tapping screws in such a way that the screw tip does not touch any wire This is impor tant to prevent wires from being cut by vibration of the car which can result in fire To prevent electric shock do not install the ampli fier in places where it might come in contac...

Page 5: ...le de consulter un professionnel Avant d utiliser l appareil prenez connaissance de ce mode d emploi et tout spécialement des AVERTISSEMENTS Pour toute question concernant cet appareil veuillez vous adresser au revendeur ou à l installateur AVERTISSEMENT Utilisez le faisceau de câbles de liaison à la batterie un câble rouge et un câble de masse qui est vendu séparément RD 223 Reliez le câble rouge...

Page 6: ...des fréquences Type de haut Remarques LPF HPF disponibles en sortie parleur LPF Gauche 40 à 120 Hz Haut parleur Utilisez un haut parleur d extrêmes graves d extrêmes graves OFF Centre Tout le spectre des fréquences Haut parleur pleine gamme HPF Droite 40 à 120 Hz Haut parleur Choisissez cette position si pleine gamme les fréquences très graves sont inutiles compte tenu des haut parleurs utilisés R...

Page 7: ...e Cosse Cosse Fusible 30 A Mode deux voies Stéréo Mode deux voies Mono Raccordement des haut parleurs et des câbles Les haut parleurs peuvent fonctionner selon trois modes quatre voies trois voies stéréo mono ou deux voies stéréo mono Connecter les fils du haut parleur pour se conformer au mode suivant les figures cidessous Mode quatre voies Mode trois voies Cache des bornes Droite Sortie haut par...

Page 8: ... câbles canal isations flexibles etc qui sont placés derrière le panneau que vous devez percer Posez les vis autotaraudeuses de manière que leur extrémité ne puisse pas endommager les câbles Il est important que l isolant d un câble ne soit pas endommagé par le frottement sur une pièce ce qui pourrait ultérieurement entraîner un court cir cuit Pour éviter tout risque de secousse électrique n insta...

Reviews: