Pioneer DDJ-RZX Operating Instructions Manual Download Page 32

En

32

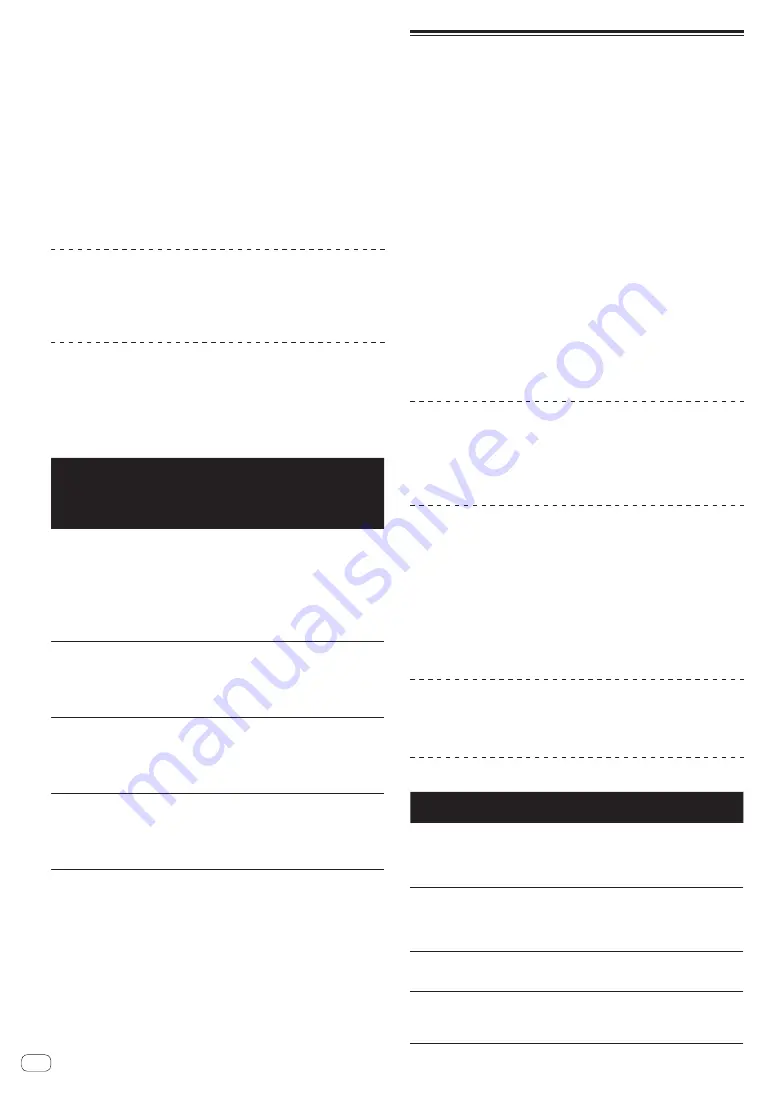
3  Turn the [OSC SAMPLER VOLUME] control.

Adjusts the sound level of oscillator sound.

4  Press one of the [OSC SAMPLER SELECT] buttons.

This selects the type of oscillator sound.
The button that was pressed flashes.

!

  You can select more than one oscillator sound.

!

  The sound generating method differs depending on the 

[

OSC SAMPLER SOURCE

] switch.

!

 [

INT.

]: Sound continues to be output while the button is pressed.

!

 [

USB-A

]/[

USB-B

]: In the [Gate Mode] setting of the connected rekord-

box, you can switch between outputting sound while the button 
is pressed and playing back to the end of the track if the button is 
pressed.


For details, see the rekordbox software’s manual.

Quitting the oscillator function

When you release your finger from the [

OSC SAMPLER SELECT

] button, 

the released button changes from flashing to lit and the oscillator sound 
stops.

Type of oscillator sound

When the software is connected with the unit, the following sound 
sources are selected by default.
The oscillator of rekordbox dj can be changed to the desired sound 
source.
For how to change the sound source of the oscillator, see the rekordbox 
software’s manual.

Effect Name

Descriptions

OSC SAMPLER 
PARAMETER

 control 

(when using sound 
sources included in 
the unit)

NOISE

Generates white noise.

Turn counterclockwise: The 
cut-off frequency of the filter 
through which the white 
noise passes gradually 
descends.
Turn clockwise: The cut-
off frequency of the filter 
through which the white 
noise passes gradually rises.

SINE

Generates sine wave sound.

Turn counterclockwise: 
Reduces the frequency of 
the sine wave.
Turn clockwise: Increases 
the frequency of the sine 
wave.

SIREN

Generates a siren-like 
sound.

Turn counterclockwise: 
Reduces the reverberation 
time of the siren sound.
Turn clockwise: Increases 
the reverberation time of the 
siren sound.

HORN

Generates a horn-like 
sound.

Turn counterclockwise: 
Reduces the reverberation 
time of the horn sound.
Turn clockwise: Increases 
the reverberation time of the 
horn sound.

!

  When using the sound sources included in rekordbox dj, you can 

control the sound pitch with the 

OSC SAMPLER PARAMETER

 con-

trol. Left turn lowers the pitch, and right turn raises the pitch.

Using a microphone

1  Connect a microphone to the [MIC1] or [MIC2] 
terminal.

2  Set the [OFF, ON, TALK OVER] selector switch to [ON] 
or [TALK OVER].

 [

ON

]: The indicator lights.

 [

TALK OVER

]: The indicator flashes.

!

  When set to [

TALK OVER

], the sound of channels other than the 

[

MIC1

] channel is attenuated by -18 dB (default) when a sound of -10 

dB or greater is input to the microphone.

!

  The sound attenuation level when [

TALK OVER

] is selected can be 

changed in the utilities screen. For instructions on changing it, see 

Changing the talk over function level

 on page  39 .

!

  The talk over mode can be switched to the normal mode or the 

advanced mode. For instructions on changing it, see 

Changing the 

talk over function setting

 on page  39 .

3  Turn the [MIC1] or [MIC2] control.

Adjust the level of the sound output from the [

MIC1

] channel.

!

  Pay attention that rotating to the extreme right position outputs a 

very loud sound.

4  Input audio signals to the microphone.

Adjusting the sound quality

Turn the [EQ (HI, MID, and LOW)] controls.

 [

HI

]: –12 dB to +12 dB (10 kHz)

 [

MID

]: -12 dB to +12 dB (2.5 kHz)

 [

LOW

]: –12 dB to +12 dB (100 Hz)

Using 

MIC FX

1  Press one of the [MIC FX SELECT] buttons.

This selects the type of effect. The button that was pressed flashes.

!

  Even when one of the [

MIC FX SELECT

] buttons is selected, if a differ-

ent [

MIC FX SELECT

] button is pressed, the newly pressed button is 

selected.

2  Turn the [MIC FX PARAMETER] control.

The effect is applied to the channel(s) for which the control(s) was (were) 
turned.

Quit 

MIC FX

Press the flashing [MIC FX SELECT] button.

The effect is canceled.

MIC FX

 types

Effect 
Name

Descriptions

[

PRAMETER

] control

ECHO

Applies an echo effect, with the 
sound delayed slightly after the 
original sound output several 
times and gradually attenuated.

Counterclockwise: The delay time 
of echo sound gradually becomes 
longer.
Clockwise: The delay time of echo 
sound gradually becomes shorter.

REVERB

Applies a reverberation effect 
to the original sound.

Turn counterclockwise: The rever-
beration effect of a small space is 
applied.
Turn clockwise: The reverberation 
effect of a large space is applied.

PITCH

Changes the sound pitch.

Turn counterclockwise: The pitch 
descends.
Turn clockwise: The pitch rises.

V TUNE

Corrects the sound pitch 
automatically.

Turn counterclockwise: The pitch 
descends in semitone steps.
Turn clockwise: The pitch rises in 
semitone steps.

Summary of Contents for DDJ-RZX

Page 1: ...DJ controller DDJ RZX http pioneerdj com support http rekordbox com For FAQs and other support information for this product visit the above site Operating Instructions ...

Page 2: ...Before start Features 3 What s in the box 4 About rekordbox 4 Viewing the Operating Instructions of rekordbox 5 Install rekordbox 5 Connections and part names Connections 7 Part names and functions Browser section 10 Deck section 10 Jog dial display section 13 Mixer section 13 Effect section 15 Display section deck 15 Display section mixer 16 Touch display deck section 16 TRACK INFO 17 MEMORY CUE ...

Page 3: ...ratching and reverse playback to create music perfor mances with even greater originality 4 CHANNEL MIXER The unit includes 4 CHANNEL MIXER which allows the DJ to indepen dently operate songs being played back with four decks Four songs can be mixed to create a highly individualistic DJ mix Level meters are located near the master unit and the operation inter face of each channel so that input and...

Page 4: ... the English and French versions of the Operating Instructions Quick Start Guide for the North American region Cautions The license key cannot be reissued Be careful not to lose it About rekordbox rekordbox rekordbox is a composite software that enables track management and DJ performances rekordbox dj The DJ performance function of rekordbox is called rekordbox dj Enter the license key shown on t...

Page 5: ...he Agree check box if you agree When you select the check box Download becomes clickable 4 Click Download Downloading of rekordbox starts About the installation procedure The installation procedure depends on the operating system OS on the computer you are using Installation procedure Mac OS X Do not connect this unit and the computer until installation is completed If any other programs are runni...

Page 6: ...se to quit the rekordbox installer The installation is now complete To use rekordbox dj rekordbox dvs and rekordbox video activation license authentication is required For details see the rekordbox rekordbox dvs or rekordbox video Operating Instructions https rekordbox com ja support manual php ...

Page 7: ...o high when using unbalanced outputs 4 SIGNAL GND terminal Connects an analog player s ground wire here This helps reduce noise when the analog player is connected 5 USB B terminal Connect to a computer Connect this unit to your computer directly via a USB cable included with this product or the one that conforms to USB 2 0 A USB hub cannot be used 6 PHONO terminals Connect to a phono level MM car...

Page 8: ... terminals simulta neously If one is connected or disconnected while the other one is being used the volume of the other one in use may increase or drop suddenly Connecting the input output terminals Connecting input terminals Rear panel AUDIO OUT R L CONT R L R L R L R L R L R L To power outlet Power cord 㸦included㸧 DJ player DJ player DJ player DJ player Computer Analog player Microphone Analog ...

Page 9: ...ls Rear panel R L Component amplifier powered speaker etc Power amplifier for booth monitor powered speakers etc Power amplifier powered speakers etc 1 1 Do not connect the terminal that can supply phantom power to the MASTER 1 terminal Front panel Headphones ...

Page 10: ...ers or deletes the selected track to from Tag List SHIFT press Displays Related Tracks if hidden and hides it if displayed No display l Related Tracks displayed l No display l Also when Related Tracks is displayed the cursor moves to the Related Tracks area 4 LOAD button Press Loads the selected track to the deck Press twice Loads the track loaded in the deck not being operated to the deck on the ...

Page 11: ... for which an active loop is not set is loaded the closest loop in a clockwise direction can be set as an active loop The function is invalid when a track which a loop is not registered to is loaded Canceling the active loop setting If pressing the SHIFT and AUTO BEAT LOOP buttons when a track for which an active loop is set is loaded the set active loop can be canceled b LOOP 1 2X button Press Se...

Page 12: ...eginning of the track q QUANTIZE button Press Turns the quantize function on For example when the quantize function is turned on the point is automatically set to the nearest beat position when a hot cue is set The resolution of the quantized beat can be selected in the Preferences of rekordbox SHIFT press Loads the currently playing sequence into the deck as a track r SYNC button Press Switches b...

Page 13: ...fader of deck 2 or deck 4 is moved to the frontmost position When the USB terminal is switched sound is also switched instantaneously Therefore when the button is flashing before switching the USB terminal make sure that the deck is not used by another user 4 USB B button When lights the USB B terminal is used in communication with the computer The USB A button and USB B button located at the left...

Page 14: ... Indicator Displays the sound level of the respective channels before passing through the channel faders x TRIM control Adjusts the level of audio signals input in each channel y ISO EQ HI MID LOW controls Boosts or cuts frequencies for the different channels z COLOR control This changes the parameters of the SOUND COLOR FX of the differ ent channels A Headphones CUE button Press The sound of chan...

Page 15: ...audio or video tracks loaded into the decks performance pad information and effect information 1 3 2 5 4 6 1 VIEW PAD INFO DECK VIDEO button Press Displays the performance pad information or video track information for each deck Each press of the button switches between the performance pad information and video track information The pad information corresponding to the performance pad mode is disp...

Page 16: ...etailed waveform display 3 SOUND COLOR FX SINGLE MODE button Press Displays the SINGLE MODE setting screen of SOUND COLOR FX SINGLE MODE is a mode for using SOUND COLOR FX assigned common to all channels 4 SOUND COLOR FX MULTI MODE button Press Displays the MULTI MODE setting screen of SOUND COLOR FX MULTI MODE is a mode for using SOUND COLOR FX assigned indi vidually to each channel 5 Touch displ...

Page 17: ... button SAMPLER MODE VELOCITY SAMPLER MODE Displays the setting state name playback state SYNC state and play back mode of the SAMPLER assigned to each PAD In addition the BANK number BPM value QUANTIZE setting state and SYNC setting state of the displayed SAMPLER are displayed SEQUENCE CALL MODE Displays the name playback state BANK number and bar position of the pattern assigned to each PAD In a...

Page 18: ... neously by sliding a finger on the touch display If COMBO FX is pressed twice the screen switches to the effect setting screen In the effect setting screen you can change the type of effect and the setting for whether or not the effect continues even when you release your finger from the COMBO FX screen SAMPLER REPEAT If the SAMPLER REPEAT button is pressed the SAMPLER REPEAT screen is displayed ...

Page 19: ...K button is pressed and held you can switch between displaying detailed waveforms vertically and horizontally Furthermore if you move to the detailed waveform area of another deck while touching the detailed waveform of a certain deck with a finger and then release the finger from the display the same track can be copied to the other deck WAVEFORM screen VERTICAL WAVEFORM screen HORIZONTAL BROWSE ...

Page 20: ...ipment through shielded cables and connectors Use only the furnished accessory connecting cables D44 8 2_A1_En 4 Turn on the computer s power 5 Connect the power cord To power outlet Power cord 㸦included㸧 6 Press the u switch on this unit s rear panel to turn this unit s power on Turn on the power of this unit For Windows users The message Installing device driver software may appear when this uni...

Page 21: ...ration for KUVO and activation work for rekordbox dj are required at first startup of the rekordbox software 1 Prepare the license key The rekordbox dj license key provided with this unit is required to activate rekordbox dj There is no need for this product s users to purchase the rekordbox dj license key separately 2 Activate rekordbox dj For the activation method for rekordbox dj see the rekord...

Page 22: ...s hardware For detailed instructions on operating rekordbox dj see the rekord box software s manual Loading tracks and playing them The following describes the procedure for loading tracks onto deck 1 as an example BPM DOWN BPM UP 3 1 Rotary selector 2 BACK button 3 LOAD button 1 Select the Collection or a playlist or other item and then press the unit s rotary selector to move to the track list 2...

Page 23: ...hannel fader away from you 5 Turn the MASTER LEVEL control to adjust the audio level of the speakers Adjust the level of the sound output from the MASTER 1 and MASTER 2 output terminals to an appropriate level Monitoring sound with headphones Set the positions of the controls etc as shown below Names of controls etc Position HEADPHONES MIXING control Center HEADPHONES LEVEL control Turned fully co...

Page 24: ... For example when set to 1 beat from 1 8 beat the pad s setting is as shown below 1 8 beat reverse direction 1 2 beat reverse direction 1 2 beat forward direction 1 beat reverse direction 1 beat forward direction 1 8 beat forward direction 1 4 beat reverse direction 1 4 beat forward direction If a button is pressed while pressing SHIFT only page1 page5 and page9 can be selected 3 Press pad 1 pad 3...

Page 25: ...e performance pad as shown below Sliced sections 1 to 8 Domain 1 2 3 4 5 6 7 8 Section 1 Section 2 Section 3 Section 4 Section 5 Section 6 Section 7 Section 8 3 Press the PARAMETERc or PARAMETERd button Set the loop playback length for the slicer The setting value for the loop playback length changes each time the button is pressed The length of loop playback while a pad is pressed can be changed ...

Page 26: ...ity sampler mode When the SAMPLER mode button is pressed while pressing the SHIFT button the mode switches to the velocity sampler mode When the SAMPLER mode button is pressed the mode switches to the normal sampler mode Using the sequencer Sampler performances can be recorded and played back The sequencer function can be used to achieve a variety of perfor mances such as superimposing an original...

Page 27: ...ad 6 The end position is specified at the playback position and the specifica tion range is confirmed 4 Press performance pad 1 to pad 4 The effect to apply during playback in the specified range is selected If there are multiple specified ranges the same effect is applied to all of the ranges 5 Press performance pad 8 The active sensor effect turns on or off 6 Press performance pad 7 The specifie...

Page 28: ...tton which was pressed first flashes and the DECK button which was pressed later lights Status display in the dual deck mode When entering DUAL DECK mode the deck status of the DECK button which was pressed first is displayed Turning the DUAL DECK mode off Press the DECK 1 or DECK 3 button The dual deck mode turns off and the DECK button lights The controller switches to the deck of the pressed DE...

Page 29: ...t function is set 3 While pressing the SHIFT button move the crossfader in the opposite direction from the left edge or right edge Playback of the track starts from the set cue point When the crossfader is returned to the original position while press ing the SHIFT button during playback the track moves instanta neously back to the set cue point and the pause mode is set Back Cue If no cue is set ...

Page 30: ...ressing the SHIFT button to select the effect type The selected effect is displayed on the rekordbox dj screen 4 Press the effect parameter 1 button to turn the effect on The ON button for the effect is highlighted on the rekordbox dj screen and the effect is enabled 5 Operate the effect parameter 2 button or the effect parameter 3 button to switch the effect s parameter The parameter button corre...

Page 31: ...ND COLOR FX of rekordbox dj to the USER mode to change the SOUND COLOR FX setting You can set each effect to the desired effect Effect Name Descriptions COLOR control PRAMETER control SPACE Applies a rever beration effect to the original sound Turn counterclock wise Applies the reverberation effect to the mid and low ranges Turn clockwise Applies the rever beration effect to the mid and high range...

Page 32: ...ht turn raises the pitch Using a microphone 1 Connect a microphone to the MIC1 or MIC2 terminal 2 Set the OFF ON TALK OVER selector switch to ON or TALK OVER ON The indicator lights TALK OVER The indicator flashes When set to TALK OVER the sound of channels other than the MIC1 channel is attenuated by 18 dB default when a sound of 10 dB or greater is input to the microphone The sound attenuation l...

Page 33: ...ns of rekordbox video can be displayed on the displays and controlled You can perform operations such as the displaying of video selection operation of the types of effects to be used when mixing the images of each deck on off operation of the effect to be added to images after mix ing start stop operation of a slide show show hide operation of the text function show hide operation of camera image...

Page 34: ...ear from the LCD screen and the effect is disabled Switching the HOLD setting The setting can be changed by pressing the HOLD button in the screen HOLD ON Maintains the effect even if you release your finger during effect operation HOLD OFF Cancels the effect if you release your finger during effect operation Note For details on the selectable effect candidates see the rekordbox video Operating In...

Page 35: ...y target text information in rekordbox video 2 Press the ON button The text information is displayed in the output video of rekordbox video Pressing the ON button again returns to the hidden state Displaying a preview Text display can be checked just on the MASTER VIDEO screen of this unit by pressing the PREVIEW button It is not displayed in the output video of rekordbox video Note For details on...

Page 36: ...rdbox video Note For details on the camera device setting procedure see the rekordbox video Operating Instructions Access the rekordbox product site and see the rekordbox video Operating Instructions in Support http rekordbox com Other settings Selecting a connected computer When two computers with rekordbox installed are connected to this unit you can select the images of which computers to displ...

Page 37: ...p Setting the control signals Set the control signals depending on whether your device is an analog player or DJ player Set the control signals as described below 1 Connect this unit to the computer with a USB cable 2 Launching rekordbox 3 Click Preferences Input channel Settings Utility of rekordbox PERFORMANCE mode The setting utility of this unit starts 4 Select the CONTROLLER OUTPUT tab in the...

Page 38: ...MIDI controller The unit automatically changes operation as follows depending on whether rekordbox is running When rekordbox is running controller operation depends on the rekordbox functions When rekordbox is not running the unit operates as a general MIDI controller Even though rekordbox is running you can forcefully operate the unit as a general MIDI controller 1 Press the WAKE UP UTILITY butto...

Page 39: ...f 6 dB 12 dB 18 dB and 24 dB Adjusting the crossfader cut lag Adjust the play cut lag of both ends of the crossfader Adjustment can be made from 0 5 mm to 3 7 mm in 0 1 mm increments By default the level is set to 1 0 mm 1 Press the WAKE UP UTILITY button for over 1 second The utilities screen appears on a display of this unit 2 Use the rotary selector to select and enter CROSS FADER CUTLAG 3 Use ...

Page 40: ...displayed on the screen in order Touch 4 places in all 5 Press the rotary selector to enter The changed settings are stored This unit has been shipped after calibration Set the calibration again if you cannot touch properly When setting the calibration do not use a pointed object like a ball pen Setting monaural stereo of master output By default stereo is set 1 Press the WAKE UP UTILITY button fo...

Page 41: ...Flashing The SLIP button is always flashing when slip mode is on Setting items of Mixer tab in Controller Fader Start setting Changes the fader start function setting By default this is enabled When the Activate the fader start when moving a channel fader or the cross fader while pressing the SHIFT button check box is selected the function is enabled About the setting utility software The setting ...

Page 42: ... Fader A 2 Cross Fader B 2 Cross Fader B 2 Cross Fader B 2 Cross Fader B 2 Cross Fader B 2 MIC MIC MIC MIC MIC Post CH1 Fader 2 Post CH2 Fader2 Post CH3 Fader2 Post CH4 Fader2 1 The audio data is output with the same volume at which it is input to this unit regardless of the USB Output Level setting 2 When using for applications other than recording pay attention to the DJ application s settings s...

Page 43: ...e etc is running quit that application before adjusting the buffer size Display the setting utility before starting Click the ASIO tab If the buffer size is made large drops in audio data breaks in the sound occur less easily but the time lag due to the delay in the transfer of the audio data latency increases Checking the version of the driver software Display the setting utility before starting ...

Page 44: ...cy to a suitable value Cannot output the microphone sound Are the OFF ON TALK OVER selector switches set to the proper position Set the OFF ON TALK OVER selector switches to the proper position Cannot output the sound of the external device Is the LINE PHONO USB selector switch or CD USB selector switch set to the proper position Set the LINE PHONO USB selector switch or CD USB selector switch to ...

Page 45: ...n different from the actually touched location responds Calibration adjustment of touch display is deviating Adjust the touch display in the TOUCH DISPLAY CALIBRATION settings of the utilities screen About the liquid crystal display Small black or shining points may appear on the liquid crystal display This is a phenomenon inherent to liquid crystal displays this is not a malfunction When using in...

Page 46: ...B Output MICPeak Limiter Mic Balance Trim Master ATT Booth MONO STEREO Booth ATT Mic to Booth Gain Booth Out Using as a controller for other DJ software This unit also outputs the operating data for the buttons and controls in MIDI format If you connect a computer with a built in MIDI compatible DJ software via a USB cable you can operate the DJ software on this unit The sound of music files being...

Page 47: ...M LICENSE 1 Limited License Subject to this Agreement s restrictions Pioneer DJ grants to You a limited non exclusive non transfer able license without the right to sublicense a To install a single copy of the Program in Your computer or mobile device to use the Program only for Your personal pur pose complying with this Agreement and the Documentation Authorized Use b To use the Documentation in ...

Page 48: ...ffect The waiver by either party of any default or breach of this Agreement will not waive any other or subsequent default or breach 4 No Assignment You may not assign sell transfer delegate or otherwise dispose of this Agreement or any rights or obligations under it whether voluntarily or involuntarily by operation of law or otherwise without Pioneer DJ s prior written consent Any purported assig...

Reviews: