background image

Summary of Contents for CT-055W

Page 1: ...ARTS LOCATION E X P L O D E D V I E WA N D P A R T SL I S T P C BOARDSCONNECTION 1 2 3 4 5 6 7 8 2 3 5 6 23 25 27 37 g S C H E M A T I C D I A G R A M 4 3 10 ELECTRICAL PARTSLIST 47 11 ADJUSTMENT 50 RÉGLAGE 56 AJUSTE I2 SAFETYINFORMATION 13 SUPPLEMENT FOR HEM AND HB TYPES 62 62 plCfNEEFl ELECTFIGINIC CG F PCIFIATICIN 4 1 Mesuno 1 chore Mesuno ku Tokvo 1s3 Japan PfoNEEFf ELEcrFoNrcBrusa t t is_ â E...

Page 2: ...being turned on or off O POWER ON When the machine is turned on the built in micro computer is initiatized Fig 4 1 and is ready to re ceive inPut sent from the keY Wslt for mlcro comput r lCSOt to 3t6blli26 Chæk to s lf decks A and B ar in th STOP mod thst 15 when th hoad bts is lN ll thev âro not in ths STOP mod low r th hoâd b63e to put thsm in tho STOP mode Th61 th ba e is low i3 depctêd bv MOD...

Page 3: ...leaseevaluate this model and service manual by answeringthe following questions Your ideas may be realizedin our future products Your answerswill be appreciated Thank you PIONEER ELECTRONIC CORP T Nakagawa Manager ServiceSection lnternational Division 1 SERVICING EVALUATION Circle applicablenumber Good FaiI Poor a Disassembly Re assembly b Circuit Checks c Replacement of Parts d Adjustment s f If ...

Page 4: ...t SERVICE MANUAL EVALUATION Circuit MechanismDescription b Circuit Diagram 3 OTHER Pleasedescribeother areasof servicingwhich you may find difficult Completed by Company Name Address CitylStatelZip Date Pleasesendthis form filled to the dittribrtot ir yo r outty ...

Page 5: ...terference by one or more of the MISCELLANEOUS Power requirements KU model AC 120V 60 Hz HB model AC 2 10V 50 60 Hz HEM model AC220V 50 60 Hz Power consumotion KU HEM and HB mode s 17wa11s D i m e n s i o n s 4 2 O W x 1 0 2 H x 3 1 4 5 D m m 16 9 16 W x 4 H x 12 61 16 D in Weight without packaging 5 5 k9 l12lb 2 ozl FURNISHED PARTS Operating instructions I Connection cordwith pinplug 2 C o t t o ...

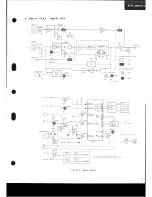
Page 6: ...3 BLOCK DIAGRAM r S l 5 6 g 1 M B B E FOR MS crRcurls I lol orr Eton MUTING TRANSISTOR St o p o OECKA MECHANISM ASS Y D É C K A DECK8 ffi flll p ERASE HEAD ...

Page 7: ...ss this switch Noise reduction manufactured under license from Dolbv Laboratories LicensingCorporation Dolby and the double D symbol are trademarks of Dolby Laboratories LicensingCorporation DOLBYB C SELECTOR SWTTCH DOLBYNR B C This deck is equippedwith both type B and type C Dolbynoise reduction systems AftertheDOLBY NRON OFF switchispressed select typeB or C using thisswitch TheDolbyindicator co...

Page 8: ...ON with NORMAL Epe 5304 ând S305 Ëïr l nn a O and METAL tape 5304 and s305 ELECTRTCSWITCH Sl S6 6 61 o I o ilU fING 1RÂNSISTOR F o P t on LIilE OUT I s su P U L L u P l 2 v I DECKB ts I L M I t 2 n M 4 L M 7 T S I A S O L 2 ÀsoL I I MUTE BSOL 2 BSOL I LINE XUTE KEY SCAN coev 1fl BIAS ii f3 Fig 4 6 Signat route1 ...

Page 9: ...P I FFor REW FF I rt F F R E W REW I rr M S Egualin starus to bothdecks A andB setin STOP mode F i s 4 5 F U N C T I O N COPY SWITCH CONTROLPARTSOUTPUT D E C KA D E C KB S 1 S2 53 55 54 56 S7 M 1 M2 M4 M3 M 7 M 6 M5 1 2 3 4 5 b STOP STOP PLAY STOP STOP PLAY STOP STOP STOP PLAY B E C R E C O F F ON L H H L H l l I L H roNi L H H u H L i L H O F F i H L L L H H L L H O N L H L H H L H L H O N L H L ...

Page 10: ... i i MEcHaNlsMrss ualY I L EL CÎRIC SWITGH SI S6 16l orr Iton MUltitG TRANSISTOR i orr i o x 1 t uu PULL uP tzv F L S t L s 2 t 5 3 s 5 s 4 s 6 oït L M I t 2 n M 4 L M 7 T S I r2v q3rI D E c K B I 1 _ s4o5 rL MEcHaNrsM aSSEMBLY i I À s o L 2 Â s o L I B uuTE BsoL2 BSOL I coPYH TÀrx MUIE PE ON wilh NOBIVIALtâpe 5304 and 5305 OFF with CrO and l 4ETALtâpe 5304 and 3305 Fig 4 6 Signalroute 1 ...

Page 11: ...4 Key Matrix Circuit M O O E 5 3 0 1 E N O s 302 H A L F s303 END s40 M O O E s402 s403 a P o I P l c P 2 P3 P4 C OP Y szt8 4 s 2 r 8 t I s 2 r 8 5 eur r uPRESrsroR os2e oE l1l D2t3 PL Y o s 3r rr3l i or trIr D533 STOP I I I ...

Page 12: ...This pulse in turn is fed into one of the pins 17 through 22 of IC 501 as the key matrix input cor responding to the key input thus allowing the microcomputer to send output signals matched with key inputs to each section F i g 4 l I REC LEO O liOhB up Ch ck to 3 I TIMEFI REC k y is O N o r O F F Reâdy to rs c6iva k V In put Check tho TIMER REC key rtats oN oFF slor d in th m mory It ON tho unit 1...

Page 13: ...J 1 M 8 FOR HEAo r st ll o F F 1 MUTE 8 soL 2 E S O L I L iME MUTE KEY s c  N coot nriT B I A S R E C R E C M U T E P 8 s o L E N O r 0 D R I V E C l R C t r T K E Y MÂTRIX C I R C U I T aà fi oR ft r O N w L I h N O R M A L r a p e r S 3 0 4 â n d 5 3 0 5 O F F w r h C r O a n d M E T A L r d p e r S 3 O 4 d n d S 3 O 5 r Fig 4 7 Signal route2 ...

Page 14: ...HEAo F o l3l 3il19 lÆ tv t t rh br f R E C L S i s 3 s 5 t FORMS crRcurrs2 1 l r l l rJ I M8 A S O L 2 ASOL I B MUTE B SOL 2 BSOL I LINE MUTE KEY SCAN ôoY KEY MÂlRtX MUTE PA SOLENOID O R I V E C I R C U I T t I S3O4 B DECK A i F J MEcHANTsM asseàlaLv I Y L J r s z D E C K I i saos MEcHANtsM lsseuar v ON with NORMAL rape 5304 and 5305 OFF wûh CrO ànd METAL râpe 15304and 5305 Fig 4 1O Signalroute 5 ...

Page 15: ... tg I H s t L S 4 ss L M 2 M a L u z T S i ON wrth NORMAL tape 5304and5305 OFF wrrh CrOl and METAL lape 15304and 5305 I t3oo g DECKÂ I r T r rl r i I M8 MUTE A SOL 2 s o l I MUTE I SOL 2 E S O L I L I N E MUTE KEY SCAN KEY M A T R I X B I A S REC REC lfurE Pa X E Y MÂTR IX C I R C U I T u e e f F H u s I I I c 5 o l Fig 4 B Signalroute3 ...

Page 16: ...ssEMBLY I q3l I D E C KA R c h C R C U T u 8 ë D pr rr Tst r 8 L I N E I N J l H i s4o5 ç MECHANTSM aSSEMBLY i L _ _ _ _ _ _ _ _ _ _ _ J ON wirh NORMAL tapê 5304 ând S3OS ôit n c o and METAL rape ls3o4 and 5305 I s su çF PULLuP t2v 16 îl s orr A iIUTE A SOL g asoL I MUTE B SOL 2 ESOL I LINE ilUÏE XEY SCAN KEY MATRIX crRcu 1 Fig 4 9 Signal route 4 ...

Page 17: ...r I otr I 5 5 V ç PULL UP I IzV H S r s 5 s 4 f M 3 I f P l l ji s RI B Â s o L I MUTE 8 soL 2 BSOLJ L I N ôpY KEY MÂTRIX E l a s REC REC I UTE PA r i s 3 o 4 a o E c K a I I 1 _J MEcHANTsM asseuerv I Al x ff on v t O N w t r h N O R M A L r a p e 5 3 0 4 a n d 5 3 0 5 1 OFF wrrh CrO and METAL taoe 5304 and 5305 Fig 4 11 Signal route6 ...

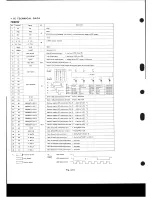
Page 18: ...EMORYLED7 Memorv display LED drive outpul lNo 7 L lighls up LED 2 27 8 2 MEMOBYLED6 Memory display LED drive output No 6 L lighls up LEO 2 2A D3 MEMOFYLED5 Momory display LED drive output No 5l L lights up LED 2 29 B4 MEMOFIY LED 4 Memory display LED driv output No 4 L lights up LED 2 30 B5 MEMOFY LEO 3 Memo y display LED d ive output No 3 L lights up LED 2 31 B6 MEMORYLED2 Memory disptay LEO driv...

Page 19: ... E A D O F F H v r z ï T I S 3 O 4r â D E C Ka I FORMS crRcurT s2 I f f l l oo G__ l I rl _l t l lJ I I IUTE Â SOL 2 Â s o L I MUTE B SOL 2 85oL I L I N E HUTE KEY SCAN coPYuiià t 8rÂs REC REC MUTE PB D E C K A O E C X B lus I d rcsol aà 1 J on t ON w lh NORMAL tape 5304 ànd 5305 O F F w r t h C r O a n d M E T A L t a p e l S 3 O 4 a n d 5 3 0 5 1 F i g 4 l 1 S ig n a lro ut e6 ...

Page 20: ...arch takes place Moreover the sarneprograrn can be played back asmany times as the prognm No key is repeatedlydepressed up to 16 times When used for copying this mode en ables the desired number of progxamson the o riginal tape to be dubbed in any desired sequence During copying the non recordedsectionsbetween the programs being dubbed are automatically ad justed for a uniform interval automatic r...

Page 21: ... B 1 M E M O R Y L E D 7 Memory displav LED dilve ourput No 7 L lightsup LED 2 27 IVEMOFY LEO 6 Memory displav LED drive oulput No 6 L lighrsup LED 2 2A D3 M E M O R YL E D 5 Memory displôy LED driveoutpul No 5 L tighrsup LED 2 B4 MEMORY LED 4 Memory displav LED drive output No 4 L lighrsup LED 2 30 MEMORY LEO 3 Memory display LED drive output No 3 j L lightsup LED 2 MEMORYL E D 2 Memory display L...

Page 22: ...PROGRAMSEARCH l N ô a b o l u t r t ô l L E O r l 6 h 6 i l o w r v 2 n d p r o g m o n w r d L E D s h t c o h n n u o u r v LÊO rldnù r rrlv 2nd o d 6 ew rd LEO rr ô rrowrv L E O t l r h d t l l v Fi1 4 12 ...

Page 23: ... bluE dr 19Â d tor STOFI o l Rq Fi4 6rcnôo LEO fi ô6 f ilY N rt groqrdm to b Plâv d bæk LEO ltdhrrr owry rogramSearchFlowchart ...

Page 24: ...r d À 6 n o É r v 2 n d p o g ô o n w r d E O I e h r r c o n r n u ô u r l Y L E O i r d h 6 r r r v 2 n d o 4 r 6 ô n w r d L É o r r t h r i o w v f l X _ L E D F r o I o r o o g r F I I L E O r r a À é n ù r v I I I t Fis 4 12 ...

Page 25: ...ftqÉm bing Étchd LEO ll ù6 fa tlv N tt P69r m o b Pl Yêd bck LED fla ho srodY gramSearchFlowchart ...

Page 26: ...ffi 1 3 2 5 DISASSEMBLY o I o a __ a Front panel V assemdy D fq v 3 a D X o J Complex assembly ...

Page 27: ...the mecha nism unit to be dismounted without requir ing the front panel assembly to be re moved Remove screîv to dismount the stay For the removal of the bottom plate re move screw O ot the bottom of the set This allows the soldering on the composite assemblv B to come into view Removing rivet and screw on the a pat i causes the P C B holder to be un fastened enabling DOLBYINR assembly to be detac...

Page 28: ... 5 DISASSEMBLY 2 3 o I A f r q à Y Door panel B D Door panel A ...

Page 29: ...transistor assembly Undo screïv G ott its lower portion to re move the transformer For the removal of door panels A and B slide the panelsupward with the doors kept open 10 To removethe front panel base undo screw L and slightly lower the panel stayhook D upper four portions and hookQ lower two portions using a flat screwdriver etc 11 the tape counter is removed by removing screw lE L2 The panel s...

Page 30: ...B S O L H DECKA MECHANICAL CONTROL asoLrQ9 H ril u J f r2 asoLre H E rr SIGNAL ROUTES a M U T I N 6 CONTROL A M U T E H r 3 j F B MU TE H necz e a L B I A S H M S INOICATION CONTROL nEc rruo t SIGNAL ROUTES a M U T I N G CONTROL C OP Y 1ô H mE ilur r l necuuïE OPERATION KEY INPUT DEC P L A Y B F F B R E W B S T O P B R E C B P L A Y A S T O a s o L 2 a murE B xurE B r a s INOICATION CONTROL Fig ë ...

Page 31: ...T l l O O m s T2 2OOms T3 7OOm3 T 4 S O O m s S T O P A o r B C O P Y P L A Y R E C iming Chart ...

Page 32: ...3 o 7 EXPLODEDVIEW AND PARTS LIST 7 1 MAIN A B I I D I ...

Page 33: ... 39 D ll rr 29 29 2s t4 29 28 ...

Page 34: ...on some component pafts indicates the importance of the safeû factor of the part Therefore when replacing be sure to useparts of identicol designation t For your Parts Stoeh Controt the fost mouing items are indicated with the marhs and GENERALLY MOVES FASTERTHAN This claæification shall be adiusted by each distributor becauseit dependson model number temperature humidity etc fl Bonnet case ANE489...

Page 35: ...AD 834 Top View eo er transformer 120V ATS 122 t ruse 2A AEK 122 A ff powerswitch stol ASG 541 A Powersupplyassembly GWR 206 L ED RED AEL 382 LED GREEN AEL424 Knob C FF AAD 824 Cassetteplate AXR o11 ff Pincharm AXP O22 PB head APB006 Dummy head AXNOl6 Pushknob AAD 894 DOLBY NR assembly GWY 130 tf Ps66 relay RY301l AsR o74 AWM 629 assemblv Bl rc ilc501 PD301 2 ...

Page 36: ...2 7 3 MECHANISM ASSEMBLY DECKB D I A t B I o a 3 2 12 4 e ...

Page 37: ...5 4 o A 1 J 26 43 38 82 ...

Page 38: ... 2A Foot assembly Fronl panelassembly Tactual knob Eject knob Knob A PLAY Knob B STOP K n o b C F F Knob D REW Knob E REC REC MUTE Spring Spring Tape counter Screw Rolary knob PITCH CONTROL Power knob assembly Push knob Bonnet case Door panelA Door panel B Strain relief Pushswitch POWER S1011 Power cord Screw Screw Transistor O4O1 4P pin jack REC PLAY Variableresistor REC VOLUME VR107 Cassetteplat...

Page 39: ...qD 7 2 PACKING Para Listof Packing Mark No Part No C I 1 AHA 379 2 AHG I82 3 AHE 348 4 ADEO74 5 A EX 16 6 AHG 169 7 AHG l17 8 ARB 10 Pad Bag Packingcase Cord Head cleaner Bag Bag Operating instruction ...

Page 40: ...7 I r REC O T H I t À Ln 5r l il c al n l j I ô J l À A I 1 I l 1 i6 6 _ I t r I 1 E w l o I o 1P ro DISPLAY ASS Y GWY 129 TRANSISTOR ASS rC I I ...

Page 41: ...o A OL8YNR ASS Y GWY I3O CONTROL ASSY AWP Ot9 T I A T S 1 2 2 POWER SUPPLYASS Y GWR 206 t l t l II QgOi 2SCi74OS o902 2SA933S OgOi 9O5 USlO35 Dror RBr52 Dto2 1O4 55566 oto5 KzLr30 oto6 KzLo6 ...

Page 42: ...CZ26P100FMC 69 BBZ20P050FMC 70 BCZ20P120FMC 71 PCZ20P050FMC 72 BBZ26P080FMC 73 PCZ26P320FMC 74 PCZ20PO60FMC 75 PCZ26PO40FMC Spring Reel receptacleB Cassettecaseassembly Spring REC PBhead Erasehead Motor Solenoid 1 Solenoid 2 Leafswitch Leaf switch Leaf swilch Leaf switch Screw Screw Screw Screw Screw Screw Screw Screw Screw Screw WasherE type WasherE type Washer Washer Washer Washer Washer Washer ...

Page 43: ...r pulley Bell Worm AS cam Spring Drive arm assembly Spring Sensor Spring Sensorarm Spring Spring Triggerarm Spring Cam gear Spring O ring 53 54 AXS 074 55 AXV 083 56 AXP 030 57 AXV 084 58 AP8 006 59 AXN 016 60 AXM 010 61 AXN 017 62 AXN 018 63 64 AXN 019 65 AXN 020 66 AXN 021 67 BMZ20Y120FMC 68 PCZ26P100FMC 69 BBZ20P050FMC 70 BCZ20P120FMC 7 1 72 73 74 75 Eject stopper Joint rod Cassettecaseassembly...

Page 44: ...4 f tr 6l 5 4 ...

Page 45: ...I T JllZ 7 4 MECHANISM ASSEMBLY DECKA 4 s 3 ...

Page 46: ...07 59 AP8 008 60 AXN 023 61 AXN or7 62 AXN 018 63 AXN 022 64 AXN 019 65 AXN O20 66 AXN 021 67 BMZ20Y120FMC 68 PCZ26P100FMC 69 BBZ20P050FMC 70 BCZ2oP120FMC 71 PCZ20P050FMC 12 BBZ26P080FMC 73 PCZ26P320FMC 74 PCZ20PO60FMC 75 PCZ26PO40FMC 8 1 a2 83 a4 85 Spring Reel receptacleB cassettecaseassembly Spring REC PBhead Erasehead Motor Solenoid1 Solenoid 2 Leafswitch Leaf switch Leaf switch Leaf switch Sc...

Page 47: ...AXR 008 17 AXV 065 18 AXT 008 19 AXV 066 20 AXV O67 53 g 55 56 57 t r 5 8 59 f f 6 0 61 62 63 64 65 66 67 68 69 70 A A ff ff Eject stopper Joint rod Cassettecaseassembly Spring PB head Dummy head Molor Solenoid 1 Solenoid2 Leaf switch Leaf switch 6 7 I 9 1 0 31 32 33 3 4 35 36 3 7 38 39 40 AXN 021 Leafswitch BMZ20Y120FMC Screw PCZ26P100FMC Screw BBZ20P050FMC Screw BCZ 2OP12OFMC Screw BBZ26POSOFMC ...

Page 48: ...o t È t 10 DOLBY NR ASS Y GWY I3O HA t2058 N1 2SCr 740S 1 ffi1sr3 REc 47 OTHER o CONTROLASSY AWP ot9 C D POWER SUPPLY ASS Y GWR _206 11 r 3 H f w l tl â9Oa t tr c90r sc1 74cs a 9 a 2 s  9 3 3 5 D r 9O5 5ro35 10 ...

Page 49: ...il 7 8fg NtT 2 2 JNIT 2 2t Dæt to o tt 212 D213 214 DISPLAYASS Y GWY t29 AEL é82 AEL 424 z t K 2 6 1 TRANSISTOR ASS Y ...

Page 50: ...7 o æ 5 O 4 0 3 0305 0æ7 030 oæ5 0 5 r 5 5 r a Q 5 5 r 4 Q 5 l O 5 3 r 5 0 9 5 1 O c501 aaaz O5o5 aær o5o3 c 6 0 1 1 6 0 l a 6 o 4 Q 6 O 6 c o 0 6 0 r Q 5 2 6 5 2 9 O5O4 tu 5oa t il l l i i  5 r R 5 i 1 1 1 III I I I y 1 p o f f 1 1 5 4 ...

Page 51: ...P C BOARDS CONNECTION DIAGRAM COMPLEX ASS Y AWM 629 lClOl o s40 o3 04 v R s 2 i lÈi 11 i1 r l j t r l _r I t 9 5 i s e  t t c i J ici L l J i r i El 3 oæB oto5 VRIO6 yRio5 I I nÀSi Ei r i_ 4 LF L _ J D 3 2 ...

Page 52: ...O 5 2 6 5 2 9 O 5O4 tu 5Og 7 0 3 0 8 0 3 0 6 I Ir li È i i l l i l l l æ l t 1 l l l l I i l o ô ô o o o t J 5 5 æ i rii r i i ri 1 f R 5 o e l R s t I j r td J 6 t ô o ô o l os 1t l i lt 1l r av srt 1 J f I e l l l f ï l L INE T 6 a L I N E rfl O 11 1 1 I f i r_Rr 5 4 ...

Page 53: ...3 8 P C BOARDS CONNECTIONDIAG COMPLEX ASS Y AWM 629 A A NiËUnÂl rlj z t _I I 3 2 f RA tcroi oror ro2 oro3 ro4 lcto4 0304 02ro o20a Q303 0 o9 a207 vRæ2 vRær vRior loz vRto3 ro4 ...

Page 54: ...1 ExternalAppearance of Transistors and lCs 2SA933S 2SCt740s HA12O58NT A M52181 M5220L M51143AL M74LS42P B ...

Page 55: ...061 us1035 1 S 15 5 5 Part No Ë 0902 fr 0901 i D901 D905 CAPACITOR Mark Symbol Delcription 25A9335 2SC1 7405 usl 035 1S1555 Part No Symbol Dæription Part No c 1 0 1 c 1 0 2 c103 c104 c105 Cl t0 c106 cl07 cl 08 cl09 c l 1 1 c112 cl13 C114 RESISTORS Note When ordering resistors conuert the resistonce ualue into code form and then rewrite the part no as before wbrk Symbot Dercription Pert No c901 RES...

Page 56: ...luewhen the pinch roller commences 10 3 0 1 0 H z l 5 H z STD 301 3 kHz fiitn fr pnch control VR VR2O1 set ro the phvsical center position adlust VR501 r l i l r d l l r c i l ll l r ot speed ADJ r l s VR6O1 b o o i pincntonetpressure spring AXV F l aryrl Tension gauge Part No GGK 047 Pinch roller pressure spring Part No AXV 066 À f p Speed Adiustment Adiustat beginning of tape 3O10Hz t SHz fn O t...

Page 57: ...n 2SA9335 2SC1 7405 usl035 151555 Pea No swrTcH Merk Symbol Dercription Part No A t stol Push swilch CAPACITORS Mark Symbol Dercription ASG 541 Part No c 1 0 1 c 1 0 2 c103 cl04 c105 c11 0 c106 c107 c108 c109 c 1 1 1 c112 c l 1 3 C l 1 4 RESISTORS Note frlhen ordering resistors conuert the resistance value into code form and then rewrite the part no as before Mrrk Symbol Delcription Part No CEA3R3...

Page 58: ...pitch control VR VR201 set to the physicalcenter position adiust VR501 a É epuce tne pincnrollerpressure spring AXV 066 i Il I l rtp speed ADJ o GI VR50l o Tension gauge Part No GGKO47 Pinch roller Capstan Pinch roller arm Pinch roller pressurespring Part No AXV 66 4 Tape Speed Adiustment Adiustat beginning of tape Mode Test lape Adjustmenr location Specaitcatlons rating PlaYback frequency I PLAY ...

Page 59: ...29 C330 CU7 C34a c331 C332 c303 c304 c307 c308 c313 c314 C351 C352 c354 C356 c311 C312 c 31 5 C3 1 6 c309 c310 c319 C320 C341 C342 c353 c321 C322 c349 C350 c323 C324 c317 C31 8 c337 C338 c335 C336 c339 C340 c343 C344 c c Ds L r0 l J 50 ccDsL 390J50 CE AR1 5 MsOL CEAR33MsOL CEAR47MsOL CEAR68MsOL CEA 1OOM 25L CEAlOOM 25L C E A1 O 1 M 1 6 L cEA 221M16L CE A1 0 1 M25L CEA4R7MsOL CEA47OM1OL coMA 103J50...

Page 60: ...1 Fuse 2Al ComplexAssembly B AWM 629 SEMICONDUCTORS Mark Symbol Description AWM 629 GWY I30 GWY I29 GWR 206 AWP O19 ATS 1 22 AÉ K 122 Part No ff RY3O1 Read relay COILSAND TRANSFORMERS Mark Symbol Dcscription Part No L3O1 Inductance L2O3 L204 L2O1 L2O2 lnductance L2O5 L2O6 Trap coil LÎ01 Lî02 Trapcoil ATHO94 ATH O95 ATH 096 ATMO32 ATM O33 Part No T301 Biass OSCtransformer ATX 032 c ff t ff ft ff ff...

Page 61: ...3 t l l2 DIAGRAM 1 SCHEMATIC L r B C f t t I I D ...

Page 62: ...Y SIOI POWER ON _ QEE INOICArcR ASS Y S2O1 MEMORY 1 M OFF S 2 O 2 1 M E M O R Y 2 O N _ O F S 2 O 3 M E M O R Y 3 O N O F F S2O4 MEMORY 4 ON OEE s 2 o 5 M E M O R Y 5 O N S F S 2 G M E M O R Y 6 O N O F F S 2 O 7 M E M O R Y 7 O N O F F s2og M MORY I ON trF s 2 o 9 i P L A Y æ C A O N O f s 2 r o s T o P r o E c x a N O F F s2il I FF æCK A ON OFF s2l2 REw æCK Al ON oEl s2r3 RAY ÉcK A ON OFF s2r4 s...

Page 63: ...L o0 0a 20ra 2ro 303 304 0307 3r 40ra40 5æ 525 o529 60h603 2SCt740 S ou 302 5r51 5r8 2S0438 0305 3æ 501 502 2SA933S rcro to5 106 1c468P o5o3 526a528 6 1606 fr 2O3 O5O41 5r4 RNZ2OI O53O 53t RN ZO o3ol 5or 51515r8 s5s6 æOla 4 æ21ffi 5y1539 usro35 05r91 533 54O 2 tx261 ...

Page 64: ......
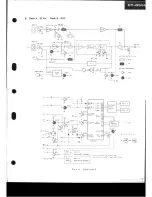
Page 65: ...pe 6 Adjust both left and right channels unless otherwisespecified 7 And unless indicated otherwise leave the DOLBY NR switchin the OFF position 8 Let the set warm up for at leasta few minutes before commencing adjustments And before commencing the record playback frequency response adjustment let the set age for three to five minutes 9 Always adjust the set in the given adjustments order If the o...

Page 66: ...andplayback frequency response zone NORM Fig 11 6 Allowablerecording andplayback frequency response zone CrOz Test Tape STD 610 TAPE SELECTOR METAL DOLBY NR OFF DOBLYNR B TYPE ON DOLBYNR C TYPEON TestTape STD 603 TAPESELECTOR CrOz DOLBYNR OFF DOLBY NR B TYPEON DOLBY NR C TYPEON 5 2 4 5 B r25 æV5 90 Fig 11 7 Allowablerecording andplayback frequency response zone METAL ...

Page 67: ... M P L A Y Play the 31 5Hz 0dB prrtion of the STD 3318 test tape v R 1 0 5 L v R 1 0 6 R Ï P L TP R 7 7dBv 4 1 2 m V 3 Recording Playback FrequencyResponse Adjustment Tape selector Mode Input signal testtape Adiustment location Measuringlocation Adjustment value R e m a r k s N O R M R E C A p p l y a 3 1 5 H 2 s i g n a l to the recordingtermi nats Input signallevelto be applied to the recording ...

Page 68: ...se adjustment vR301 Ll vR302 Rl Recording level adjustment vR201 L vR202 R Fig 11 3 Headazimuthadiustment Fig 11 4 Allowable playback frequency responsezone vR103 vilo vR t06 VR50t vHrub o vR2o2Æ vR3ot d vR105 VR302 vR201 Æ Headazimuth adiustmentscrew The CT 055Wfeaturesanauto tapeselectormechanism Test lape sTD 3318 Tapeselector NORM DOLBY NR switch O F F Due to edge effect compensate the right c...

Page 69: ...T 055Wfeaturesan auto tape selectormechanism Allowable copy frequency responsezone DO LBYN R OFF Test Tape STD 608A Tape selector NORM TestTape STD 603 Tapeselector CrO2 Test Tape STD 6O4 Tape selector METAL ...

Page 70: ...lecteur de bande Mode Signal d entrée bande d essai Emplacement du régla9e Emplacement de mesure Valeur de réglage Remarques Normal NORM Beproduc tion PLAYI Reproduire la portionlokHz 2OdB de la banded essai STD 331B Vis de réglagede l azimutage de la tête F i 9 1 1 3 ÏP L TP R Niveau de signal de reproduction maxi mal Metûe en place l arrêt de vis après avoir effec tué ce réglage 2 Réglagedu nive...

Page 71: ...à cinq minutes 9 Toujours procéder aux réglagesdans I ordre indiqué Si cet ordre est modifié il ne sera plus possible d effectuer des réglagescorrecte ment et cela pourrait entraîner une dégrada tion desperformances Procédurede réglage Platine A 1 Réglagede I azimutagede la tête 2 Réglagede l égalisateurde reproduction 3 Réglagedu niveaude reproduction Platine B 1 Réglagede I azimutagede la tête 2...

Page 72: ...n Galet presseur Brasdu galet presseur Ressortde pressiondu galet presseur pièce no AXV O66 Placerle contrôle de ton VR VR201 sur la position centraleet aiusterle vR501 Platine o F Réglagede la vitessede la u bande g VR5O1 o 16 4 Réglaç de la vitesse de la bande o Procéder au réglage âu déb ut de la bande Mode Bade d essai Emplace ment du réglage Valeurs nominales fréquence de reproduction Repro ...

Page 73: ... r o d u c r i o n d e 7 7 d B v 4 l 2 m V sort obtenu Oxyde de chrome CrO2 Enregistre ment repro duction R E C P L A Y Enregistrerle signalde 31 5Hz sur la bande d essai ST0 603 puis reproduire l e s i g n a l T P L T P R Vérifier que le niveaude reproduction d u 3 15 H z e s tà 7 7 d B v 1 1 5 d 8 MéÎal METAL Enregistrre menl repro duction R E C P L A Y Enregislrerle signalde 31 SHz sur la bande...

Page 74: ...presiôn AXV 0661 Medidor de tensiôn No de parte GGK O47 Eje de arrastre Rodillo de presi6n Brazodel rodillo de PresiÔn Muellede presiôndel rodillo de No de parte AXV 0661 presrôn Magnetôfono A o P Ajuste de la o u l velocidad de la cinta vR5O1 d o Ë ë 4 Aiuste de la velocidadde la cinta o Aiustar al principio de la cinta Mode Cinta de prueba Lugar de aiuste Valores de especificaciones Frecuenciade...

Page 75: ...BYNR OFF arrêtl DOLBY NR TYPE B ON marche DOLBY NR TYPE C ON marchel 1 z Fig 11 5 Zone de réponseen fréquenceadmissiblede lectureet d enregistrement NORM Fig 11 6 Zonederéponseenfréquenceadmissibledelectureetd enregistrement CrOz Barde d étalonnage STD l 0 Tapeselector METAL DOLBYNR oFF arrêt oor ev NR TypE B oN marche DoLBy NR TypE c oN marche Fig 11 7 Zone de réponseen fréquenceadmissiblede lect...

Page 76: ...taque de bande Commutateur Dolby NR OFF arrêt Banded essai STD 608A Sélecteurde bande NORM Banded essai STD 03 Sélecteurde bande CrO2 Banded essai STD 604 Sélecteurde bande META 5 3 2 s r 5 æo tr5 500 Fis 11 8 Réponse en fréquence admissible encopie ...

Page 77: ... respuestaen frecuencia para reproducciôn y grabaciôn dejar que se precaliente de tres a cinco minutos 9 Ajustar siempre el aparato en el orden de ajuste dado Si se cambia el orden no son posibles los ajustes adecuados lo cual puede ocasionarpérdida del rendimiento Procedimientosde ajuste Magnetôfono A 1 Ajustedel acimut delacabeza 2 Ajustedel ecualizador de reproducciôn 3 Ajuste del nivel de repr...

Page 78: ... Zonade respuesta de frecuencia de grabaciôn y reproducciôn O r irib 6 I I Cinta de prueba STD 608A Selectorde cinta NORM DO LBYNR O FF DOLBY NR TIPO B ON DOLBYNR T POC ON Cinrade prueba STD 610 Selectorde cinta METAL DOLBYNR O FF DOLBY NR TtpO B ON OO L BYNR T t pOC ON Zonaderespuesta defrecuencia degrabaciôn y reproducciôn o r r b ililr ...

Page 79: ...nutos antes de iniciar los ajustes Y antes de empezar el ajuste de la respuestaen frecuencia para reproducciôn y grabaciôn dejar que se precaliente de minutos 9 Ajustar siempre el aparato en el orden de ajuste dado Si se cambia el orden no son posibles los ajustes adecuados lo cual puede ocasionarpérdida del rendimiento Procedimientos de aiusæ Magnetôfono A 1 Ajuste del acimut de la cabeza 2 Ajust...

Page 80: ...tde reproducciôn a tasposiciones MAX Girados comptela Seôal de entrada cinta de prueba Lugar de ajuste Lugar de medician I N O R M P L A Y Reproducir la parte de lOkHz 20d8 de ta cinta de prueba sTo 331 B Tornil lo de ajustedel acrmul de la cabeza F i s t 1 3 T P L T P R livelméximo de ta reôalde reproduc r o n Aplier et encla vamrento del tor nillo despuésde t r1 i tl ucciôn Observaciones l Ajust...

Page 81: ...r02 REC PLAY Grabar la sefialde 31 sHz en la cinta de prueba STD 603 y reproducirla 3 T P l L TP2 R Comprobar que el nivel de reproducci6n de 31 SHz seade 7 7dBV É 1 5d8 METAL REC PLAY Grabarla seffal de 31sHz en lacintade pruebaSTD 610 y reproducirla 4 ï P l L TP2 R Comprobar que el nivel de reproducciôn de 31 sHz seade 7 7dBv 1 5d8 Tornillo de ajuste del acimut de la cabeza Cabeza de borrado Cab...

Page 82: ...COR RECTED BEFORE RETURilING THE APPLIATTCE TO THE CUSTOMER 2 PRODUCT SAFETYNOTICE Many electricaland mechanical partsin the appliance have specialsafety relatedcharacteristics Theseare often not evident from visual inspectionnor the protection afforded by them necesarily can be obtained by using replacementcomponentsrated for voltage wattage etc Replacementparts wtrich havethesespecialsafely char...

Page 83: ...SOg36A orot RBt52 O OZ O4 55566 Dios KZLi30 0106 KzLo6l OtOT ttz orr3 DlO lO4 S5566 oro5 KzLt30 D r o 6 K Z L O 6 I OlOT t 12 uSlO35 D I I S R D 75 E B Q O 1 V O L T A G E r _ I I R E G U L A T O R I llo D o4 iî 1 A f S t 2 4 R 106 5 6 c t o t ol A s rot c i o t a c G 5 0 2 c r o 2 Â c G O l 9 s t o l r a s c 5 4 1 a c 2 4 a v 50 6OH z AC POWER CORD AOG O79 HA TYPE A D G 0 4 3 Y P T Y P E Drog oil...

Page 84: ...GENERALLYMOVES FASTERTHAN This classification shall be adjusted by each distributor becauseit depends on model number temperature humidity etc Contrast of Miscellaneous Parts PowerSupplyAssembly PartsListfor HEMandHBtypes PowerAssembly cWR 208 SEMICONDUCTORS Symbol Dercription Part No swlTcH Mark Symbol Description Part No a r s1ol Pushswitch powER Asc 541 Mark t a t o101 D101 Dl02 D103 D104 D105 ...

Page 85: ...RFAl 4PL5R6J RDl 2PM681J R101 Rl02 Rî03 8105 R106 R107 PowerSupplyAsembly Circuitfor HEMtype POWER SUPPLY ASS Y GWR 2O8 Rrol oror zsDB36A Dro r RB152 DtOz tO4 55566 o roS K Z Lt 3 0 Dto6 KZLO6I g1g7 12 usro35 oi l 3 RD7 5E B IAU t REGULATOR R 106 5 6 2 4 O V i G R Y T t A T S 1 2 4 L ac 220v 50 60 Hz AC POWER CORO a o G o 4 l A crot O o l i srol 1 t9 c ror ac c 5 oz c l o 2 a c G o l 9 s l o l a s...

Reviews:

Related manuals for CT-055W