background image

External storage device (USB, SD)

The SD memory card, SDHC memory card,
USB memory device and USB portable audio
player are collectively referred to as the

exter-

nal storage device (USB, SD)

. If it indicates

the USB memory and USB portable audio
player only, they are referred to as the

USB

storage device

.

Features

Touch panel key operation

It is possible to operate the navigation and
audio functions by using the touch panel key.

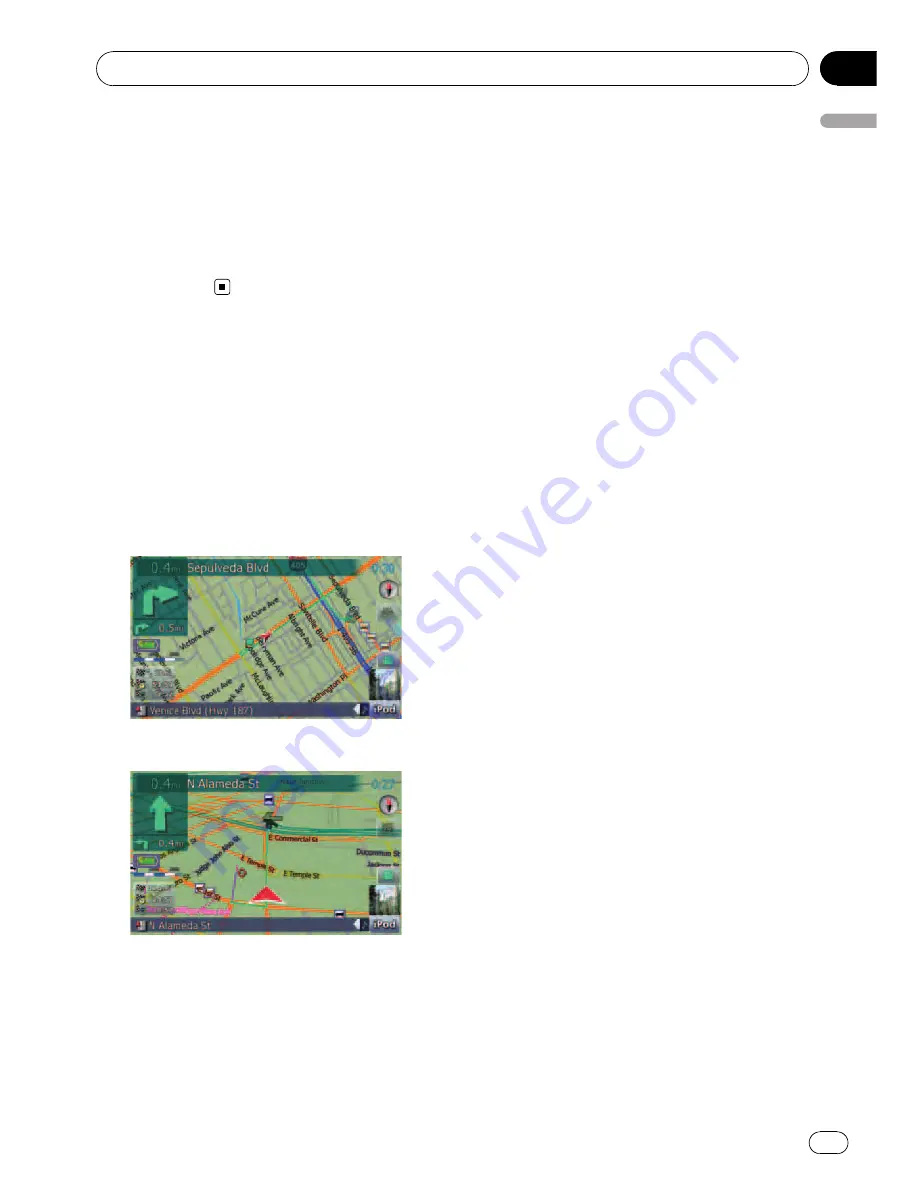
2D and 3D map view modes

Various types of screen displays can be se-
lected for navigation guidance.

2D map screen

3D map screen

A wide variety of Points of Interest
(POI) information

More than 100 types of POI categories are in-
cluded in the database. You can also create
your own customized POIs and categories.

Auto reroute function

If you deviate from the set route, the system
will re-calculate the route from that point so
that you remain on track to the destination.

p

This function may not work under certain
conditions.

Assign your original image as a splash
screen

You can store your own pictures on an external
storage device (USB, SD) in JPEG or BMP for-
mat and import an original splash screen to
this navigation system. These imported
images can be set up as customized splash
screens.

p

Imported original images will be stored in
the built-in memory, but the ability to save
these images cannot be guaranteed com-
pletely. If your original image data is de-
leted, set the external storage device (USB,
SD) again and re-import the original image.

A wide variety of playable file formats

!

Following file types is playable on the exter-
nal storage device (USB, SD).
MP3, WMA, AAC, WAV, MPEG-4, AVI

Notice regarding video viewing

Remember that use of this system for com-
mercial or public viewing purposes may
constitute an infringement on the author

s

rights as protected by the Copyright Law.

Notice regarding MP3 file usage

Supply of this navigation system conveys
only a license for private, non-commercial
use and does not convey a license nor
imply any right to use this product in any
commercial (i.e. revenue-generating), real
time broadcasting (terrestrial, satellite,
cable and/or any other media), broadcast-
ing/streaming via internet, intranets and/or
other networks or in other electronic con-
tent distribution systems, such as pay-
audio or audio-on-demand applications. An
independent license for such use is re-
quired. For details, please visit
http://www.mp3licensing.com.

Introduction

En

7

Chapter

01

Intr

oduction

Summary of Contents for AVICF500BT - CD-VM1 Optional Microphone

Page 1: ...cludes the important information that you must understand before using this navigation system This software requires that the navigation system is properly connected to your vehicle s parking brake and depending on your vehicle additional installation may be required For more information please contact your Authorized Pioneer Electronics retailer or call us at 800 421 1404 English ...

Page 2: ...first time startup 15 Regular startup 15 How to use the navigation menu screens 16 Screen switching overview 16 What you can do on each menu 17 Displaying the rear camera image 17 Listening to the combined car stereo sounds 17 How to use the map 18 How to read the map screen 18 Switching the map between 2D and 3D 20 Changing the scale of the map 20 Scrolling the map to the position you want to see...

Page 3: ...Direct Activating the service 46 Checking your product key 46 Subscribing to the MSN Direct service 47 Activating the MSN Direct function 47 Browsing gas prices 47 Browsing movie times 48 Searching for a theater by selecting a movie title 48 Searching for a movie title by selecting a theater 49 Browsing weather information 50 Checking the local weather information 50 Checking worldwide weather con...

Page 4: ...ack from a specified time 70 Using the Function menu 71 Using the iPod iPod Starting procedures 72 Reading the screen 72 Using the touch panel keys Music 73 Browsing for a song 73 Starting the video playback 74 Using the touch panel keys Video 75 Browsing for a video 76 Using the Function menu 76 Using the AV input Starting procedures AV 78 Using the touch panel keys 78 Customizing preferences The...

Page 5: ...ice commands related to hands free phoning 102 Tips for Voice Operation 103 Other functions Returning the navigation system to the default or factory settings 104 Setting items to be deleted 105 Appendix Troubleshooting 106 Messages and how to react to them 109 Messages for Audio Functions 110 Positioning technology 111 Positioning by GPS 111 Map matching 111 Handling large errors 111 When positio...

Page 6: ...procedure from a menu name If you want to check the meaning of each item displayed on the screen you will find the ne cessary page from the Display information at the end of the manual Glossary See the glossary to find the meaning of a term Terminology Before moving on take a few minutes to read the following information about the conven tions used in this manual Familiarity with these conventions...

Page 7: ...lash screen to this navigation system These imported images can be set up as customized splash screens p Imported original images will be stored in the built in memory but the ability to save these images cannot be guaranteed com pletely If your original image data is de leted set the external storage device USB SD again and re import the original image A wide variety of playable file formats Foll...

Page 8: ...ed must be compati ble with the profile of this navigation sys tem When using Bluetooth wireless technology this navigation system may not be able to operate all of the functions on the cellular phone Rear view camera ready You can display what is behind the vehicle if connected to a rear view camera e g ND BC2 sold separately Map coverage For more details about the map coverage of this navigation...

Page 9: ... settings on page 104 Resetting the navigation system Press RESET button only under the following conditions Prior to using this product for the first time If the product fails to operate properly If there appear to be problems with the op eration of the system When adding removing additional pro ducts that connect to the navigation sys tem If your vehicle position shown on the map with a signific...

Page 10: ... the buttons 1 MENU button Press MENU button to display the Top Menu Press and hold to display the Screen Cali bration screen For details concerning operations refer to Adjusting the response positions of the touch panels touch panel calibration on page 93 3 2 1 5 6 7 d e f g 4 c 8 b h a 9 Basic operation En 10 Chapter 02 ...

Page 11: ...n English is selected pressing the center al lows you to hear the previous route gui dance p When your phone is paired to the naviga tion system pressing its center allows you to answer an incoming call or end the phone call 6 Built in microphone Microphone for hands free operation Also this microphone can be used on the voice operation 7 Power button When the system is powered off press and hold ...

Page 12: ...vice never remove it from this naviga tion system while data is being transferred If data loss or corruption occurs on the sto rage device for any reason it is usually not possible to recover the data Pioneer accepts no liability for damages costs or expenses arising from data loss or corruption Inserting an SD memory card 1 Open the cover 2 Insert an SD memory card into the SD card slot Insert it...

Page 13: ...e you cannot use an iPod and a USB memory device To use them supply power through this product by another method such as connecting an AC adapter or vehicle power charger Plugging in a USB storage device 1 Connect the supplied USB cable to USB connector 2 Plug a USB storage device into the USB connector USB cable supplied USB storage device p Compatibility with all USB storage device is not guaran...

Page 14: ...face cable for iPod to both USB connector and AV input USB interface cable for iPod 3 Connect your iPod USB interface cable for iPod p For more details about iPod compatibility with this navigation system refer to the in formation on our website p Connection via USB hub is not available Disconnecting your iPod Pull out the USB interface cable for iPod after checking that no data is being ac cessed...

Page 15: ...sclaimer carefully checking its details and then touch OK if you agree to the conditions The Top Menu appears Regular startup CAUTION The rear view camera function is not available for safety reasons until the navigation system boots up completely Start the engine to boot up the system After a short pause the navigation splash screen comes on for a few seconds p The screen shown will differ depend...

Page 16: ...How to use the navigation menu screens The Top Menu appears when you boot up the navigation system for the first time Screen switching overview Basic operation En 16 Chapter 02 ...

Page 17: ...r camera image RearView is useful if you want to monitor an attached trailer etc For details refer to Setting the rear view camera on page 92 1 Press MENU button to display the Top Menu and then touch Settings 2 Touch System Settings and then touch Back Camera 3 Touch On next to Camera to acti vate the camera setting 4 Press MENU button to display the Top Menu and then touch AV Source 5 Touch Rear...

Page 18: ...gain p For more information about the direc tion symbol refer to Supplemental infor mation about directions on page 115 2 Distance to the guidance point Shows the distance to the next guidance point 3 Name of the street to be used or next gui dance point 4 Current time 5 Compass The red arrow indicates north 6 Map mode selector For details refer to Switching the map between 2D and 3D on page 20 7 ...

Page 19: ...ion e Street name or city name that your vehi cle is traveling along f Multi Info window Shows the value on the items selected on Displayed Info Touching this area allows you to display the Route Information screen For details refer to Displayed Info on page 82 For details refer to Checking the current route conditions on page 41 p This item is not shown when Full Screen Cockpit is set to On For d...

Page 20: ...he fol lowing settings in Route Unpaved Roads Highways Ferries U turns Permit Needed Toll Roads For your safety please review and obey all local traffic rules along the highlighted route Switching the map between 2D and 3D 2D map screen 3D map screen 1 Press MAP button to display the navi gation map screen 2 Touch or to switch the map mode Changing the scale of the map 1 Press MAP button to displa...

Page 21: ...bottom of screen with street name and other informa tion for this location being shown The infor mation shown varies depending on the position 4 Touch and drag the map in the desired direction to scroll Dragging the map scrolls it The scrolling in crement depends on your dragging length p Pressing MAP button returns the map to the current position Changing the tilt and rotation angle of the map On...

Page 22: ...operation 2 Current page total pages 3 Returns the previous screen 4 Touching or on the scroll bar scrolls through the list and allows you to view the re maining items 5 Listed items Touching an item on the list allows you to nar row down the options and proceed to the next operation The operation of the on screen keyboard 1 2 3 4 5 6 7 8 9 a 1 Text box Displays the characters that are entered If ...

Page 23: ...r case When a space is entered it switches automatically enables you to enter letters with capitals caps lock 8 Displays the key to enter special characters such as p The appearance of this key and typeable characters change according to the cur rent keyboard layout 9 Keys Switches the on screen keyboard layout a Done Confirms the entry and allows you to proceeds to the next step Basic operation E...

Page 24: ...e location in question Also the information on the traffic regula tions provided will be for a passenger vehi cle and not for a truck or other delivery vehicles Always follow the actual traffic regulations when driving Searching for a location by address The most frequently used function is Ad dress in which the address is specified and the destination is searched 1 Touch Destination on the Top Me...

Page 25: ...irmation Screen 9 Enter the street name and touch the de sired one from the list When a street is already set touching Street Center allows you to select the re presentative point of the street and proceed to the Map Confirmation Screen When a street is already set touching In tersection allows you to search for an in tersection After entering the second street name and selecting the desired inter...

Page 26: ...touch to retry with another address Searching for the vicinity Points of Interest POI Information about various facilities Points Of Interest POI such as gas stations parkings or restaurants is available By selecting the category or entering the POI Name you can search for a POI Searching for POIs around the cursor 1 Touch Destination on the Top Menu and then touch POI 2 Touch Around Cursor 3 Drag...

Page 27: ...the information of a specified location on page 38 Searching for a nearby POI 1 Touch Destination on the Top Menu and then touch POI 2 Touch Around Current GPS Location The list of POI categories appears For the subsequent operations refer to Searching for POIs around the cursor on the previous page Searching for POIs along the current route p This function is available when the route is set 1 Tou...

Page 28: ... the list Selecting an item that has already been stored allows you to overwrite it 4 Touch the search method that you want to put it into memory The list of POI categories appears 5 Touch the category that you want to put it into memory If there are more detailed categories within the selected category select the desired category from the list repeatedly until your desired cate gory appears Your ...

Page 29: ...h for POIs with using the pre stored shortcut 1 Touch Destination on the Top Menu and then touch POI 2 Touch Saved Criteria 3 Touch one of the items on the list 4 Touch the desired POI 5 Touch on of the options at the bottom of the Map Confirmation Screen to select the next operation Touching Route and Go Here Now se quentially enables you to set your selected po sition as your destination and cal...

Page 30: ...nsert the SD card 2 Touch Destination on the Top Menu and then touch USB SD 3 Touch the desired storage that you want to load 4 Touch the folder that includes the de sired item on the list 5 Touch one of the items on the list 6 Touch on of the options at the bottom of the Map Confirmation Screen to select the next operation Touching Route and Go Here Now se quentially enables you to set your selec...

Page 31: ...fore entering this screen 4 Touch to delete the current value and enter the desired coordinate Touching N S or E W changes the hemi sphere 5 Touch Done The screen returns to the previous screen Touch the other key that you have not entered yet enter the latitude or longitude and then touch Done to finish the entry 6 Touch OK The Map Confirmation Screen appears 7 Touch on of the options at the bott...

Page 32: ...onfirmation Screen to select the next operation Touching Route and Go Here Now se quentially enables you to set your selected po sition as your destination and calculate the route up that point For details concerning other operations on the Map Confirmation Screen refer to What you can do with the Map Confirmation Screen on page 36 Deleting an entry in History Items in History can be deleted All e...

Page 33: ...to mistakenly delete item Setting up a route to your home If your home location is stored the route home can be calculated by touching a single key Touch Destination on the Top Menu and then touch Return Home When the route is not set route calculation starts immediately When the route is already set a message will appear asking you to cancel the current route Touch Yes to start the route calculat...

Page 34: ...e screen to scroll the map to the desired position 3 Touch to display the Map Confir mation Screen The Map Confirmation Screen appears 4 Touch on of the options at the bottom of the Map Confirmation Screen to select the next operation Touching Route and Go Here Now se quentially enables you to set your selected po sition as your destination and calculate the route up that point For details concern...

Page 35: ...Searching for and selecting a location En 35 Chapter 03 Searching for and selecting a location ...

Page 36: ...rmation of a speci fied location on page 38 Enables you to call the position if a telephone number is available Pairing with cellular phone featuring Bluetooth wireless technology is required For more details concerning the operation refer to Dialing a phone number on the Map Confirmation Screen on page 58 Route Go Here Now Calculates the new route by setting the cursor position as the new destina...

Page 37: ...l the current route Touch Yes to start the route calculation p When the cursor overlaps with a destina tion that has already been set touch Re move Dest to cancel the current route or recalculate the route by setting one of the remaining waypoints as the destination Setting the location as a waypoint 1 Touch Route on the Map Confirma tion Screen 2 Touch Add Via When no waypoint is set route calcul...

Page 38: ...ation Screen The Map Confirmation Screen appears 4 Touch Info at the bottom of the Map Confirmation Screen The Point Info screen appears 1 2 1 The address and coordinates 2 Information about a nearby POI 5 Touch or to scroll the nearby POI list and then touch the desired POI Touching one of the listed POIs enables you to view more detailed information about the POI 6 Touch OK If you touch OK the M...

Page 39: ...n the cursor on the desired area by scrolling the map and displaying the Map Confirmation Screen 2 Touch Save as on the Map Confir mation Screen 3 Touch Add POI The list of POI categories appears 4 Touch the desired category to which the location is to be assigned If there are more detailed categories within the selected category repeat this step as many times as necessary 5 Touch Add here when th...

Page 40: ...2 Touch Save as on the Map Confir mation Screen 3 Touch Add Favorite 4 Touch the desired entry Selecting an item that has already been stored allows you to overwrite it 5 Enter the desired name and then touch Done to complete the entry Storage has been completed and the item is available as a preset entry on Favorites Deleting an entry in Favorites All entries in Favorites can be deleted at once 1...

Page 41: ...h Route Function 2 Touch Route info The Route Information screen appears 1 3 4 5 6 7 8 2 1 Starting point 2 Current position 3 Waypoint 4 Destination 5 Time and distance up to the point currently shown The remaining distance and time as well as the estimated time of arrival are displayed 6 The route calculation method that is cur rently set Method For details refer to Route on page 83 7 Point curr...

Page 42: ...n screen appears 3 Touch Fly over The simulation will start p If you want to stop the simulation touch on the map Checking the entire route overview on the map You can check the entire outline of the current route 1 Touch Destination on the Top Menu and then touch Route Function 2 Touch Route info The Route Information screen appears 3 Touch Fit to Screen A 2D map screen will appear with the curre...

Page 43: ...e shown Road List Displays the turning points with the most simplified condition the duplicate route names are merged into one p When a long distance route is calculated your navigation system may not be able to list all roads In this case the remaining roads will be shown in the list as you drive on Checking the current route En 43 Chapter 05 Checking the current route ...

Page 44: ...3 Touch i or j to move the waypoint or destination Put them in the desired order Touching Optimize sorts the waypoints auto matically so that the route will compromise the least time and distance 4 Touch Done The route is recalculated and the map of the current position appears Deleting a waypoint You can delete waypoints from the route and then recalculate the route You can delete waypoints succe...

Page 45: ...ecause deleted data cannot be restored take extra care not to mistakenly delete item Deleting the current route If you no longer need to travel to your destina tion follow the steps below to delete the cur rent route and cancel the route guidance 1 Touch Destination on the Top Menu and then touch Delete Route A message confirming the cancellation of the current route appears 2 Touch Yes Editing wa...

Page 46: ...s reception limitations of Microsoft s Direct Band network Please visit http www msndirect com pioneer or current coverage area maps subscription details and other important information about MSN Direct Activating the service You have to activate MSN Direct first p A web connected computer is required for the online subscription p If you have difficulty for the online subscrip tion please call tol...

Page 47: ...the signal strength If the signal is weak move to another location where a stron ger signal can be received 3 Touch Status 4 Wait until the activation status changes to Active It may take approximately 20 or 30 minutes to complete the activation After activation is complete the information will be available on each menu Browsing gas prices Recent gas prices of nearby gas stations are displayed in ...

Page 48: ...rs can be displayed on a list Switching the screen allows you to see the movie title now showing This informations does not necessarily corre spond to actual information Utilize the infor mation for your reference It may take up to 6 hours for all the data to be come available under the following conditions When you use MSN Direct for the first time When you have not performed this function previo...

Page 49: ...lecting a theater 1 Touch Destination on the Top Menu and then touch MSN Direct 2 Touch Movie Times The nearby theaters are displayed 3 Touch the desired tab to change the sort order Available options Distance default Sorts the items in the list in order by dis tance from the vehicle position Name Sorts the items in the list alphabetically 4 Touch the desired theater The movie titles currently sho...

Page 50: ...mation is displayed Using traffic information You can view current traffic conditions and in formation When the navigation system re ceives updated traffic information it will overlay the traffic information on your map and also display detailed text information when available In the default setting the navigation system takes into account traffic information and tries to avoid traffic jam and sug...

Page 51: ...on the Top Menu and then touch MSN Direct 2 Touch Traffic and then touch Set tings The Traffic Settings screen appears Available options Recalculate to avoid traffic Enabled Calculates the new route with the traffic congestion taken into account when rerout ing Disabled Calculates the new route without the traffic congestion taken into account when rerout ing Sort events by Distance Sorts the traf...

Page 52: ...s also disconnected When the system restarts the system automatically attempts to re connect the previously connected cellular phone Even when the connection is sev ered for some reason the system automati cally reconnects the specified cellular phone except when the connection is sev ered due to cellular phone operations Displaying the Phone Menu Use the Phone Menu if you connect the cel lular ph...

Page 53: ...t find the cellular phone you want to connect check that the cellular phone is waiting for the Bluetooth wireless technology connection 6 Touch the cellular phone name you want to register A message promptings you to enter a PIN code appears 7 Enter the PIN code 1111 using the cel lular phone When a connection is successfully estab lished a connection complete message ap pears the screen returns t...

Page 54: ...lular phone by setting the navigation system to standby mode and re questing connection from the cellular phone 1 Activate the Bluetooth wireless tech nology on your cellular phone For some cellular phones no specific action is necessary to activate Bluetooth wireless tech nology For details refer to the instruction manual of your cellular phone 2 Touch Phone Settings on the Phone Menu For details...

Page 55: ...ct Connection starts When a connection is successfully estab lished a connection complete message ap pears the screen returns to the Phone Settings menu by touching OK p If another cellular phone is already con nected touch Disconnect next to the cel lular phone name to disconnect it and start connection p To cancel the connection to your cellular phone touch Cancel p If connection fails check to ...

Page 56: ...ouching p You can adjust volume when you are talk ing To adjust volume touch Vol and Vol displayed on the screen like below when you are talking 3 Touch to end the call The call ends p When there is an incoming call pressing MULTI CONTROL answers the call During the call pressing MULTI CONTROL gets you off the phone p If the voice on the other end of the call is too quiet to hear you can adjust th...

Page 57: ... to Displaying the Phone Menu on page 52 2 If you touch an entry on the list dialing starts p If you touch Detail you can check the de tails of the party before making a phone call p To cancel the call after the system starts dialing touch 3 Touch to end the call Making a phone call using the received call history The received call history saves 30 calls per re gistered cellular phone If the numbe...

Page 58: ...f selected alphabets Touching ABCDE also displays the page in cluding the entry whose names start with pri mary symbols or numbers Touching Others displays the page including entries that are not assigned to any of the other tabs 4 Touch the desired entry on the list to make a call 5 Touch to end the call Dialing a phone number on the Map Confirmation Screen You can make a call to the searched loc...

Page 59: ...e New mail from sender s name is dis played and the notice disappears after eight seconds p If you want to delete the message touch anywhere on the screen p If the voice language with TTS is currently used the audible message can be output For details refer to Selecting the lan guage on page 91 Transferring the phone book You can transfer the numbers in a registered user phone s address book into ...

Page 60: ...lu lar phone supports one by one transfer only send all the entries that you want to transfer before touching OK p If your phone has a capability for automatic transfer of phone book this screen is skipped and transfer will start p The transferred data can not be edited on the navigation system 5 When the completion message ap pears check the message and touch OK Transfer ends Clearing memory You ...

Page 61: ...luetooth wave transmission You can stop transmission of electric waves by turning off the Bluetooth function If you do not use the Bluetooth wireless technology we recommend selecting Off 1 Touch Phone Settings on the Phone Menu For details refer to Displaying the Phone Menu on page 52 2 Touch Off on Bluetooth On Off Touching Bluetooth On Off switching be tween On and Off Answering a call automati...

Page 62: ...ying the Phone Menu on page 52 2 Touch Echo Cancel Touching Echo Cancel switches between On and Off Setting the automatic connection When an automatic connection is active the navigation system will automatically establish a connection with a registered phone when it comes into range Using this feature will re lease you from all of the processes for estab lishing a connection p With some cellular ...

Page 63: ...tem and then perform the phone book transfer Making and receiving calls You may hear a noise in the following situa tions When you answer the phone by using the button on the phone When the person on the other end of line hangs up the phone If the person on the other end of the phone call cannot hear the conversation due to an echo decrease the volume level for hands free phoning This may reduce t...

Page 64: ...rectly Image data can not be transferred from the cellular phone Depending on the cellular phone phone book transfer may not be available Updating the Bluetooth wireless technology software Downloading the files of updating will be avail able in the future You will be able to download the latest update from appropriate website by using your PC p Before you download the files and install the update...

Page 65: ...formed in order of folder number Folders are skipped if they con tains no playable files If there are no play able files on folder 001 root folder playback starts from folder 002 Reading the screen p Optimum performance of this unit may not be obtained depending on the connected external storage device p You can playback the files on a USB sto rage device compliant with Mass Storage Class For deta...

Page 66: ... the files is displayed in stead Using the touch panel keys Music 1 Recalls equalizer curves Select one from the 11 equalizer curves p This function is also effective for beep sounds 2 Displaying the Function menu For details refer to Using the Function menu on the next page 3 Switch the operation screen Touching the key switches between the screen to operate music files and the screen to oper ate...

Page 67: ...e Name file name Artist Name artist name p If the information has not been recorded on files nothing may be displayed p For WAV files only the information marked with can be displayed p If the characters recorded on the com pressed audio file are not compatible with this navigation system those characters may turn into garbled characters Using the Function menu 1 Touch USB or SD on the AV Source m...

Page 68: ... play is performed in the current repeat play range Touching Scan switches between On and Off When you find the desired track touch Scan to turn scan play off p After all tracks or folders scanning are finished normal playback will begin again p If you turn Scan to On while the re peat play range is set to Track the re peat play range changes to Folder automatically Playing the music file USB SD E...

Page 69: ...to Inserting and ejecting an SD memory card on page 12 p If the external storage device is already set touch USB or SD on the AV Source menu p Playback is performed in order of folder number Folders are skipped if they con tains no playable files If there are no play able files on folder 001 root folder playback starts from folder 002 Reading the screen 1 3 6 5 4 2 p Optimum performance of this un...

Page 70: ...will skip to the previous file Fast rewind or forward Keep touching o or p to perform fast rewind or forward p There is no sound on fast rewind or for ward p Moving MULTI CONTROL left or right enables you to perform the equivalent operations 6 Playback and Pause Touching f switches between playback and pause 7 Displaying the map screen 8 Specify the chapter you want to play back or the time to sta...

Page 71: ...ng operations refer to Screen switching overview on page 16 2 Touch the screen to display the touch panel keys 3 Touch Func p If the touch panel keys are not shown touching anywhere to display them 1 1 Repeating play Each touch of Repeat changes the set tings as follows Media Repeat all video files in the se lected external storage device USB SD File Repeat just the current file Folder Repeat the ...

Page 72: ...tor Appears when the shuffle play is activated 3 Repeat play indicator Appears when the repeat play is activated All tracks repeat One track repeat 4 Album artwork Album art of the current song is displayed if it is available 5 Song title episode indicator Shows the title of the current song When the podcast is played the episode is displayed 6 Artist name podcast title indicator Shows the artist ...

Page 73: ...he song using the category tabs to play touching the key displays the previous list 6 Skip back or forward to another song Touching p skips to the start of the next song Touching o once skips to the start of the current song Touching again will skip to the previous song When the track with chapters played chapter can be skipped back and forward Fast rewind or forward Keep touching o or p to perfor...

Page 74: ...re viously selected Searching for applicable items by alphabet Using the search control displays the page in cludes the first applicable option p This function is available for the alphabeti cal list only Search control 1 Touch your desired category tab to dis play the list 2 Touch the item that you want to refine 3 Touch c or d to select the character p THE or The and space at the beginning of th...

Page 75: ...select the video from the list to play after touching Top Menu touching the key displays the previous list If you touch Top Menu again but do not select a video this key is disabled until you select a video with the list next time 4 Skip back or forward to another song Touching p skips to the start of the next video Touching o once skips to the start of the current video Touching again will skip t...

Page 76: ...ch the item that you want to refine 3 Touch c or d to select the character p THE or The and space at the beginning of the artist name will be ignored and the next character will be taken into account for searching 4 Touch the character key to display the page includes applicable options 5 On the video list touch the video you want to play Using the Function menu 1 Touch iPod on the AV Source menu ...

Page 77: ...wer than normal speed Faster Playback faster than normal speed 4 Playback the video on the wide screen mode If the video is compatible with wide screen format set Widescreen to On in order to view the video image in the wide screen Each touch of Widescreen changes the settings as follows On Outputs the wide screen video from iPod Off Outputs the normal sized video from iPod p Display size is chang...

Page 78: ...V cable sold separately to AV input jack 2 Touch AV Input on the AV Settings menu For details refer to Setting video input AV on page 95 3 Touch AV on the AV Source menu The image is displayed on the screen For details concerning operations refer to Screen switching overview on page 16 Using the touch panel keys Touch the screen to display the touch panel keys 1 Hides the touch panel keys Touching...

Page 79: ...desired op tion to change the settings 2 3 1 1 Slider Touching the desired point on the bar or dragging the slider to the desired point al lows you to change the value 2 Detailed setup key Displays the screen for setting the prefer ences in detail 3 On off control Touching On or Off enables activation or deactivation of this function 5 Touch to return to the Navi Set tings menu GPS Time Settings I...

Page 80: ...e Time Settings screen provides you to set the time manually 1 Touch GPS Time Settings on the Navi Settings menu The GPS Status screen appears 2 Touch Time Settings The Time Settings screen appears Available options Auto Correction Synchronizes the internal clock of this navi gation system with the accurate time trans mitted from GPS GMT Changing this preference allows you to set the time manu all...

Page 81: ...l on the Navi Settings menu The Visual Settings screen appears 2 Touch Map Settings The Map Settings screen appears Available options Map color Enables you to define the map color for day time and nighttime use Touch this key to show the next screen Daylight color profile The daytime map color can be set Touch the key and select the desired profile from the list Night color profile The nighttime m...

Page 82: ...field is described here along with an operational ex ample 1 Touch Visual on the Navi Settings menu The Visual Settings screen appears 2 Touch Displayed Info The Displayed Info screen appears 3 Touch the key on the right of Top field to display the options 4 Touch your desired option Smart Zoom Enables the navigation system to zoom in automatically when you approach a guidance point and zoom out a...

Page 83: ... Navi Settings menu The Visual Settings screen appears 2 Touch On or Off to activate or deacti vate Overview Mode Touching allows you to enter the detailed setting screen only when On has been se lected Available options Route event distance for Overview mode Allows you to set a distance to activate Overview Mode The map starts zoom ing out when the distance to the next gui dance point is further ...

Page 84: ... Activates or deactivates map matching p This selection is available only when Pedestrian is selected on Vehicle Warn in pedestrian mode Activates or deactivates an over speed warning for the pedestrian Unpaved Roads On Calculates a route without avoidance of un paved roads Off Calculates a route with avoidance of un paved roads to the extent possible Highways On Calculates a route without avoidan...

Page 85: ...and date can be customized Touch Regional Settings on the Navi Settings menu The Regional Settings screen appears Available options Distance Units Controls the unit of distance and speed shown Coordinate display format Controls the format of latitude and longi tude shown Date format Controls the format of date shown Date delimiter Controls the delimiter format for the date shown Time format Contro...

Page 86: ...eep tone volume Dynamic Volume Increases and decreases the master vo lume of the navigation guidance and beep automatically according to the current speed This function is very helpful when you are driving at high speed and there is too much noisy to hear the guidance in structions and beep Touching allows you to enter the de tailed setting screen only when On has been selected Minimum speed Enabl...

Page 87: ...e desired key to customize it Available options POI Icon Visibility Distance Touching the key shows the option Touch one of them to set the desired visibility When Satellite is selected the POI icons will appear even though they are far away from your current position When Close is selected only the nearest POI icons will ap pear Selecting Off hides the POI icons of this category Same Visibility i...

Page 88: ...you want to create a new category 5 Enter the category name and touch Done to complete the entry Editing your customized POI If you have already stored the customized POI you can edit the POI property p If the custom POI is found on an external storage device USB SD the navigation system will show a POI list which includes them 1 Touch Visual on the Navi Settings menu The Visual Settings screen ap...

Page 89: ...g only for that trip 1 Touch Visual on the Navi Settings menu The Visual Settings screen appears 2 Touch Manage Track Logs A list of track logs already recorded appears A blank list appears if you have not recorded it yet 3 Touch Record to activate the track log ger The key then changes to Stop Recording Touching Stop Recording allows you to de activate the track logger p If there is not enough sp...

Page 90: ...ngs screen appears 2 Touch Manage Track Logs 3 Touch Track Log Options 4 Touch the desired key to operate it Available options Update interval Sets how often the system updates the log Current autosave track size Sets a size limit on automatic logging This setting will be effective only when Enable Auto saving is On Enable Auto saving Sets whether the automatic logging is acti vated or not Limit T...

Page 91: ...System Settings The System Settings menu appears Selecting the language You can set the languages used on the pro gram and voice guidance Each language can be set separately p If you use voice operation select English in Program language of Language If you select other languages voice operation will not be available For details refer to Basics of Voice Oper ation on page 98 1 Touch Language on the...

Page 92: ...n the top most directory of the external storage device USB SD and store the picture files in this folder 2 Insert the SD memory card into the SD card slot or plug the USB storage device to the USB connector 3 Touch Splash Screen on the System Settings menu For details refer to Displaying the System Settings menu on the previous page The navigation system checks the external sto rage device USB SD...

Page 93: ...hift lever is in the REVERSE R position GND When the polarity of the connected lead is negative while the shift lever is in the REVERSE R position Adjusting the response positions of the touch panels touch panel calibration If you feel that the touch panel keys on the screen deviate from the actual positions that respond to your touch adjust the response po sitions of the touch panel screen p For ...

Page 94: ...er Management on the System Settings menu For details refer to Displaying the System Settings menu on page 91 2 Touch the desired key to change the setting Available options Auto Power Off Enables you to set the automatic suspend of the system Never Deactivates the automatic suspend func tion 10 min Suspends the system automatically if you do nothing for 10 minutes Backlight Timeout Enables you to...

Page 95: ...the backlight of the LCD screen you can turn off the screen display without turning off the voice guidance Touch Screen Off on the System Set tings menu For details refer to Displaying the System Settings menu on page 91 The screen is turned off p To turn on the screen touch anywhere on the screen The options on the AV Settings menu Displaying the AV Settings menu 1 Press MENU button to display th...

Page 96: ...imultaneously Changing the wide screen mode Touch Wide Mode on the AV Set tings menu For details refer to Displaying the AV Set tings menu on the previous page Each touch of Wide Mode changes the set tings as follows Full Normal Full full A 4 3 picture is enlarged in the horizontal di rection only enabling you to enjoy a 4 3 TV pic ture normal picture without any omissions Normal normal A 4 3 pict...

Page 97: ...rmation for voice commands with the data on iPod p After you select Off in VR Catalog Mode the system doesn t catalog the data on the iPod In such case the pre viously cataloged data are available as voice commands p Once you start the cataloging process only a few basic voice commands can be used for iPod until the process has completely finished p If unreadable characters are included in the dat...

Page 98: ...om mands the system accepts Flow of voice operation You can start voice operation any time even when the map screen is displayed or audio is operating Some operations are not available The basic steps of voice operations are as follows 1 Switch the screen to map screen or AV operation screen For details concerning operations refer to Screen switching overview on page 16 2 Press MULTI CONTROL to ac...

Page 99: ...r details refer to Acquiring Cataloging iPod music information on page 97 Examples of voice operation of the iPod are shown below A method for playing the album title named Pioneer is described here along with an operational example 1 Press MULTI CONTROL to start voice op eration 2 Say Change Source to display the AV source selection screen 3 Say iPod on the selection screen to switch the AV sourc...

Page 100: ...lbums d Start playback from the top of Albums Play the album Album name d Start playback from the top of the selected album Play playlists d Start playback from the top of Playlists Play the playlist Playlist name d Start playback from the top of the selected playlist Play genres d Start playback from the top of Genres Play the genre Genre name d Start playback from the top of the selected genre S...

Page 101: ... desired item on the list or say the desired voice commands Page down Page up d Displays the previous or next page of the selection list Note 1 Note 1 The voice commands is available only when the selection list is displayed Voice operation for AV source other than iPod AV source selection Voice commands and operations Change Source to SD Media d Switch the AV source to SD Change Source to USB d S...

Page 102: ...to call d The system starts dialing to the num ber Note2 List outgoing calls d Display the list of recent outgoing calls Dialed Numbers to select the number and call List recent calls d Incoming calls Note 4 d Display the list of recently received calls Received Calls to select the number and call List recent calls d Outgoing calls Note 4 d Display the list of recent outgoing calls Dialed Numbers ...

Page 103: ...oise from outside the vehicle can interfere with voice operation Keep a proper distance from the microphone For optimum pick up don t speak commands extremely close to the microphone Pause before giving a command Speaking too soon may cause the recognition to fail Pronounce your commands carefully Speak slowly deliberately and clearly Operating Your Navigation System with Voice En 103 Chapter 14 O...

Page 104: ... each method see the list presented later Method 1 Remove the battery pack 1 Move the battery lock knob to unlock position and slide the cover 2 Detach the battery pack 3 Attach the battery pack and close the cover 4 Move the battery lock knob to lock position This transforms the system into the same state as when the battery is completely run out Method 2 Restore Factory Settings Clears some item...

Page 105: ...st status of AV operation screen etc The setting will be retained 1 The setting will be cleared and returned to the default or factory settings Navigation functions Method 1 Method 2 Destination Menu All settings on MSN Direct 1 Navi Settings Sound settings Master Sound settings Voice Keys Dynamic Volume 1 Other settings 1 System Settings Language 1 Other settings Audio functions Method 1 Method 2...

Page 106: ...le lo cation Obstacles are blocking signals from the satellites The position of satellites relative to your vehicle is inadequate Signals from the GPS satellites have been modified to reduce accu racy GPS satellites are operated by the US Department of Defense and the US government reserves the right to distort positioning data for military reasons This may lead to greater positioning errors If a ...

Page 107: ... and apply the parking brake The parking brake is not applied Connect the parking brake cord and apply the parking brake The backlight of the LCD panel is turned off Turn on the backlight Page 95 Nothing is displayed and the touch panel keys cannot be used The setting for the rear view camera is incorrect Select the appropriate setting for the rear view camera The shift lever was placed in R when ...

Page 108: ... navi gation system Update the software version of iPod Songs on iPod connected with this system cannot be available as voice commands or different song or title from the one that you said is recognized iPod content data has been up dated but the data on this system s memory has not been updated yet i e system has not cataloged new iPod content or cataloging was not completed If you update the iPo...

Page 109: ...target phone s Bluetooth wire less technology The cellular phone is paired con nected with another device Cancel the pairing connection and retry Rejection has been received from the cellular phone Operate the target phone and accept the con nection request from the navigation system Furthermore check the connection settings on your cellular phone The target cellular phone can not be found Check w...

Page 110: ...d Connected iPod is not sup ported Please check instruc tion manual The iPod is not compatible with this navigation system Use an iPod with a compatible version iPod connection failed Please reconnect Communication failure Disconnect the cable from iPod Once iPod main menu is displayed connect the cable again If the message appears frequently consult your dealer Updating VR dictionary Please wait ...

Page 111: ...ut if signal quality is poor only two dimen sions latitude and longitude can be obtained and positioning errors are somewhat greater Map matching As mentioned the positioning systems used by this navigation system are susceptible to certain errors Their calculations may on occa sion place you in a location on the map where no road exists In this situation the processing system understands that veh...

Page 112: ...ax because this may block the reception of GPS signals p If a GPS signal have not been received for a long time your vehicle s actual position and the current position mark on the map may diverge considerably or may not be up dated In such case once GPS reception is restored accuracy will be recovered Conditions likely to cause noticeable positioning errors For various reasons such as the state of...

Page 113: ... many height changes If you enter or exit a multi storey parking lot or similar structure using a spiral ramp If your vehicle is turned on a turntable or si milar structure If your vehicle s wheels spin such as on a gravel road or in snow If you put on chains or change your tires for ones with a different size If trees or other obstacles block the GPS signals for a considerable period Appendix En ...

Page 114: ...ets or traffic regulations into account It is not necessarily an optimum route In some cases you may not be able to set the streets you want to pass If you need to pass a certain street set the waypoint on that street If the destination is too far there may be in stances where the route cannot be set If you want to set a long distance route going across several areas set waypoints along the way Du...

Page 115: ... other dangers Bad weather condition Police ahead Detailed information for playable media Compatibility Common notes about the external storage device USB SD Depending on the kind of the external sto rage device USB SD you use this naviga tion system may not recognize the storage device or files may not be played back prop erly Do not leave the external storage device USB SD in any location with h...

Page 116: ...starting playback of audio files encoded with image data Depending on the USB storage devices connected to this navigation system noise may be generate on the radio Do not connect anything other than the USB portable audio player USB memory device The sequence of audio files on USB mem ory For USB portable audio players the sequence is different from that of USB memory device and depends on the pl...

Page 117: ...0 kbps CBR VBR Sampling frequency 16 kHz to 48 kHz ID3 tag ID3 Tag Ver 1 0 1 1 2 3 Notes Ver 2 x of ID3 Tag is given priority when both Ver 1 x and Ver 2 x exist There is no compatibility with the followings MP3i MP3 interactive mp3 PRO m3u playlist WMA compatibility Media USB storage device SD memory card File extension wma Bit rate Ver 9 5 kbps to 320 kbps CBR VBR Ver 7 or 8 128 kbps to 192 kbps...

Page 118: ...y Media USB storage device SD memory card File extension m4a Bit rate 8 kbps to 320 kbps CBR Sampling frequency 8 kHz to 44 1 kHz Notes The navigation system plays back AAC files encoded by iTunes There is no compatibility with the followings Apple Lossless files encoded with VBR AVI compatibility Media USB storage device SD memory card File extension avi Compatible video codec MPEG 4 Compatible a...

Page 119: ...g the font size to smal ler However the maximum number of the characters that you can display varies ac cording to the width of each character or display area Folder selection sequence or other opera tion may be altered depending on the en coding or writing software Regardless of the length of blank section between the songs of original recording compressed audio discs play with a short pause betw...

Page 120: ... technol ogy that is developed by Microsoft Corporation WMA data can be encoded by using Windows Media Player version 7 or later Windows Media and the Windows logo are trademarks or registered trademarks of Microsoft Corporation in the United States and or other countries About AAC AAC is short for Advanced Audio Coding and refers to an audio compression technology standard used with MPEG 2 and MP...

Page 121: ...ter may break the LCD screen and cool air from the cooler may cause moist ure to form inside the navigation unit re sulting in possible damage Small black dots or white dots bright dots may appear on the LCD screen These are due to the characteristics of the LCD screen and do not indicate a problem with the LCD screen The LCD screen will be difficult to see if it is exposed to direct sunlight When...

Page 122: ...Saved Routes 33 Route Function Route info 41 Itinerary 42 Edit Route 44 Save Route 44 Coordinate 31 MSN Direct 46 Phone Menu Page Dial Pad 57 Call Home 58 Phone Volume 61 Phone Book Transfer 59 Received Calls 57 Dialed Numbers 57 Missed Calls 57 Phone Settings Connection 55 Bluetooth On Off 61 Auto Answer Preference 61 Refuse All Calls 62 Echo Cancel 62 Auto Connect 62 Edit Name 62 Clear Memory 60...

Page 123: ... Manage Track Logs 89 Route 83 Method 84 Vehicle 84 U turn penalty 84 Keep Position On Road 84 Warn in pedestrian mode 84 Unpaved Roads 84 Highways 84 Ferries 84 U turns 84 Permit Needed 84 Toll Roads 84 Warnings 85 Warn When Speeding 85 Regional Settings 85 Restore Factory Settings 85 Set Home 90 Demo Mode 86 Sound settings 86 About 86 Appendix En 123 Appendix Appendix ...

Page 124: ...Camera 92 Screen Calibration 93 Picture Adjustment 94 Power Management 94 Battery Status 94 Service Information 95 Screen Off 95 AV Settings menu Page AV Input 95 MUTE Input GUIDE 96 Wide Mode 96 Audio Out Selection 96 VR Catalog Mode 97 Appendix En 124 Appendix ...

Page 125: ...ortcut menu Map Confirmation Screen Page Map 34 Save as 37 Add Pin 38 Add POI 39 Add Favorite 40 Route 36 Go Here Now 37 Add Via 37 Continue 37 Starting Point 37 Info 38 Appendix En 125 Appendix Appendix ...

Page 126: ...n as a route has been set Guidance point These are important landmarks along your route generally intersections The next gui dance point along your route is indicated on the map by the yellow flag icon Home location Your registered home location ID3 tag This is a method of embedding track related information in a MP3 file This embedded in formation can include the track title the ar tist s name th...

Page 127: ...ed course is called track log It is handy when you want to check a route traveled or if returning along a complex route VBR VBR is short for variable bit rate Generally speaking CBR constant bit rate is more widely used But by flexibly adjusting the bit rate according to the needs of audio compres sion it is possible to achieve compression priority sound quality Voice guidance The giving of direct...

Page 128: ...4 000 800 480 Display method TFT Active matrix driving Color system NTSC compatible Audio Preout output level max 0 5 V Preout impedance 1 kohm Headphone Output level max 0 2 V Load impedance 16 W Vehicle power charger Rated power source 14 4 V DC allowable voltage range 10 8 V to 15 1 V DC Grounding system Negative type Max current consumption 3 0 A USB USB standard spec USB 2 0 High Speed Max cu...

Page 129: ...USTRALIA PTY LTD 178 184 Boundary Road Braeside Victoria 3195 Australia TEL 03 9586 6300 PIONEER ELECTRONICS OF CANADA INC 300 Allstate Parkway Markham Ontario L3R 0P2 Canada TEL 1 877 283 5901 TEL 905 479 4411 PIONEER ELECTRONICS DE MEXICO S A de C V Blvd Manuel Avila Camacho 138 10 piso Col Lomas de Chapultepec Mexico D F 11000 TEL 55 9178 4270 先鋒股份有限公司 總公司 台北市中山北路二段44號13樓 電話 02 2521 3588 先鋒電子 香...

Reviews: