background image

35

En

En
g

lis

h

NOTE

Android Auto will launch automatically only when an Android Auto compatible device is correctly 
connected to this product.

1

Press .

2

Touch  

then .

3

Touch [Smartphone-related Settings].

4

Touch [Android Auto Auto-launch] to switch [On] or [Off].

 CAUTION

For safety reasons, video images cannot be viewed while your vehicle is in motion. To view video 
images, stop in a safe place and apply the handbrake.

NOTE

A High Speed HDMI® Cable (sold separately) is required for connection. For details, refer to Using an 
HDMI input (page 57)
.

1

Press 

 then touch 

.

2

Touch [HDMI].

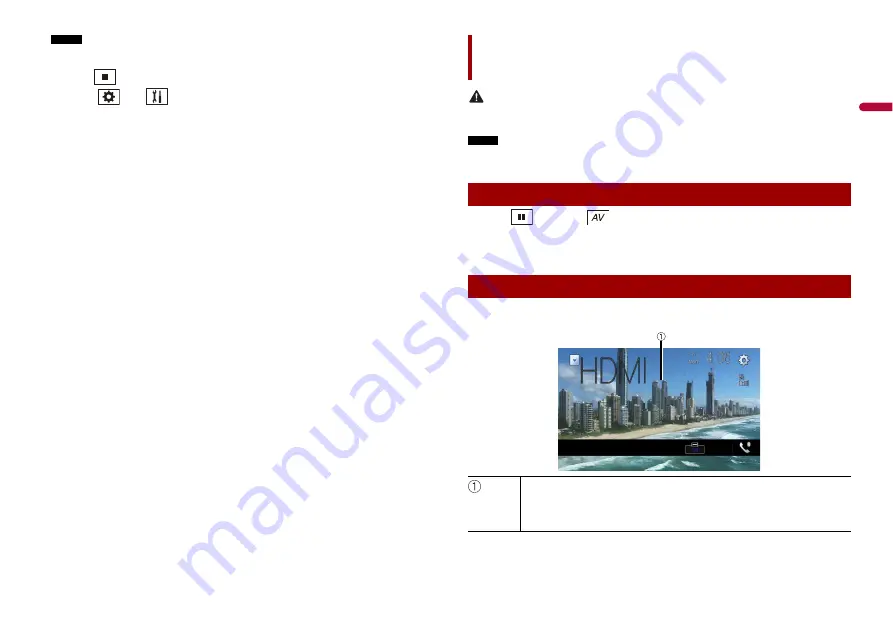
The HDMI source screen appears.

HDMI source screen

HDMI

Starting procedure

Basic operation

Hides the touch panel keys.

To display the keys again, touch anywhere on the screen.

TIP

You can set the screen size for the video image (page 50).

Summary of Contents for AVH-Z9190BT

Page 1: ...English AVH Z9190BT MONITOR RDS AV RECEIVER Owner s Manual ...

Page 2: ...unction improvements Basic operation 28 AppRadio Mode 30 Using AppRadio Mode 30 Starting procedure 30 Using the keyboard for iPhone users 31 Using the audio mix function 31 Apple CarPlay 32 Using Apple CarPlay 32 Setting the driving position 32 Starting procedure 32 Adjusting the volume 33 Android Auto 33 Using Android Auto 33 Setting the driving position 33 Starting procedure 34 Adjusting the vol...

Page 3: ...lt Also damage to the product smoke and overheating could result from contact with liquids If liquid or foreign matter should get inside this product park your vehicle in a safe place turn the ignition switch off ACC OFF immediately and consult your dealer or the nearest authorised Pioneer Service Station Do not use this product in this condition because doing so may result in a fire electric shoc...

Page 4: ... THIS LEAD MAY VIOLATE APPLICABLE LAW AND MAY RESULT IN SERIOUS INJURY OR DAMAGE Do not take any steps to tamper with or disable the handbrake interlock system which is in place for your protection Tampering with or disabling the handbrake interlock system could result in serious injury or death To avoid the risk of damage and injury and the potential violation of applicable laws this product is n...

Page 5: ...ble software updates Do not expose the LCD screen to direct sunlight when this product is not used This may result in LCD screen malfunction due to the resulting high temperatures When using a mobile phone keep the aerial of the mobile phone away from the LCD screen to prevent disruption of the video in the form of spots coloured stripes etc To protect the LCD screen from damage be sure to touch t...

Page 6: ...fer to Inserting and ejecting an SD memory card page 24 Auto EQ microphone input jack Use to connect a microphone for acoustical measurement Disc loading slot Refer to Inserting and ejecting a disc page 21 Remote Control VOLUME REAR SRC Press to cycle through all the available rear sources Press and hold to turn the rear source off SRC Press to cycle through all the available sources Press and hol...

Page 7: ...N Do not open or close the LCD panel forcefully It may cause a malfunction Do not operate this product until the LCD panel has completely opened or closed If this product is operated while the LCD panel is opening or closing the LCD panel may stop at that angle for safety Do not place glass or can on the open LCD panel 1 Press 2 Touch or to adjust the angle of the LCD panel 3 Touch Returns to the ...

Page 8: ...e remote control Using the remote control How to replace the battery Insert the CR2025 3 V battery with the plus and minus poles orientated properly Important Do not store the remote control in high temperatures or direct sunlight Do not let the remote control fall onto the floor where it may become jammed under the brake or accelerator 1 Start the engine to boot up the system The Select Program L...

Page 9: ...u stop your vehicle in a safe place and apply the handbrake Appears when items cannot be displayed on a single page Drag the side bar the initial search bar or the list to view any hidden items 1 Press The menu bar pops up on the screen NOTE The menu bar availability may vary depending on the activating source 1 Touch Operating the time bar You can change the playback point by dragging the key The...

Page 10: ...al and lower case letters Top menu screen Favourite source icons TIPS When you connect the external navigation system to this unit the navigation mode key is displayed at the middle of the right side of the display If you select Power OFF you can turn off almost all functions The Power OFF mode is released in the following cases An incoming call is received only for hands free phoning via Bluetoot...

Page 11: ...luetooth function on the device 2 Press 3 Touch then The Bluetooth screen appears 4 Touch Connection 5 Touch The unit starts to search for available devices then displays them in the device list 6 Touch the Bluetooth device name After the device is successfully registered a Bluetooth connection is established by the system Once the connection is established the device name is displayed on the list...

Page 12: ...ge the PIN code for Bluetooth connection The default PIN code is 0000 1 Touch 0 to 9 to input the pin code up to 8 digits 2 Touch Device Information Displaying the device name and address of this product Bluetooth Memory Clear Touch Clear then OK to clear the Bluetooth memory Hands free phoning Making a phone call To end the call 1 Touch The following items are displayed Name of the current mobile...

Page 13: ...hone or smartphone NOTES When an iPhone running iOS 6 1 or higher is used Siri Eyes Free Mode is available with this product For using this function with a smartphone the device must be compatible with Android Auto For using the voice recognition function with a smartphone launch Android Auto beforehand 1 Press 2 Touch 3 Touch The voice recognition function launches and the voice control screen ap...

Page 14: ... press the accept button on the mobile phone when a call comes in hands free phoning may not be performed Setting the private mode Adjusting the other party s listening volume Notes for hands free phoning The registered name will appear if the phone number is already registered in the phone book When the same phone number is registered under different names only the phone number will be displayed ...

Page 15: ...ou can also skip files forwards or backwards By pressing then touch and hold or you can also perform fast reverse or fast forwards Selects a file or folder from the list to playback NOTE This function is available only when the AVRCP version of the Bluetooth device is 1 4 or higher Switches among the Bluetooth devices when the devices are connected to this product via Bluetooth Bluetooth audio pla...

Page 16: ...Wi Fi settings Menu Item Description Wi Fi ON OFF Switches Wi Fi connection on or off Device Information Displays the network name and MAC address of this product Before using the Wi Fi audio player connect the device to this product via Apple CarPlay page 32 or Android Auto wirelessly page 34 1 Press then touch 2 Touch Wi Fi Audio The Wi Fi audio playback screen appears NOTES Wi Fi Audio is displ...

Page 17: ...ource icon When you select Source OFF the AV source is turned off 1 Press then touch the AV operation key 2 Touch 3 Touch the source key When you select Source OFF the AV source is turned off NOTE This function is available only when you stop your vehicle in a safe place and apply the handbrake 1 Press then touch 2 Touch and hold the source icon and drag the icon to the desired position 1 Press th...

Page 18: ...ion of iPod iPhone or the version of smartphone OS it may not be compatible with this unit The setting may not be operable right after it is changed This setting is available only when a hands free telephone is not used The setting will change after the following processes are automatically executed The source is turned off AppRadio Mode Apple CarPlay or Android Auto is exited The smartphone conne...

Page 19: ...io Mode to use AppRadio Mode The available function icons are displayed 7 Touch OK Smartphone Android device 1 Press then touch 2 Touch Radio The Radio screen appears Radio screen Radio Starting procedure Basic operation Recalls the preset channel stored to a key from memory Stores the current broadcast frequency to a key Displays the preset channel list Select an item on the list 1 to 6 to switch...

Page 20: ...oadcast frequencies BSM To cancel the storage process 1 Press 2 Touch then The system setting screen appears 3 Touch AV Source Settings 4 Touch Radio Settings The menu items vary according to the source Radio settings Menu Item Description Local Off FM Level1 Level2 Level3 Level4 AM Level1 Level2 Local seek tuning allows you to only tune into radio stations with sufficiently strong signals NOTE Th...

Page 21: ...oading slot 1 Press 2 Touch to open the LCD panel 3 Insert a disc into the disc loading slot The source changes and then playback will start NOTE If the disc is already set select Disc as the playing source 1 Press 2 Touch to open the LCD panel 3 Remove the disc and press TIPS By pressing then touch or you can also skip files chapters forwards or backwards By pressing then touch and hold or you ca...

Page 22: ...o images stop in a safe place and apply the handbrake Video source screen 1 Video source Hides the touch panel keys To display the keys again touch anywhere on the screen Performs fast reverse or fast forwards Touch again to change the playback speed Stops playback Performs frame by frame playback Performs slow motion playback Each time you touch it changes the speed in four steps in the following...

Page 23: ...gle Multi angle This function is available for DVDs featuring multi angle recordings Sets a repeat play for all files the current chapter the current title Displays the DVD menu keypad If items on the DVD menu appear the touch panel keys may overlay them If so select an item using these touch panel keys Touch or to select the menu item then touch NOTE The way to display the menu differs depending ...

Page 24: ... and then playback will start NOTE If the disc is already set select Disc as the playing source 1 Press 2 Touch to open the LCD panel 3 Remove the disc and press 1 Press Compressed files Inserting and ejecting media Inserting a disc Ejecting a disc Inserting an SD memory card 2 Touch to open the LCD panel 3 Insert an SD memory card into the SD card slot 4 Press NOTES This system is not compatible ...

Page 25: ...you can also perform fast reverse or fast forwards You can set the screen size for the video and image files page 50 Unplugging a USB storage device Starting procedure For Disc For USB SD Basic operation Audio source screen 1 Example USB Audio source Displays the link search screen Touch the song to play back followed by touching the song information after switching to Music Browse mode page 26 TI...

Page 26: ...older or the next folder Sets a repeat play range for all files the current folder the current file Plays files or does not play in random order TIP Once the database is created in the USB storage there is no need to create the database again as long as the same contents are saved To enter the Music Browse mode directly touch and then touch Tag before selecting the song CAUTION For safety reasons ...

Page 27: ...ching it Skips files forwards or backwards Performs fast reverse or fast forwards Still image source Hides the touch panel keys To display the keys again touch anywhere on the screen Switches between playback and pause Switches the following media file types Music Compressed audio files Video Compressed video files Photo Image files Skips files forwards or backwards Selects the previous folder or ...

Page 28: ...e playing Apple Music Radio iPod Connecting your iPod Basic operation Audio source screen 1 Audio source Displays the link search screen Select a song from the list related to the song currently playing TIP If you touch the artwork the list of songs in the album is displayed NOTE This function is not available while playing Apple Music Radio Switches between playback and pause Skips files forwards...

Page 29: ...ast Slow NOTE The audiobook speed icon may not change depending on the connected iPod iPhone Sets a repeat play range for all in the selected list the current song Plays songs within the selected list album randomly Apple Music Radio source Apple Music Radio screen Switches between playback and pause Displays the pop up menu for Apple Music Radio Touch Play More Like This to play back songs simila...

Page 30: ...ntent and functionality of compatible applications are the responsibility of the App providers In AppRadio Mode usage is limited while driving with availability of functions and content determined by the App providers AppRadio Mode allows access to applications other than those listed subject to limitations while driving PIONEER IS NOT RESPONSIBLE AND DISCLAIMS LIABILITY FOR THIRD PARTY NON PIONEE...

Page 31: ...rd language page 41 For smartphone Android users Using the keyboard for iPhone users You can output the audio mixing AV source and an application for iPhone or smartphone when AppRadio Mode is used NOTE Depending on the application or AV source this function may not be available 1 Start up the AppRadio Mode 2 Press VOL The audio mix menu will be displayed on the screen NOTES The audio mix menu is ...

Page 32: ...OUT LIMITATION ANY INACCURACIES OR INCOMPLETE INFORMATION To achieve optimum usability of Apple CarPlay set the driving position setting correctly according to the vehicle The setting will be applied the next time an Apple CarPlay compatible device is connected to this product 1 Press 2 Touch then The system setting screen appears Apple CarPlay Using Apple CarPlay Setting the driving position 3 To...

Page 33: ...the main sound volume press VOL on the unit You can operate Android applications with finger gestures such as tapping dragging scrolling or flicking on the screen of this product Compatible Android devices For details about compatibility of Android models refer to the following website https support google com androidauto NOTE The compatible finger gestures vary depending on the application for th...

Page 34: ... the screen The unit configures the connection then start the application TIP You can use voice recognition function by pressing once Android Auto is activated NOTES For details on USB connection refer to Connecting via the USB port page 56 If twenty devices are already paired the message confirming whether to delete the registered device is displayed If you want to delete the device touch Agree I...

Page 35: ...not be viewed while your vehicle is in motion To view video images stop in a safe place and apply the handbrake NOTE A High Speed HDMI Cable sold separately is required for connection For details refer to Using an HDMI input page 57 1 Press then touch 2 Touch HDMI The HDMI source screen appears HDMI source screen HDMI Starting procedure Basic operation Hides the touch panel keys To display the key...

Page 36: ...for connection For details refer to Using an AUX input page 57 You can set the screen size for the video image page 50 1 Press 2 Touch then 3 Touch Input Output Settings 4 Confirm that AUX Input is turned on 5 Press then touch 6 Touch AUX The AUX screen appears AUX Starting procedure AUX screen Basic operation Hides the touch panel keys To display the keys again touch anywhere on the screen TIP Yo...

Page 37: ...place and apply the handbrake 1 Press 2 Touch then 3 Touch Input Output Settings 4 Touch AV Input 5 Touch Source for AV source or Camera for camera 6 Press then touch 7 Touch AV for AV source or Camera View for camera The image is displayed on the screen NOTE If Source is selected 2nd Camera Input is automatically set to Off page 40 AV input Starting procedure AV source screen Basic operation Hide...

Page 38: ... is configured then the instruction message appears on the display NOTES When Apple CarPlay or Android Auto with wireless connection is activated the connection swtiching confirmation screen appears Touch Yes to proceed to Wireless Mirroring When the Wi Fi connection is set to OFF the connection confirmation screen appears Touch Start to make the connection 7 Make a Wireless Mirroring connection o...

Page 39: ...EVERSE R position Camera View mode also allows you to check what is behind you while driving Camera for Camera View mode Camera View can be displayed at all times Note that with this setting the camera image is not resized to fit and that a portion of what is seen by the camera is not viewable To display the camera image touch Camera View on the AV source selection screen page 17 NOTES To set the ...

Page 40: ...Gear Setting Setting the polarity of the rear view camera Battery The polarity of the connected lead is positive Ground The polarity of the connected lead is negative NOTE If the camera polarity setting is wrong or wrong camera setting is made press and hold to release the rear view camera screen and then change the camera polarity setting to Battery Parking Assist Guide On Off You can set whether...

Page 41: ...del when With Adapter mode is engaged otherwise select W o Adapter Restore Settings NOTE This setting is available only when you stop your vehicle in a safe place and apply the handbrake Menu Item Description All Settings Almost all settings or recorded content returns to the default Audio Settings Restore to default Audio settings NOTE This setting is available when the source is turned off Theme...

Page 42: ...the dimmer available time is 24 hours NOTE The time display of the dimmer duration adjusting bar depends on the clock display setting page 50 Picture Adjustment Menu Item Description Brightness 24 to 24 Adjust the black intensity Contrast 24 to 24 Adjust the contrast Colour 24 to 24 Adjust the colour saturation Menu Item Description With some pictures you cannot adjust Hue and Colour NOTES The adj...

Page 43: ...he installation position or angle NOTE If you touch Reset Distance all learned results stored in Distance are cleared Menu Item Description CAUTION Do not turn off the engine while importing an image from the external storage device The menu items vary according to the source Connection Status Check that the leads are properly connected between this product and vehicle GPS Antenna Displays the con...

Page 44: ...Select the theme colour TIP You can preview the top menu screen or the AV operation screen by touching Home or AV respectively Clock Select the style of the clock from the preset image Preset Images Select the desired preset style for the clock off Hides the clock display The external storage device is inserted or plugged in in advance to customise the image page 24 You can export settings you hav...

Page 45: ...n the navigation outputs the guidance voice ATT The volume becomes 20 dB lower than the current volume Mute The volume becomes 0 Off The volume does not change Source Level Adjuster 4 to 4 Adjust the volume level of each source to prevent radical changes in volume when switching between sources other than FM Touch or to adjust the source volume after comparing the FM tuner volume level with the le...

Page 46: ... conditions Bass Boost 0 to 6 Adjust the bass boost level Menu Item Description 1 All is not available when Network Mode is selected as the speaker mode 2 If you change the listening position setting the output levels of all the speakers will change in conjunction with the setting 3 To use this function the vehicle s acoustics must be measured in advance 4 This function is available only when the ...

Page 47: ...ttery Performing Auto EQ CAUTION Do not turn off the engine while the measurement is in progress NOTES Auto EQ changes the audio settings as follows The fader balance settings return to the centre position page 45 Previous settings for Auto EQ will be overwritten 1 Stop the vehicle in a quiet place close all doors windows and sun roof and then turn the engine off If the engine is left running engi...

Page 48: ...rs a language code input screen is shown Input the four digit code of the desired language then touch Audio Language 1 2 Set an audio language preference When you select Others a language code input screen is shown Input the four digit code of the desired language then touch Menu Language 1 2 Set a menu language preference When you select Others a language code input screen is shown Input the four...

Page 49: ...by generating a DivX VOD registration code which you submit to your provider Registration Code is 10 digit Deregistration Code is 8 digit NOTE Make a note of the code as you will need it when you register or deregister from a DivX VOD provider Menu Item Description 1 You can switch the language by touching the switch languages key during playback 2 The setting made here will not be affected even i...

Page 50: ...enu column Favourite menu Creating a shortcut Selecting a shortcut Removing a shortcut 1 Touch the current time on the screen 2 Touch or to set the correct time and date You can operate the following items Year month date hour minute TIPS You can change the time display format to 12hour or 24hour You can change the order of date display format Day month Month day You can set the screen mode for AV...

Page 51: ...ideo for the rear display Mirror The video on the front screen of this product is output to the rear display NOTE Not all videos or sounds can be output to the rear display DVD CD The video and sound of a disc are output to the rear display NOTE Compatible video types are DVD V Video CD DivX MPEG 1 MPEG 2 and MPEG 4 only USB1 The video and sound of the USB storage device is output to the rear disp...

Page 52: ... or the shape of the vehicle interior WARNING Pioneer does not recommend that you install this product yourself This product is designed for professional installation only We recommend that only authorised Pioneer service personnel who have special training and experience in mobile electronics set up and install this product NEVER SERVICE THIS PRODUCT YOURSELF Installing or servicing this product ...

Page 53: ...he connector itself Do not pull the lead as you may pull it out of the connector This product cannot be installed in a vehicle without ACC accessory position on the ignition switch To avoid short circuiting cover the disconnected lead with insulating tape It is especially important to insulate all unused speaker leads which if left uncovered may cause a short circuit Before installing this product...

Page 54: ... speed detection circuit and the position of the handbrake switch vary depending on the vehicle model For details consult your authorised Pioneer dealer or an installation professional Perform these connections when using a subwoofer without the optional amplifier To power supply Power cord Left Speaker leads Right Front speaker STD or high range speaker NW Rear speaker STD or middle range speaker...

Page 55: ... output NW Yellow black MUTE If you use an equipment with Mute function wire this lead to the Audio Mute lead on that equipment If not keep the Audio Mute lead free of any connections This product System remote control Connect to Blue white cable max 300 mA 12 V DC Rear speaker STD Middle range speaker NW Front speaker STD High range speaker NW Subwoofer STD Low range speaker NW NOTE Select the ap...

Page 56: ...USB port USB port2 USB cable supplied with CD MU200 USB micro USB cable Type USB A micro USB B supplied with CD MU200 Smartphone When you use the rear view camera the rear view image is automatically switched from the video by moving the gearstick to REVERSE R Camera View mode also allows you to check what is behind you while driving WARNING USE INPUT ONLY FOR REVERSE OR MIRROR IMAGE REAR VIEW CAM...

Page 57: ...omponent For details refer to AUX page 36 CAUTION Be sure to use a mini jack AV cable CD RM10 sold separately for wiring If you use other cables the wiring position might differ resulting in disturbed images and sounds This product HDMI port High Speed HDMI Cable sold separately HDMI device sold separately NOTE When you connect the High Speed HDMI Cable use the lock tie to fix it securely page 57 ...

Page 58: ...ving Make sure that leads cannot get caught in a door or the sliding mechanism of a seat resulting in a short circuit Please confirm the proper function of your vehicle s other equipment after installation of this product Do not install this product where it may i obstruct the driver s vision ii impair the performance of any of the vehicle s operating systems or safety features including airbags h...

Page 59: ...ashboard or console Frame In some types of vehicles discrepancy may occur between the unit and the dashboard If this happens use the supplied frame to fill the gap Truss head screw Be sure to use the screws supplied with this product Installation using the screw holes on the side of this product Leave ample space 5 cm 5 cm CAUTION Do not cut the GPS aerial lead to shorten it or use an extension to...

Page 60: ...he aerial inside the vehicle on the dashboard or rear shelf Make sure the surface is free of moisture dust grime oil etc before affixing the metal sheet Install the microphone in a place where its direction and distance from the driver make it easiest to pick up the driver s voice Be sure to turn off ACC OFF the product before connecting the microphone Depending on the vehicle model the microphone...

Page 61: ...files on the disc are in an irregular file format Check the file format The disc format cannot be played back Replace the disc The loaded disc is a type this product cannot play Check what type of disc it is The screen is covered by a caution message and the video cannot be shown The handbrake lead is not connected or the handbrake is not applied Connect the handbrake lead correctly and apply the ...

Page 62: ...d this product cannot be established Perform the connection process Problems with the phone screen A black screen is displayed While operating an application the application was ended on the smartphone side Press to display the top menu screen The smartphone OS may be awaiting screen operation Stop the vehicle in a safe place and check the screen on the smartphone The screen is displayed but opera...

Page 63: ...onnected external storage device USB SD is enabled Follow the external storage device USB SD instructions to disable security Skipped The connected external storage device USB SD contains DRM protected files The protected files are skipped Protect All the files on the connected external storage device USB SD are embedded with DRM Replace the external storage device USB SD Incompatible USB The conn...

Page 64: ...mages are not output from the Android Auto compatible device Park your vehicle in a safe place and follow the instructions displayed on the screen If the error message is still displayed after performing on screen iPod Bluetooth Apple CarPlay Android Auto instructions please reconnect the device Some basic precautions are necessary when handling your discs Use only conventional fully circular disc...

Page 65: ...ecording device writing software their settings and other environmental factors Please record with the correct format For details please contact manufacturer of media recorders or writing software Titles and other text information recorded on a CD R CD RW disc may not be displayed by this product in the case of audio data CD DA Read the precautions with CD R CD RW discs before using them Common no...

Page 66: ...layed back properly depending on the environment in which the file was created or on the contents of the file This product may not play back files depending on the application used to encode the files This product may not operate correctly depending on the application used to encode WMA files Depending on the version of Windows Media Player used to encode WMA files album names and other text infor...

Page 67: ...z EXTENSION avi divx PROFILE Home Theater Profile MAX RESOLUTION 720 x 576 Compatible video codec MPEG4 H 264 H 263 Xvid Maximum resolution 1 920 x 1 080 Maximum frame rate 30 fps Compatible video codec MPEG4 H 264 H 263 Maximum resolution 1 920 x 1 080 Maximum frame rate 30 fps Compatible video codec MPEG4 H 264 H 263 Maximum resolution 1 920 x 1 080 Maximum frame rate 30 fps Compatible video cod...

Page 68: ...ding and refers to an audio compression technology standard used with MPEG 2 and MPEG 4 Several applications can be used to encode AAC files but file formats and extensions differ depending on the application which is used to encode This unit plays back AAC files encoded by iTunes Google Google Play and Android are trademarks of Google LLC FLAC DivX AAC Google Google Play Android Android Auto is a...

Page 69: ...etermined by the App providers The terms HDMI and HDMI High Definition Multimedia Interface and the HDMI Logo are trademarks or registered trademarks of HDMI Licensing Administrator Inc in the United States and other countries Siri Using app based connected content HDMI Remember that use of this system for commercial or public viewing purposes may constitute an infringement on the author s rights ...

Page 70: ...m 81 6 mm Pixels 1 209 600 2 520 480 Display method TFT Active matrix driving Colour system PAL NTSC PAL M PAL N SECAM compatible Durable temperature range 20 C to 80 C Power off Audio Maximum power output 50 W 4 ch 4 Ω Liquid crystal display LCD screen Maintaining the LCD screen LED light emitting diode backlight Specifications 50 W 2 ch 4 Ω 70 W 1 ch 2 Ω for subwoofer Continuous power output 22 ...

Page 71: ...MPEG 1 Layer 1 MPEG 1 Layer 2 MPEG 1 Layer 3 MPEG 2 Layer 1 MPEG 2 Layer 2 MPEG 2 Layer 3 MPEG 2 5 Layer 3 WMA decoding format WMA 10 Std WMA 10 Pro WMA 9 Lossless AAC decoding format MPEG 2 AAC LC MPEG 4 AAC LC WAV signal format Linear PCM FLAC signal format Ver 1 3 0 SD image JPEG decoding format JPEG SD video H 264 video decoding format Base Line Profile Main Profile High Profile WMV video deco...

Page 72: ... 2018 PIONEER CORPORATION All rights reserved CRB5090 B ID ...

Reviews: