background image

14

En

Using TIME WARP

The Time Warp function can be used to automatically loop record the 

output from the unit so that you can call patterns previously played.

1  Press the 

[TIME WARP]

 button.

The 

[TIME WARP]

 button changes from a dim white light to a bright 

white light.

The display shows the length of the pattern to be previewed.

!


If the 

[TIME WARP]

 button is pressed during pattern playback, 

the unit plays back to the fourth beat indicator (the 

[TIME WARP]


button flashes), and then enters Time Warp mode (the 

[TIME 

WARP]

 button lights up).

!


The pattern cannot be changed while in Time Warp mode.

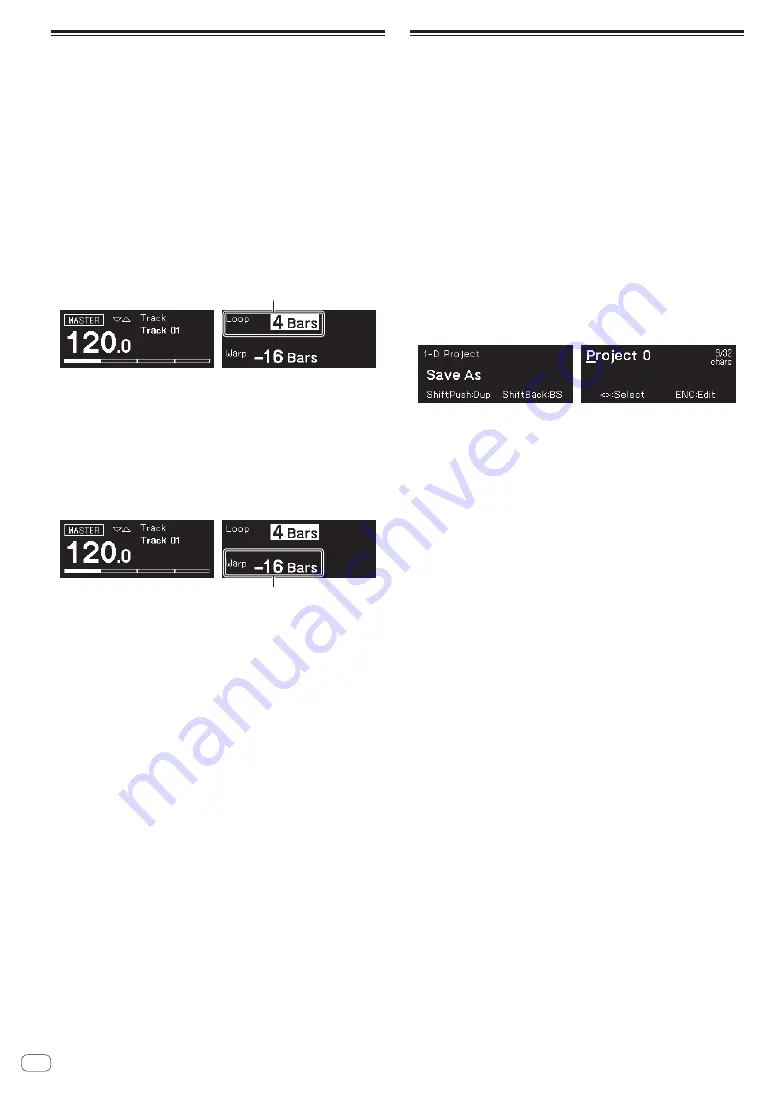
2  Turn the rotary selector.

The pattern can be previewed in different lengths: 

[1 Bar]

[2 Bars]

[3 Bars]

[4 Bars]

.

The lengh of the pattern to be previewed

3  Press the desired pad to begin previewing.

The unit plays the loop with the length specified in step 2 from the pad 

that was pressed.

The pads that light up brightly are in the preview range. The pads with 

a dim light can be selected to start the preview. The preview cannot be 

started at pads that do not light up.

!


The preview restarts each time a pad is pressed.

!


To stop a preview, press the 

[

g

]

 (stop) button.

!


The length of one pad is 1 Bar.

The beginning of the preview

4  Press the 

[PATTERN]

 button.

The unit enters Save mode and the 

[PATTERN]

 button lights up green.

The pad of the current pattern lights up brightly. The pads with saved 

patterns have a dim light. The pads do not light up when there are no 

saved patterns.

5  Press the desired pad to save a pattern being 

previewed.

The pattern is saved and the pressed pad lights up.

!


A pattern cannot be saved to the pad with the current pattern.

6  Press the 

[PATTERN]

 button again to exit Save mode.

The 

[PATTERN]

 button dims green.

7  Press the 

[TIME WARP]

 button again to exit Time 

Warp mode.

The 

[TIME WARP]

 button changes from a bright white light to a dim 

white light.

Saving a project

1  Press the 

[GLOBAL]

 button.

The 

[GLOBAL]

 button lights up and the display shows the GLOBAL 

menu.

2  Turn the rotary selector to select 

[Save As]

, and press 

the rotary selector.

!


Select 

[Save]

 to overwrite the project.

3  Press the 

[

c

]

/

[

d

]

 button to move the cursor and 

change the character by turning the rotary selector.

Name the project by repeating this step.

!


Alphanumeric characters, symbols, or a blank space can be 

inserted.

!


To delete a character in front of the cursor, press and hold the 

[SHIFT]

 button and press the 

[BACK]

 button.

!


To insert a blank in front of the cursor, press and hold the 

[SHIFT]


button and press the rotary selector.

!


When an existing project is opened, the name of the project 

appears in the display.

4  Press the rotary selector.

The project is saved.

Summary of Contents for Toraiz Squid

Page 1: ...Multitrack Sequencer Operating Instructions Quick Start Guide pioneerdj com support For FAQs and other support information for this product visit the above site...

Page 2: ...g instructions in the literature accompanying the appliance The lightning flash with arrowhead symbol within an equilateral triangle is intended to alert the user to the presence of uninsulated danger...

Page 3: ...ece of furniture etc on the power cord or pinch the cord Never make a knot in the cord or tie it with other cords The power cords should be routed such that they are not likely to be stepped on A dama...

Page 4: ...ecifications Please note that depending on the operating system version web browser settings etc operation may differ from the procedures described in this manual This manual provides brief descriptio...

Page 5: ...w PDF format files 1 Launch a web browser on your PC Mac and access the Pioneer DJ site below pioneerdj com To select your language click the flag or global icon in the top right corner of the screen...

Page 6: ...nctions section in the Operating Instructions Control panel Global section Phrase arrangement section Step edit section Global section 1 SHIFT button 2 k record button 3 g stop button 4 d play button...

Page 7: ...WING control h REV button i right button j down button k zigzag button l SWITCH BACK button m clockwise button n counterclockwise button o skip back button p GROOVE BEND slider q AUTOMATION ON indicat...

Page 8: ...ton B TRIGGER button C TIE button D ACTIVE button E COPY button F PASTE button G c button H d button I 16 pads J HARMONIZER buttons K PITCH button L PITCH CC1 control M GATE button N GATE CC2 control...

Page 9: ...tween off and on for this unit 4 USB B terminal 5 MIDI THRU OUT2 terminal 6 MIDI OUT1 terminal 7 MIDI IN terminal 8 CV OUT1 terminal 9 GATE OUT1 terminal a CV OUT2 terminal b GATE OUT2 terminal c CLOC...

Page 10: ...ted at the same time the USB bus power can be used as a backup power source If the AC adapter is disconnected while using the unit the unit automatically switches the power drive to the USB bus power...

Page 11: ...ntally disconnecting it from the unit 1 Fit the connection cable of the AC adaptor into the cable hook Secure the cable into place 2 Connect the plug of the connection cable to the DC IN terminal If t...

Page 12: ...he d play button The d play button lights up green and the unit plays the demo patterns The external device selected for the output destination also plays depending on the demo pattern being played Th...

Page 13: ...1 Press the SCALE button The SCALE button lights up and the 16 pads light up or dim red 2 Press the k record button The k record button lights up red and the unit enters recording mode 3 Press the d p...

Page 14: ...ess the PATTERN button The unit enters Save mode and the PATTERN button lights up green The pad of the current pattern lights up brightly The pads with saved patterns have a dim light The pads do not...

Page 15: ...re etc About trademarks and registered trademarks Pioneer DJ is a trademark of PIONEER CORPORATION and is used under license The names of companies and products mentioned herein are the trademarks of...

Page 16: ...16 En...

Page 17: ...En 17...

Page 18: ...18 En...

Page 19: ...En 19 PIONEER ELECTRONICS USA INC UCP0516...

Page 20: ......

Reviews: