3
1.
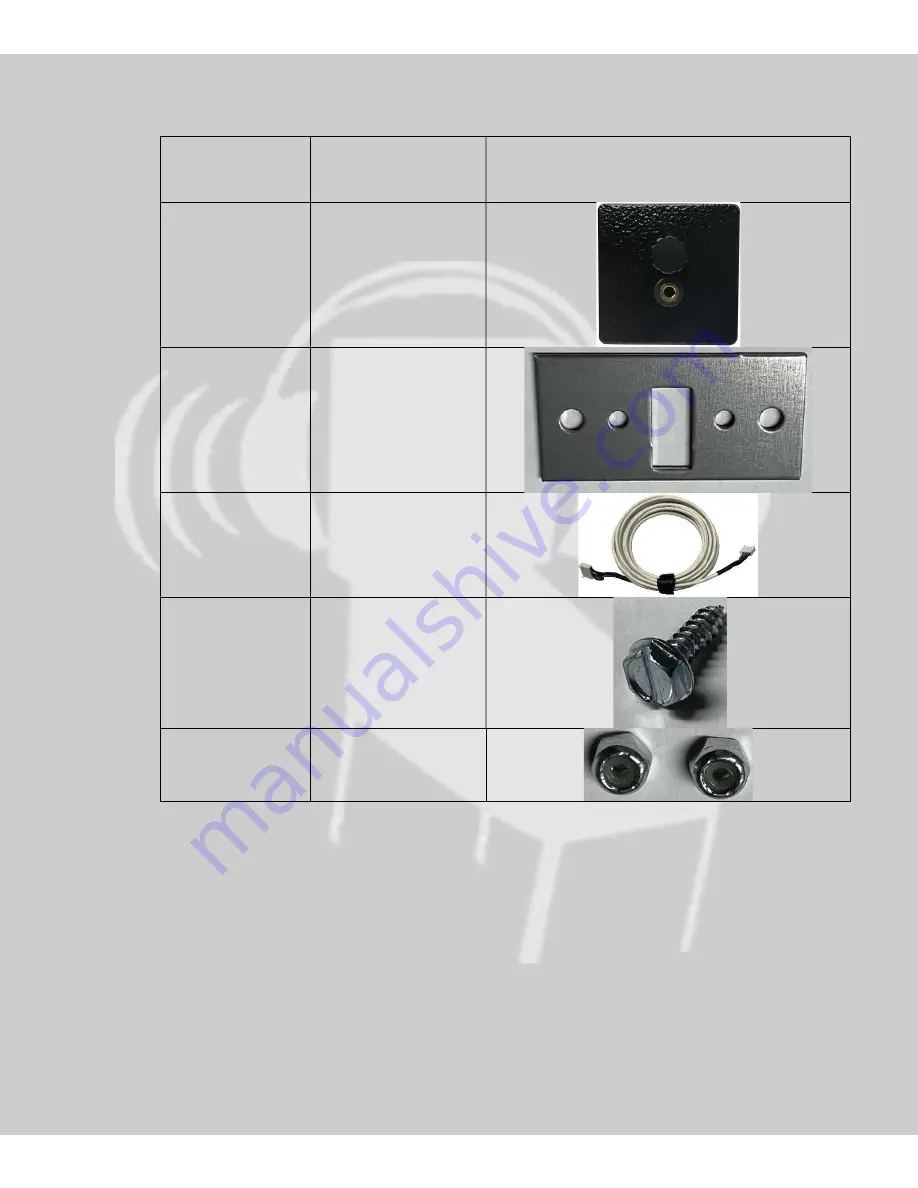
What’s included in the Kit
Item
Part Number
Picture
PinPAC TH2 Front
Panel Assembly
310.202.000
Back Plate
100.054.000
Cable
600.057.000
PinPAC TH2
Hardware Kit:
600.053.001
¼ 4-40 Inch Nuts
441.005.000
Page 1: ...ements 2 1 What s included in the Kit 3 2 Requirements 4 3 Preparation 4 4 Back Box Installation 5 5 Running the cable through the main cabinet 7 6 Removing the Tournament Hole Plug 8 7 Installing the...
Page 2: ...e sound level at a safe level to prevent long term hearing loss For a good example of recommend sound levels we recommend following suggestions given by major audio equipment manufacturers such as App...
Page 3: ...1 What s included in the Kit Item Part Number Picture PinPAC TH2 Front Panel Assembly 310 202 000 Back Plate 100 054 000 Cable 600 057 000 PinPAC TH2 Hardware Kit 600 053 001 4 40 Inch Nuts 441 005 00...
Page 4: ...ent hole on the front of the Pinball cabinet B Tools A Inch hollow tube nut driver You can purchase the tool here if you do not have one Pinnovators Link https pinnovators myshopify com collections to...
Page 5: ...speaker grill and remove the back glass Store the glass in a safe location Uncoil the included interface cable This cable has two connectors on it Cable End Plugs into Picture 5 Pin Front Headphone I...
Page 6: ...ale pin header on the Spike 2 CPU board Run the cable under the cable clamp No need to remove the cable clamp just tug on the top of it to open it Run cable under the second cable clamp and then drop...
Page 7: ...e cable clamps as shown below Leave any leftover cable slack neatly here so the cable will not get stretched when the back box is folded down Use the included Velcro tie to neatly secure the cable to...
Page 8: ...shown Some nuts can be removed my hand and some will need a pair of pliers or a wrench to remove it 7 Installing the PinPAC TH2 Plate Insert the PinPAC TH2 Front panel into the open Tournament hole T...
Page 9: ...e Pem studs of the PinPAC TH2 front plate Using your hollow nut driver tighten the lock nuts until they just start to make contact with the rear mounting plate Carfully align the PinPAC TH2 panel so i...
Page 10: ...tely remove the bracket and repair the hole Please contact us if you need help Next using your nut driver start to thread the included bolt into the rear bracket Hold off on putting the green wire und...
Page 11: ...cle the machine to get a menu setting to work properly You can make the setting but it may not fully work until the power is cycled or the game menu is entered and existed a few times The following sc...
Page 12: ...n Next advance to MUTE IF HEADPHONES DETECTED This setting causes the max volume of the headphones to behave differently If set to YES Headphone volume can go extremely high Be careful The headphone m...
Page 13: ...iliar with the menu items Menu item ADJUST HEADPHONE VOLUME is basically the same menu that the PinPAC TH2 volume control adjusts No need to touch this menu Navigate to the ADJUST MAX VOLUME LEVEL See...
Page 14: ...l pinball product ideas we are pinball people too Warranty and repairs Pinnovators will stand behind everything we sell If our product ever fails contact us and we will make it right Even if you didn...