


RXN-700 Installation guide
5
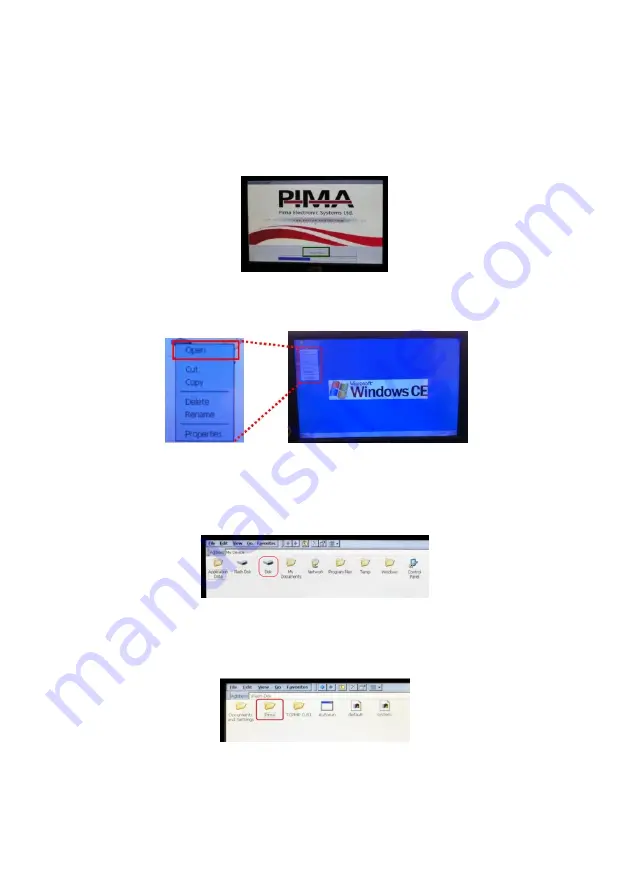
Adding new or replacing the images
1.
Restart the RXN-700 (if this is the first time you use the keypad, just plug it in).
2.
When the PIMA logo is displayed, click (using the keypad’s plastic stick) the "Exit to
Windows" button. See the green rectangle on Figure 1.
Figure 7.
3.
The Windows CE desktop immediately appears. Click and hold the “My Device” icon; in
the window that pops up (see the red rectangle on Figure 2), click “Open”.
Figure 8.
4.
Insert the USB drive into the USB socket, located on the upper left side of the keypad;
wait for its icon to appear onscreen.
5.
Click and hold the USB drive’s icon (“Disk” in Figure 9); in the window that pops up,
click “Open”.
Figure 9.
6.
Select the two image files with the stick and click “Edit” -> “Copy” from the menu.
7.
Click the “X” button on the upper right of the screen to close the current window.
8.
Click and hold the “Pima” folder; in the window that pops up, click “Open”.
Figure 10.


