


10
9
DENTAL
Liquid Crystal
DENTAL
Liquid Crystal
22. Clean the print (see section 7)
23. Rinse the print thoroughly in hot water to
remove any residual cleaning product
NOTE:
Handle the parts with care as they are more fragile
before post-exposure
25. Finish your printed parts (see section 8)
26. Take the resin bottle that you used earlier when
filling the vat, remove the cap
27. Set up a funnel and filter in the neck of the
bottle
NOTE:
With some resin bottle sizes, you will need to
remove both parts of the cap in order to make
room for the funnel.
28. Carefully remove the resin vat from the printer
29. Tilt the vat towards one corner and pour the
left-over resin through the filter and back into the
bottle, be careful not to allow the filter paper to
overflow
30. Once most of the resin has poured away, use
the vat cleaning tool to guide remaining resin
towards the corner of the vat
31. Clean off any resin drips on the outside of the
vat with paper towel
32. Place the vat on a suitable clean smooth
surface (eg the silicone mat from the top of your
Liquid Crystal Dental)
33. Use paper towel to soak up the last of the resin
in the vat
34. Use a small amount of a suitable cleaning
solvent such as IPA, along with paper towel, to
clean the vat film and vat walls, dry them thoroughly
35. Check for any fragments of cured resin
remaining on the vat film, dislodge them carefully
with the soft spatula provided, any loose pieces
can be removed using a small piece of sticky tape
36. Give the outside of the vat a final clean and
check the film for signs of damage or wear, if you
have any doubt about the condition of the vat film,
refer to section 9.1
NOTE:
Printing with a damaged vat will cause failures and
leaks causing permanent damage to the printer
37. Check the screen of your Liquid Crystal Dental
for any sign of resin contamination or damage
38. If resin is present, clean it up thoroughly with
paper towel, this is a sign that the film on your resin
vat most likely needs replacing
NOTE:
If you believe your printer’s screen may be
damaged, contact your supplier or visit the support
pages of the Photocentric website.
39. Store the resin vat inside the printer when not
in use
40. Check the screen protector.
41. If any Photocentric Resin Cleaner is left on the
print platform, clean it off with a suitable solvent
such as IPA, dry it thoroughly
NOTE:
A residue of Photocentric Resin Cleaner on the
print platform may prevent the next print from
adhering properly.
NOTE:
If you have a supply of compressed air available,
this can help with cleaning and drying the print
platform. Always wear safety glasses and take the
proper precautions when using compressed air.
42. Store the print platform inside the printer when
not in use
WARNING:
Do not open the printer hood during the printing
process
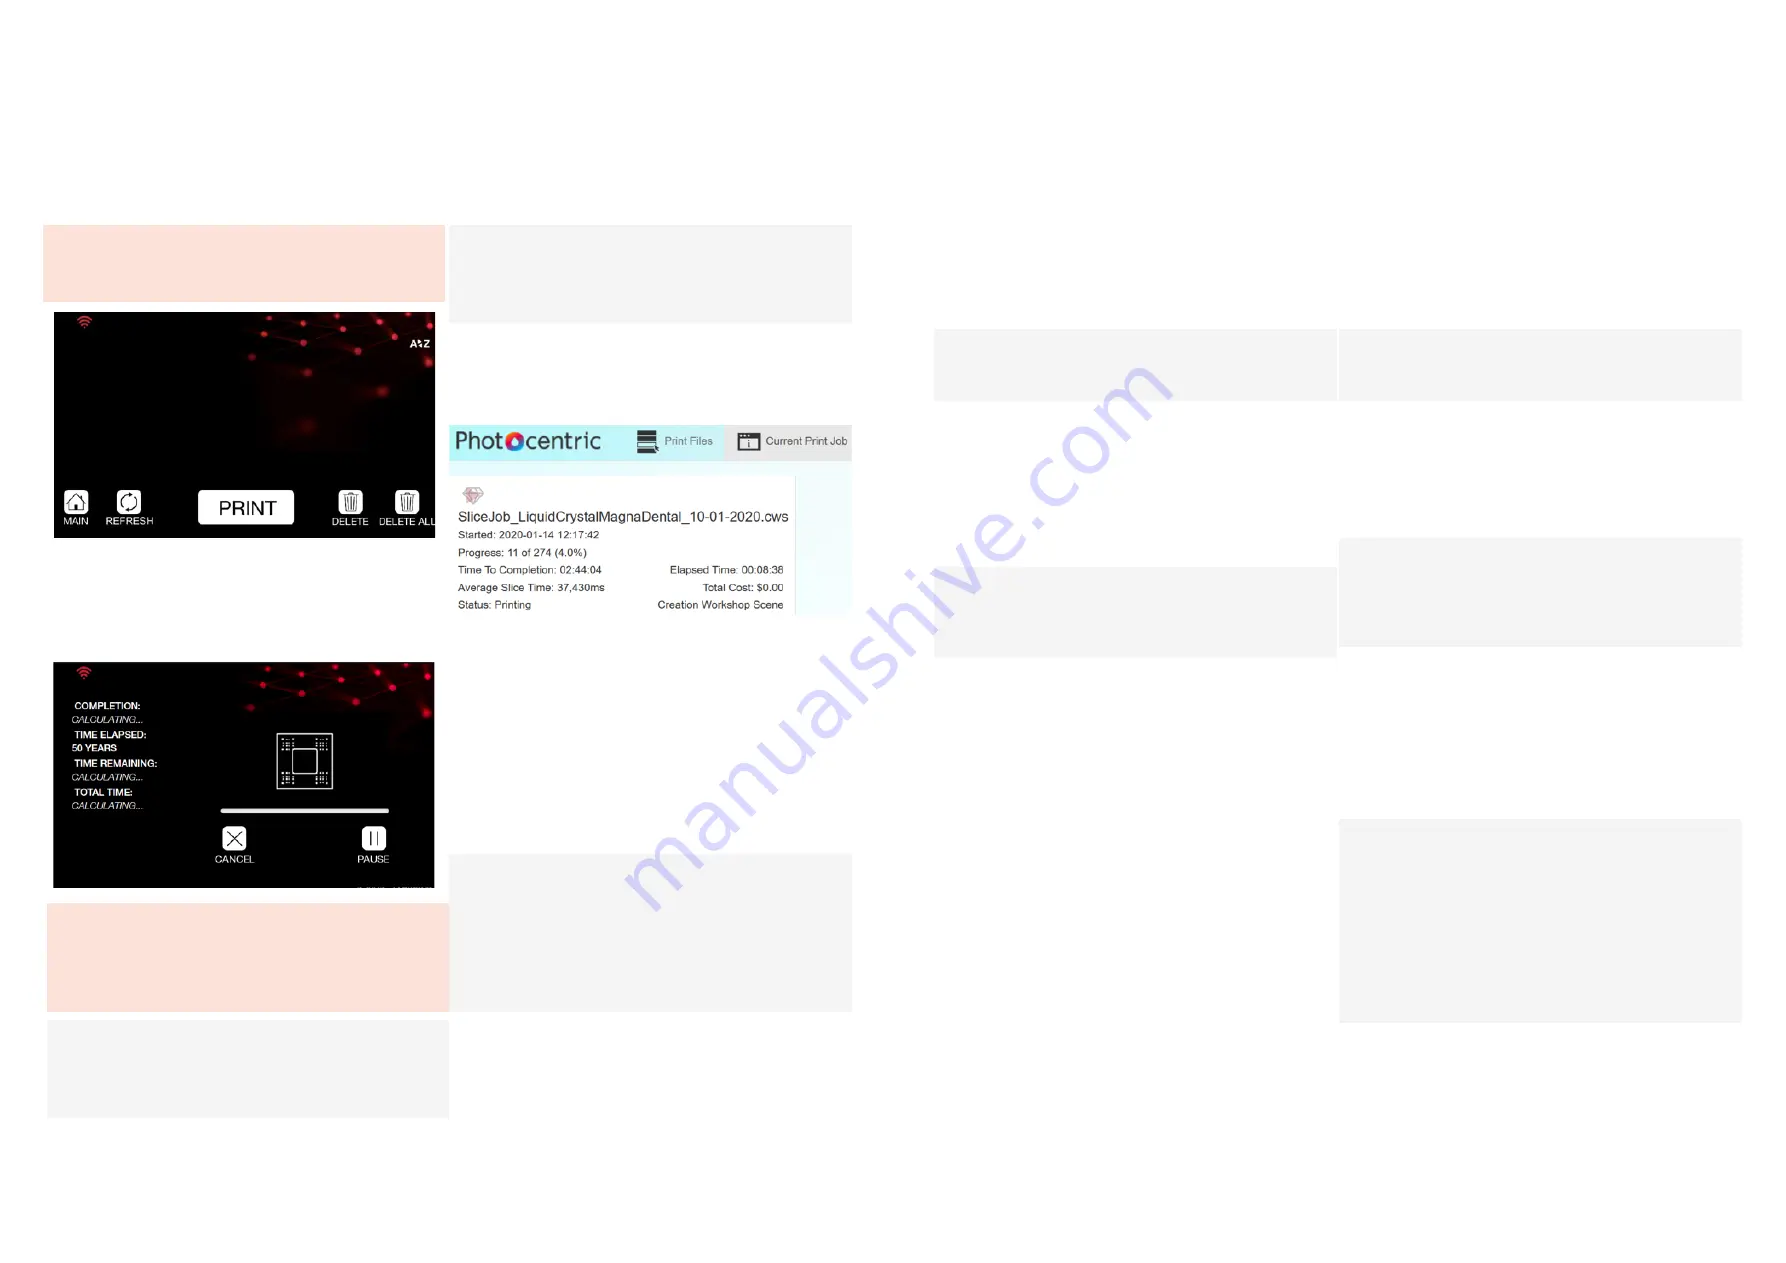
15. At any time during the printing process, you can
cancel or pause the print by making the relevant
selection, you will be asked for confirmation in
both cases
WARNING:
When a print is cancelled or paused, the printer
will not stop moving immediately. Do not open
the hood until the printer has completely finished
moving.
NOTE:
Do not pause your print unless absolutely
necessary. If needed, only pause for a short time
to avoid discrepancies in printing
16 The touchscreen will display information about
the progress of your print, the ‘TIME REMAINING’
estimate will be more accurate after the first few
layers are complete
NOTE:
If your printer is connected to your network (see
section 5.2) you can monitor print progress via
your web browser.
17. Liquid Crystal Dental does not need monitoring
or supervision during the printing process, you do
not need to be present when the print is due to
finish
18. Leaving a finished print inside the printer for a
time will allow excess resin to drip back into the
vat
19. When you are ready to clean your print, open
the hood
20. Loosen the turn knob to free the print platform
21. Grip the handles of the print platform securely
and gently pull it towards you to remove it
NOTE:
After removing the print platform from the printer,
it can be helpful to tilt it and hold it over the vat to
drain off excess resin. When you carry a finished
print to your cleaning station, use paper towel or a
suitable tray to catch any drips.


