


Maintenance
4024_en_E
PHOENIX CONTACT
5.2.3
M.2 drive
The M.2 drive location varies depending upon the model.
–
BL2 …PC 1100, BL2 …PC 2100: The M.2 card is located under the SATA drive tray.
The access panel or adapter plate and SATA drive must be removed for access.
–
BL2 BPC 3100, BL2 BPC 7100, BL2 BPC 9100: The access panel must be removed.
The M.2 card is accessible without removing the SATA drive.
–
BL2 PPC 3100, BL2 PPC 7100, BL2 PPC 9100: The M.2 card is accessible through the
cable pass through hole. The adapter plate does not require removal.
BL2 …PC 1100, BL2 …PC 2100:
1.
Remove the SATA drive and tray assembly.
2.
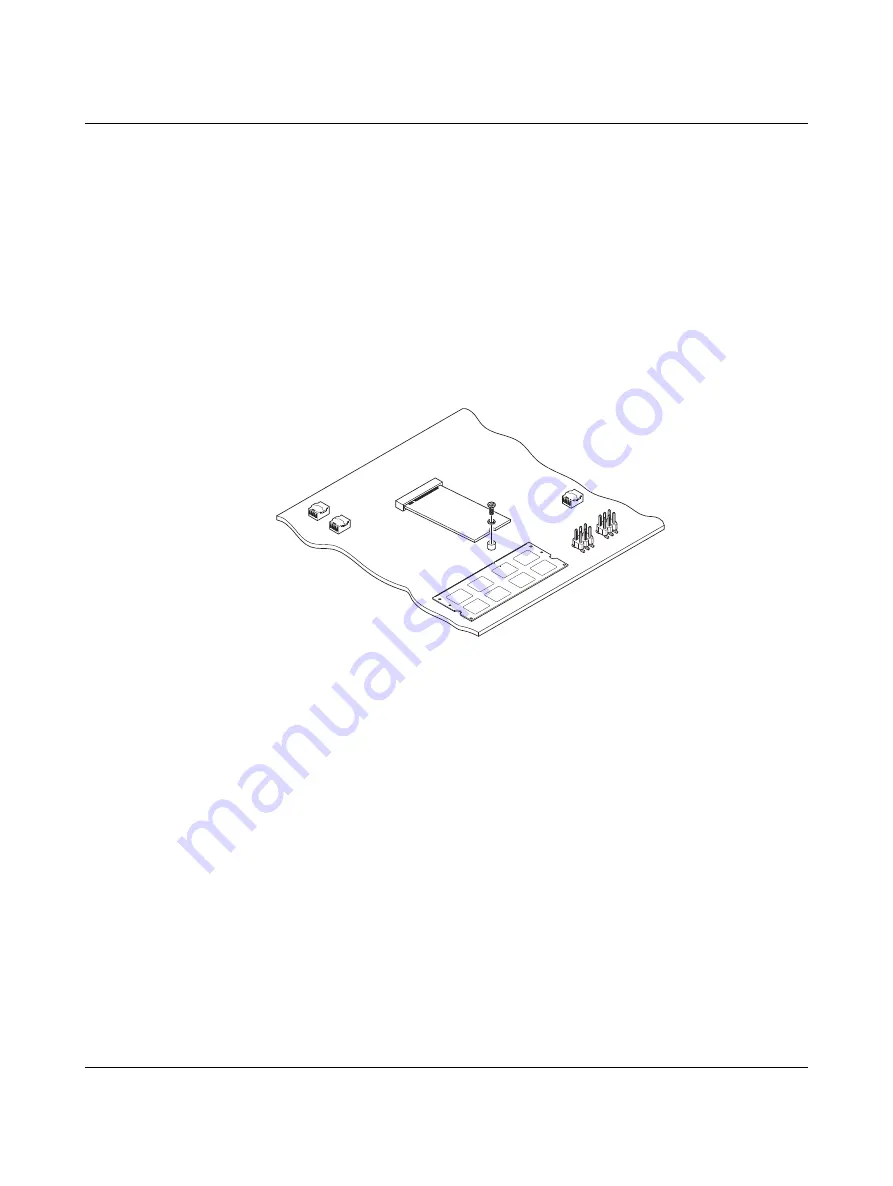
Remove the screw and washer holding the M.2 drive in place.
The card will lift off the board slightly.
Figure 5-4
M.2 drive removal
3.
Pull the drive out of the socket and remove it.
4.
Insert the new drive into the socket at the same angle as the one that was removed.
Make sure the drive is fully seated in the socket.
5.
Secure the drive with the washer and screw previously removed.
6.
Reinstall the SATA drive and tray assembly.
BL2 BPC 3100, BL2 BPC 7100, BL2 BPC 9100
1.
Remove the screw and washer holding the M.2 drive in place (see Figure 5-4). The card
will lift off the board slightly.
2.
Pull the drive out of the socket and remove it.
3.
Insert the new drive into the socket at the same angle as the one that was removed.
Make sure the drive is fully seated in the socket.
4.
Secure the drive with the washer and screw previously removed.
5.
Reinstall the SATA drive and tray assembly.
BL2 PPC 3100, BL2 PPC 7100, BL2 PPC 9100
1.
Remove the adapter plate from the chassis.
2.
Remove the screw and washer holding the M.2 drive in place (see Figure 5-4). The card
will lift off the board slightly.
Summary of Contents for Basicline 2 Series
Page 1: ...User manual UM EN BL2 100 Basicline 2 configurable industrial PCs...
Page 4: ...BL2 100 2 36 PHOENIX CONTACT 4024_en_E...
Page 18: ...BL2 100 16 36 PHOENIX CONTACT 4024_en_E...
Page 32: ...BL2 100 30 36 PHOENIX CONTACT 4024_en_E...
Page 34: ...BL2 100 32 36 PHOENIX CONTACT 4024_en_E...