


RFC 4072R
92 / 128
PHOENIX CONTACT
110146_en_00
7.2.6
Connecting to the PRIMARY controller
To be able to transfer a project to the PRIMARY controller, you must first connect
PLCnext Engineer to the PRIMARY controller. To do this, proceed as follows:
•
Double-click on the “Project (x)” node in the “PLANT” area.
⇒
The “Project” editor group opens.
•
Select the “Online Controllers” editor.
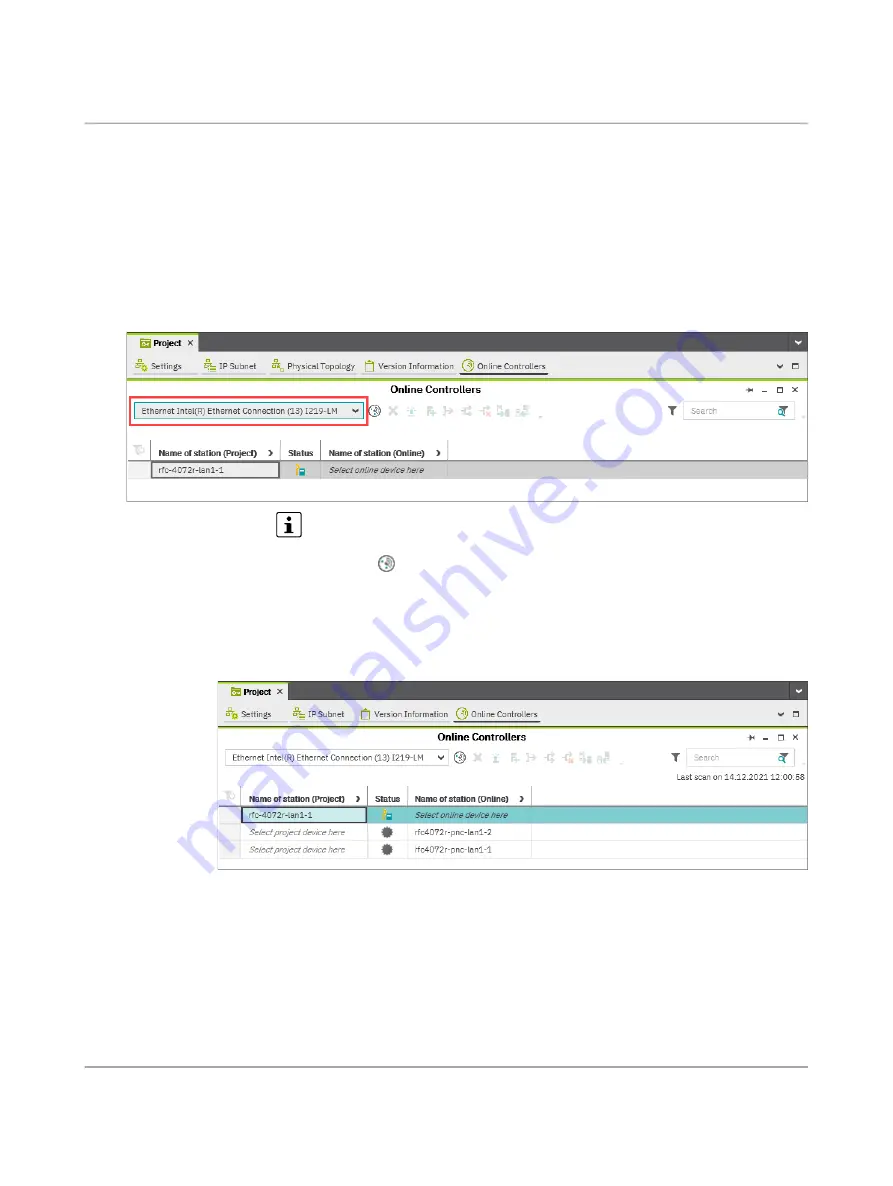
•
Select the appropriate network card from the drop-down list.
Figure 7
-
8
Selecting the network card
You can show and hide more detailed information by clicking on the arrows next to
“Name of station (Project)” and “Name of station (Online)” (see
).
•
Click on the
button to search the network for connected devices.
You can see the configured devices under “Name of station (Project)”.
You can see the devices that have been found online in the network (online devices) under
“Name of station (Online)”.
Figure 7
-
9
Assigning online devices
If you select the device (“Select online device here”) under “Name of station (Online)”, the
controller found in the network (the online device) receives the IP settings of the configured
controller.
If you select the device (“Select project device here”) under “Name of station (Project)”, the
configured controller receives the IP settings of the online device found in the network.