CAPAROC system
26 / 66
PHOENIX CONTACT
109745_en_01
4.4
Removing the modules
NOTE:
Set the channels to the no-load state on the module that is to be replaced before
changing it.
Please refer to Section
“Safety notes for mounting and removal” on page 23
A standard tool, e.g., a bladed screwdriver with a blade width of 2.5 mm, is necessary for
removing modules.
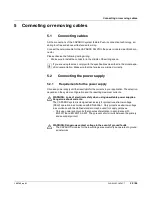
Removing cables
Section 5.3, “Removing cables”
.
Removing the module
Actuate the release mechanism to remove the power module and the circuit breaker mod
-
ules. This is located on the top of the modules (orange lever). You can then remove the
modules vertically from the current rail while the release mechanism is actuated.
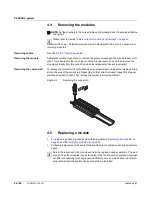
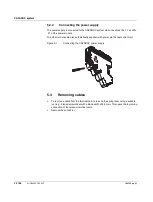
Removing the current rail
To remove the current rail from the DIN rail, use a screwdriver to release the latching via the
slot on the side of the current rail. Depending on the current rail used, repeat this step sev
-
eral times from left to right. Then remove the current rail from the DIN rail.
Figure 4
-
3
Removing the current rail
4.5
Replacing a module
•
To replace a module, proceed as described in Sections
and
“Mounting the modules” on page 25
•
Following replacement, make sure that all cables are connected correctly and securely
again.
Due to the rear current rail, modules can also be replaced during operation. The load
circuit of the other modules is not interrupted. Only the internal bus system is interrupt
-
ed. After successfully mounting a new identical module, communication is automati
-
cally restored and the system does not need to be restarted.
Summary of Contents for 1110984
Page 1: ...User manual CAPAROC System and installation...
Page 20: ...CAPAROC system 20 66 PHOENIX CONTACT 109745_en_01...
Page 22: ...CAPAROC system 22 66 PHOENIX CONTACT 109745_en_01...
Page 28: ...CAPAROC system 28 66 PHOENIX CONTACT 109745_en_01...
Page 52: ...CAPAROC system 52 66 PHOENIX CONTACT 109745_en_01...
Page 54: ...CAPAROC system 54 66 PHOENIX CONTACT 109745_en_01 Figure 8 1 PC WORX FIRMWARE UPDATER...
Page 67: ......


