


20160126 V3
3
P150PR(PG,
ER,
EG)
is
a
Zero
Client
Audio/Video
over
Ethernet
Display,
designed
as
an
endpoint
of
a
PC
sharing
solution
such
as
Windows
MultiPoint
Server
2012.
With
Windows
MultiPoint
Server
2012,
it
can
work
as
a
standalone
workstation.
The
solution
enables
a
host
PC(Server)
to
communicate
with
multiple
and
independent
stations.
Each
station
is
consisted
of
one
P150PR
(PG,
ER,
EG)
Monitor
(zero
client)
with
a
keyboard,
mouse,
and
monitor
connected,
allowing
multiple
users
to
share
the
resources/computing
of
one
single
server.
By
simple
Ethernet
connection,
the
server
provides
each
station
user
with
a
familiar
and
independent
Windows®
experience.
P150
series
Model
and
function
table
listed
as
below:
P150x
x,
represent
P150PR,
P150PG,
P150ER,
P150EG
Features
-
15
inch
diagonal
screen
with
native
display
resolution
1024
X
768.
-
Simple
Ethernet
connection
include
Video,
Audio,
and
other
USB
devices
Include
power
over
Ethernet
for
PR/PG
Models
-
Simple
Plug
and
Play:
Just
attach
a
keyboard,
mouse,
to
your
P150xx
and
connect
it
to
the
host
server.
A
station
is
set
up
easily
and
ready
for
use
right
away
-
Full
flat
front
panel
with
high
quality
resistive
touch
panel.
-
Headphone
output
-
Microphone
out
-
Build
‐
in
USB
2.0
Hub:
x
3
USB
downstream
ports
-
Build
‐
in
Audio
function;
optional
2W
speakers
per
channel.
-
5
Wires
Resistive
Touch
Panel
Control
Function.
(for
Touch
Monitor
only)
-
Fully
Glossy
surface
throughout
monitor’s
appearance.
-
Rimless
front
bezel
design,
spill
&
dust
proof,
-
Cable
management
down
routing
through
the
mounting
stand.
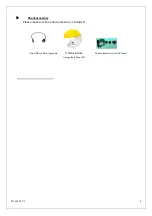
Unpack
the
monitor
-
Put
the
monitor
on
a
clean
surface;
make
sure
the
box
in
upright
position.
-
Remove
packing
materials
from
inside
of
box.
Model
PoE
power
supply
Resistive
touch
panel
Protective
cover
lens
P150PR
Yes
Yes
NA
P150PG
Yes
NA
Yes
P150ER
NA
Yes
NA
P150EG
NA
NA
Yes


