background image

46

See the System Time setting interface as follows:

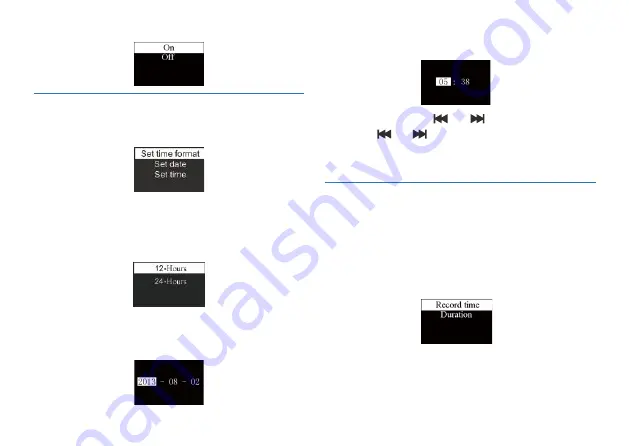
Record timer setting: as system time turns to the pre-set time, 
the device automatically starts recording. On the functions 
menu, choose the “Record timer”, then press the MENU button 
to enter “Record timer” setting. See the below reference 
picture:

The first function is to set the time to start recording. For 
setting please refer to the below picture:

On this interface, you can set the current system time and 
display format. Press STOP return to the previous level 
submenu. 
For example: select “Time Format” to show the following menu:

There are 2 time formats to choose, namely 12-hour format 
and 24-hour format. The system default is 24-hour format.

Choose “Set data”, the following interface will pop up:

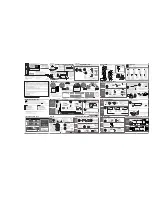
Choose “Set time”, the following interface will pop up:

On this interface, press “       ”or“      ”and “+” or “-” to set the 
time. Press“      ”or“      ”button to select year, month, day, hour, 
minute and second; press “+” or “-” to change the relevant 
numbers.

9.5  System Time Setting

9.6  Record timer setting

Summary of Contents for VTR6600

Page 1: ...www philips com dictation 注册您的产品并获得技术支持 VTR6600 使用手册 VTR6600 ...

Page 2: ...02 ...

Page 3: ...2 重要须知 3 您的数码录音笔 4 开始使用 5 录音 6 语音模式 7 音乐模式 7 1 播放模式 7 2 变速播放 6 2 变速播放 6 3 删除文件 6 4 个性化设置 6 1 语音播放 6 1 1 循环模式 6 1 3 复读次数 6 4 1 咪头增益 6 4 2 录音类型 6 4 3 录音指示灯设置 6 4 4 声控设置 6 4 5 监听设置 6 4 6 分段录音 7 1 1 循环模式 7 1 2 音效模式 7 1 3 复读模式 7 1 4 复读次数 7 1 5 复读间隔 6 1 2 复读模式 6 1 4 复读间隔 4 1 开 关机 4 2 充电方法 4 3 按键锁定 HOLD 功能 4 4 连接电脑 ...

Page 4: ... 24 24 20 20 20 20 21 21 22 22 22 22 7 3 删除文件 7 4 歌词同步显示 8 调频模式 9 系统设置 10 常见问题 11 技术参数 11 1 存储器 11 2 尺寸和重量 11 3 系统要求 11 4 录音 11 5 运行条件 9 1 背光时间 9 2 自动关机 9 3 语言选择 9 4 按键音 9 5 系统时间设置 9 6 定时录音设置 9 7 磁盘信息 9 8 固件版本 9 9 格式化内存 9 10 恢复出厂设置 ...

Page 5: ...浦公司的全方位技 术支持 如 使用手册 软件下载 保修信息等 www philips com 一键录音 仅仅拨上录音开关即可实现录音 拨下保存录音 正面触摸按键 轻触面板上的按键图标即可实现对应的按键 功能 数字降噪 能有效地对录音环境周围的噪声给予滤除 从而 可以清晰地记录有效的声音 此功能只建议在嘈杂的环境 中使用 在立体声和标准录音模式下 不能使用该功能 以常见的 MP3 格式录音 使用高速 USB 2 0 快速存取录音和数据 声控录音功能 可作为大容量的 USB 存储设备 确保最大的兼容性 产品特点 ...

Page 6: ...抗力因素而导致数据丢失 本公司一概不予负责 特别 提醒用户小心操作 注意将资料另外备份 使用耳机时请遵守下列原则 调整至合适的音量 切勿长时间使用耳机 特别需要注意 切勿将音量调至耳朵所能承受的范围之外 切勿将音量调至盖过周边环境的声音 在危险情况下请小心或暂停使用耳机 在驾驶汽车 骑自行车 玩滑板时 切勿使用耳机 否则会 导致交通意外 且违反相关法律法规 此符号标志指明帮助您更加高效简便使用设备的信息 此符号标志指明处理或操作设备时必须遵守的各种注意事项 此符号标志警告可能发生的设备损坏和数据丢失 操作不当 可能导致损坏 此符号标志警告人身伤害危险 操作不当 可能导致人身伤害 或设备损坏 提示 注意 小心 警告 听力保护 所用符号标志 安全 ...

Page 7: ...07 3 您的数码录音笔 1 开机 关机 锁定键 2 USB 接口 耳机接口 3 播放 暂停 4 音量加键 菜单项选择键 5 上一曲 快退 菜单项选择键 6 音量减键 菜单项选择键 7 内置麦克风 8 录音 播放指示灯 9 显示屏 10 停止键 文件夹切换键 11 下一曲 快进 菜单项选择键 12 喇叭 13 录音键 14 播放速度键 15 菜单键 供货范围 概览 ...

Page 8: ... ByeBye 关机 在此界面长按 MENU 键约 2 到 3 秒钟 机器返回主界面 在主界 面中包含有四个模块 下面四张图片分别代表 语音 音乐 调频和系统设置模块 然后机器进入录音文件停止播放界面 如下图所示 除了录音过程中 在其他任何界面下 长按 MENU 键约 2 到 3 秒可返回到主界面 屏背光灭后 正面触摸按键不起作用 此时滑动开机键 屏有显示后正面触摸按键方可使用 如果录音笔无法正常工作 请确认机器是否已没电 当电量指示标志为 时 请及时充电 第一次使用机器时 请对该机器充电三小时以确保机器有电 工作 注意 注意 4 1 开 关机 提示 ...

Page 9: ...小时左右 充满电时 电池符号显示满格 橙色灯灭 录音笔可作为大容量的 USB 存储设备 并可方便地对文件进行 存储 备份和移动 可使用 USB 数据线将录音笔与电脑相连 且无须安装软件 录音笔会自动显示为可移动设备 连接电脑 图标如下图所示 1 将开机键向上推至锁定位置 锁定录音笔上除了拨动录音键 的所有按键 然后屏幕上短暂显示 Hold 后 随即消失 如下图所示 2 要解除按键锁定 请将开机键向下推至中间位置 当录音笔与电脑连接时 对录音笔的手动操作将无效 4 2 充电方法 4 3 按键锁定 HOLD 功能 4 4 连接电脑 注意 在文件移入或移出录音笔时 请不要断开录音笔与电脑的 连接 当录音笔与电脑连接时 对录音笔的手动操作将无效 提示 ...

Page 10: ...系统会自动关机 如果正在录音 系统自动保存录音文件后再关机 电量不 足时 请及时充电 低电时提示的参考图标如下所示 注意 当您初次使用录音笔录音时 请注意本节中的内容说明 1 在语音模式停止状态下 按 停止 键 选择所需文件夹 2 把录音键拨到录音状态开始录音 录音 播放 指示灯 红灯闪烁 请将内置麦克风对准音源 3 按 播放 键暂停录音 录音 播放 指示灯红灯熄灭 显示屏显示 录音暂停 4 再次按下 播放 键 继续录音 5 把录音键拨到停止状态结束录音 并回到当前录音文件的停 止播放界面 ...

Page 11: ...这四 个文件夹中进行存储 每个文件夹能存储 99 个录音文件 当一个录音文件夹存满 99 个后 系统会把随后录入的文件 自动存储在下一个文件夹中 如果 四个文件夹全部录满 要再进行录音 请先删除一些不必要的文件再录 请先测试录音 以确保录音笔设置正确 每个目录最多可存储 99 个文件 总共可容纳 396 个文件 99 文件 x 4 目录 当录音时间超过录音笔可用容量或达到最大 396 个文件数 量的上限时 录音停止 请删除部分录音或将其移至电脑 录音时请勿断电 否则这会导致录音信息丢失和文件损坏 如果需要长时间录音 请在录音前充电 录音笔在充满电后可以录音 23 个小时 提示 ...

Page 12: ...始播放 录音 播放 指示灯绿灯闪烁 4 使用 键或 键调节音量 5 按 停止 键结束播放 在停止播放状态下 长按 MENU 键约 2 秒返回到主界面 6 播放过程中 按播放键暂停播放 录音 播放 指示灯 绿灯熄灭 再次按下播放键 将继续先前位置的播放 7 播放时长按 或 键 可快退或快进当前正在播 放的文件 选择要播放的录音文件后 短按播放键播放 在播放过程中 短按菜单键 弹出如下播放菜单列表 循环模式 复读模式 复读次数 复读间隔 参考界面如下 语音文件播放界面说明 6 1 语音播放 在停止状态下 按停止键 可以在 A B C D 和 MUSIC 五 个文件夹之间进行转换 注意 当耳机插入插孔内 录音笔扬声器将停止工作 提示 ...

Page 13: ...头增益 录音类型 指示灯设置 声控设置 监 听设置 分段录音 删除文件 删除全部 下面为执行删除操作的相关参考图片 在此界面下 按 键或 键改变播放速度的数值 目录播放 顺序播放选中目录的文件 全部播放完一遍当前目 录的文件后自动停止播放 目录循环 循环播放选中目录的文件 单曲循环 一直循环播放选中的当前曲文件 随机播放 随机播放当前选中目录的文件 在播放菜单列表中选择 复读模式 菜单 再按菜单键将进入 复读模式 A B 复读的具体操作请参考 音乐播放 部分的 A B 复读操作部份 详细请参考音乐模块复读间隔部分 详细请参考音乐模块复读次数部分 6 1 1 循环模式 6 1 2 复读模式 6 1 4 复读间隔 6 1 3 复读次数 6 2 变速播放 6 3 删除文件 ...

Page 14: ...4 个性化设置 在功能菜单中 选择 咪头增益 菜单 再按菜单键进入咪头 增益菜单 在咪头增益菜单中有三种增益可供选择 高 中 低 选择不同的咪头增益可以达到不同的录音效果 在功能菜单中 选择 录音类型 菜单 再按菜单键进入录音 类型菜单 在录音类型菜单中有三种录音类型可供选择 PCM 降噪录音 PCM 录音 立体声录音 长时间录音 如果选择 的是 PCM 录音类型 则在 PCM 录音达到 1 小时后 机器自动保 存录音文件 然后重新进行下一个录音 相关参考图片如下 PCM 降噪录音 WAV 格式 高音质 比特率为 384kbps PCM 录音 WAV 格式 高音质 比特率为 768kbps 立体声录音 MP3 格式 高音质 比特率为 128kbps 长时录音 MP3 格式 普通音质 比特率为 8kbps 6 4 1 咪头增益 6 4 2 录音类型 ...

Page 15: ...音灯不再做任何提示 声控录音功能一旦被启用 录音过程中 当机器检测到有声音时 录音笔会自动开始录音 当未检测到声音时 录音笔在 3 秒后 将自动暂停录音 再次检测到声音时 录音笔又会自动开始录音 声控设置参考界面图片如下 在录音过程中 分段录音功能可在每 30 或 60 分钟自动将录 音文件分段保存并自动进入下一个文件录音 分段录音功能参 考界面如下图所示 监听功能打开后 你可以插入耳机检测是否有声音输入 监听 设置参考界面图片如下 6 4 3 录音指示灯设置 6 4 4 声控设置 6 4 6 分段录音 6 4 5 监听设置 ...

Page 16: ...中短按菜单键 弹出如下播放菜单列表 循环模式 音效模式 复读模式 复读次数 复读间隔 参考界面如下图 所示 音乐文件只能放在 MUSIC 文件夹里面进行播放 注意 音乐播放界面说明 7 1 播放模式 当选中其中一个菜单时 相应的区域将会变成白色 如上图选 中 循环模式 菜单 再按菜单键 将会进入到循环模式选择 菜单 你可以选择你需要的循环模式 参考界面如下图所示 目录播放 顺序播放选中目录的文件 全部播放完一遍当前目 录的文件后自动停止播放 目录循环 循环播放选中目录的文件 单曲循环 一直循环播放选中的一曲文件 随机播放 随机播放当前选中目录的文件 7 1 1 循环模式 ...

Page 17: ... 复读 设置复读起点 在播放状态下 短按 菜单 键进入播放菜单 然后短按 键或 键选择 复读模式 选项 再按 菜单 键返回到播放状态 但此时 LCD 屏中 A B 的 A 在闪烁 等待确定复读起点 A 短按 确定复读起点 A 设置复读终点 设置复读起点 A 后 此时 LCD 屏中 A B 的 B 在闪烁 再短按 键 设置复读终点 B 此时 LCD 显 在音效模式中 你可以使用 键或 键选择相应模式 再按菜单键确认 7 1 2 音效模式 7 1 3 复读模式 7 1 4 复读次数 7 1 5 复读间隔 示 A B 当复读图标固定 A B 开始 AB 点间的反复播 放 到达设定的次数后 闪烁图标 A B 中的 A 等待 确定起点 A 这时播放返回正常播放 如不再需要设定复读 可通过以下方式退出复读模式 取消复读 短按 播放 键 将之前设置 AB 复读取消 并暂 停播放 短按 停止 键 将之前设...

Page 18: ... 保持文件 按菜单键执行命令 在音乐播放停止界面下 短按菜单键 将会弹出功能菜单列表 功能包括 删除文件 删除全部 退出 下面为执行删除操作 的相关参考图片 产品支持 lrc 歌词文件 实现歌词与歌曲同步播放 在此界面下 按 键或 键改变播放速度的数值 7 2 变速播放 7 3 删除文件 7 4 歌词同步显示 歌词文件的名称与歌曲文件的名称需保持一致 如果当前歌曲有歌词文件匹配 则在屏幕左上方的音乐模 式图标下将出现歌词标志 如下所示 若没有歌词匹配 则没有该标志 如下所示 若有歌词匹配 长按 菜单 键进入歌词界面 接着会出现 歌词显示界面 若需退出时短按 菜单 键返回歌曲模式 注意 ...

Page 19: ...电台 选择删除电台 菜单删除当前保存的某一电台或选择删除所有电台菜单删除所 有保存的电台 机器最多只能保存 40 个电台 当保存的电台数 量多于 1 个后 短按 播放 暂停 键依次以递增的方式切换 所保存的电台 短按 停止 键依次以递减的方式切换所保存 的电台 如果你选择电台录音菜单 系统将会执行电台录音功能 电台录音参考界面如下图所示 在调频模式下 短按 或 键选择频点 短按菜单键 将会弹出如下子菜单 包括 自动搜台 保存电台 电台录音 删除电台 删除全部 当自动搜台菜单被选择时 系统将会自动搜索电台 当一个电 台被检测到时 这个电台将会被自动保存在列表中 自动搜索 完电台后将显示下图 ...

Page 20: ...信息 固件版本 格式化内存 恢复出厂设置 背光时间有五种时长可供选择 15 秒 30 秒 45 秒和恒亮 如果在设定的时间内没对机器做任何操作 背光将会自动灭 如果选择恒亮 背光将会恒亮 背光设置参考图片如下 如果在设定的时间内没对机器做任何操作 系统将会自动关机 如果时长设为 0 将不会自动关机 自动关机设置参考界面如下 在语言选择菜单中 你可以选择一种语言作为系统语言 语言 选择参考界面如下 在按键音设置菜单中 你可以选择打开或关闭按键音 系统默 认为打开 选择关闭按键音 在任何按键操作 按键音都不会 起作用 参考图片如下 9 1 背光时间 9 2 自动关机 9 3 语言选择 9 4 按键音 ...

Page 21: ...在此界面下 你可以设置系统的当前时间和系统时间显示格式 按停止键可以退出当前界面回到上一级菜单 例如 选择时间格式 设置时间格式 菜单 将会显示如下参 考界面 在此界面下 按 键或 键与 和 可以设 置实时时间 按 和 选择年 月 日 按 键 或 键改变相应位置数值 选择 设定时间 菜单 将会显示如下参考界面 在此界面下 按 键或 键与 和 可以设 置实时时间 按 和 选择时 分 按 键或 键改变相应位置数值 此界面下有两种时间显示格式可供选择即 12 小时制和 24 小时 制 系统默认的是 24 小时制 例如 选择 设置日期 菜单 将会显示如下参考界面 9 5 系统时间设置 9 6 定时录音设置 ...

Page 22: ... 设置日期 和 设置时间 当系 统时间到达设定时间时 系统将自动开始录音 录音时间长度设置功能 你可以设置 30 分钟 60 分钟 120 分钟或者没限定录音时长来 设置定时录音时长 时间长度设置参考界面如下 使用此功能 你可以随时查看存储器的空间总容量和剩余空间 参考图片如下 使用此功能 你可以查看此机器的软件版本 使用此功能 你可以格式化本机器内存 参考图片如下 使用此功能 你可以恢复到原出厂时的设置 参考图片如下 9 7 磁盘信息 9 8 固件版本 9 9 格式化内存 9 10 恢复出厂设置 ...

Page 23: ...录音 10 常见问题 此处列举了常见问题的解答 可帮助解决录音笔出现的简 单问题 如果故障仍无法排除 请咨询经销商或访问我们的官 方网站 www philips com support 电池电量已耗尽请及时充电 超出录音笔允许的最大文件数量或录音笔存储空间已满 请删 除部分录音或将其移至外部存储设备 超出录音笔允许的最大文件数量或录音笔存储空间已满 请删 除部分录音或将其移至外部存储设备 录音笔可能处于锁定模式 HOLD 将 锁定 开关键往下 推至中间位置 电池电量已耗尽 请充电 ...

Page 24: ...可以录音 23 小时 11 1 存储器 宽 高 深 33 4 102 0 8 8 mm 重量 含电池 60g PCM 降噪录音 PCM NOISE CUT 比特率为 384kbps 格式为 WAV PCM 录音 PCM 比特率为 768kbps 格式为 WAV 立体声录音 HQ 比特率为 128kbps 格式为 MP3 长时录音 SLP 比特率为 8kbps 格式为 MP3 温度 5 45 C 空气湿度 10 90 不凝结 操作系统 Windows 8 Windows 7 Vista XP 2000 Mac OS X Linux 接口 USB 2 0 接口 固体版本 2014 02 12 V1 0 11 2 尺寸和重量 11 4 录音 11 5 运行条件 11 3 系统要求 ...

Page 25: ...rics displayed 3 Your Voice Tracer digital recorder 5 Recording 6 Voice Mode 6 1 Voice Playback 6 2 Playing Modes 6 2 1 Repeat Modes 6 2 2 A B Replay 6 2 3 Replay times 6 2 4 Replay gap 7 1 1 Repeat 7 1 2 Equalizer 7 1 3 A B Replay 7 1 4 Replay times 7 1 5 Replay gap 6 3 Play speed 6 4 Delete Files 6 5 Record Settings 4 Start to use 4 1 Power On Off 4 2 Recharge 4 3 Keypad Lock HOLD Function 4 4 P...

Page 26: ...Weight 11 3 System requirement 11 4 Recording 11 5 Operating conditions 10 1 Cannot switch on the device 10 2 Cannot record with the device 10 3 The device cannot play recorded audio 9 1 Backlight Time 9 2 Auto off 9 3 Language 9 4 Key tone 9 5 System Time Setting 9 6 Record timer setting 9 7 Memory info 9 8 Firmware Version 9 9 Clear memory 9 10 Reset default setting ...

Page 27: ...upward to start recording turn off to save file Luminous capacitive touch buttons Touch the button icon on the touch panel can achieve the corresponding key functions Digital Noise Reduction Effectively filter the ambient noise in the recording environment to enable crystal clear recording This feature should only be used in noisy environment and it can not applied to Stereo record and SLP record ...

Page 28: ... Do not turn up the volume so high that you can t hear what s around you When in dangerous environment please carefully use the earphones or stop using Do not use the earphones when driving cycling and skateboarding to avoid traffic accident and violating laws and regulations Observe the following guidelines when using your headphones Attention Before using the device please read this User s Manua...

Page 29: ...Volume Up Menu Selection Buttons 5 Previous Track Fast Backward Menu Selection Buttons 6 Volume Down Menu Selection Buttons 7 Built in Microphone 8 Record Play Indicator 9 Display 10 Stop Button File Folder Switch Button 11 Next Track Fast Forward Menu Selection Buttons 12 Speaker 13 Record Button 14 Play Speed Button 15 Menu Button ...

Page 30: ...button for 1 or 2 seconds If the device cannot work normally please make sure the device is not out of power When the battery indicator is displayed please charge the device promptly Note Note Note Slide and hold POWER button for 2 seconds the device starts automatically and then displays PHILIPS as shown below Then the device displays the play stop interface Press MENU button for 2 to 3 seconds t...

Page 31: ...mpty to full repeatedly indicating that the device is recharging Under normal circumstance the device can be fully recharged in around 3 hours When the device is fully recharged the battery icon is full and the orange indicator light turns off The device can be used as a USB mass storage to conveniently store back up and move files Link the device to a computer with a USB cable The voice recorder ...

Page 32: ...32 When moving files into or out of the device please do not disconnect the device from the computer While the device is connected to a computer it cannot be operated manually Note ...

Page 33: ...f and the display shows Pause 4 Press PLAY button again to resume recording 5 Slide the recording switch to STOP to end recording the device returns to the play stop interface of current recorded file Recording Interface Reference Illustration of Recording Interface When the low battery icon occurs it means the battery is nearly empty and the system will automatically shut down If the device is re...

Page 34: ...st recording to make sure that the Voice Tracer settings are correct Each folder can store 99 files at most totally 396 files 99 files x 4 folders If the recording time exceeds the usable storage of the device or the number of files reaches the limit of 396 the recording stops Please delete part of recording or move it to a computer When recording please do not cut off power otherwise loss or dama...

Page 35: ...Play indicator green light is off press PLAY again to continue playing 7 When playing press or for a few seconds to fast forward or backward 6 Voice Mode Voice Playback Interface Specification On the main interface you can select the voice mode with or buttons and then shortly press the menu button to enter Please refer to the Voice Stop interface below After the audio file is selected press the P...

Page 36: ...ck For operations of Replay Times please refer to Replay Times section in Music playback For operations of Replay interval please refer to Replay gap section in Music playback Repeat one repeat continuously the current track Sequence Play tracks sequentially in selected folder After playing all the tracks in the current folder the playing stops automatically Repeat Folder Repeat tracks on a playli...

Page 37: ...ype Record lamp VA Control Listen In Auto divide Delete file Delete all See the below related reference pictures On the left side of the interface press or button to select individual or all files on the right side of the interface press and to choose YES to confirm deletion NO to keep file press MENU button to execute 2 MIC gain From the Functions Menu select MIC gain then press MENU button to en...

Page 38: ...l automatically pause recording after 3 seconds if voice is detected again the device resumes recording See the below related reference picture 6 The Listen In function After activating the Listen In function you can connect an earphone to listen if there s any sound output See the Listen in function setting interface picture as follows 4 Record lamp From the Functions Menu select Record lamp then...

Page 39: ...ture recording During the course of recording the auto divide feature recording enables recordings to be saved automatically into a new file every 30 or 60 minutes The auto divide feature recording interface is as follows ...

Page 40: ...ect the track you want by pressing and then press PLAY to play When playing shortly press the MENU button the below menu pops up with modes of Repeat Equalizer A B Replay Replay times and Replay gap See the interface as follows 7 1 Playing Mode As illustrated Repeat is selected then press MENU button to enter the Repeat Selection Menu You can choose the preferred repeat as follows Repeat one repea...

Page 41: ... selected folder In the Equalizer Mode you can choose mode with and buttons press MENU button to confirm Playing Menu The A in A B on LCD display blinking if you need to confirm the start point A shortly press to make confirmation Set the finish mark After setting mark A the B in A B on LCD display blinking shortly press to set the finish mark The A B is displayed on the LCD As the replay marks ar...

Page 42: ...or to turn up or turn down the play speed See the below related reference pictures On the play stop interface shortly press the MENU button the below menu pops up with modes Delete file Delete All and Exit See the below interface picture This product supports lrc lyrics files realizing the synchronous broadcasting of songs and lyrics 7 2 Playing Mode 7 3 Delete Files 7 4 The lyrics displayed Lyric...

Page 43: ...pear as follows if no lyrics match then no sign will be displayed as shown below If the lyrics match long press the menu button to enter the lyrics interface lyrics display will appear To exit short press menu button to return to the Music Mode 3 ...

Page 44: ...e FM record the system starts recording the radio see the interface picture below In the Radio Mode press or button to choose radio frequency press MENU button to display the following menu including Auto search Save Channel FM record Delete Delete All After Auto Search is selected the system automatically searches radio channels When a radio channel is found the channel will be saved automaticall...

Page 45: ...elect Constant the backlight is to be always See the below picture of Backlight Time setting If there s no operation on the device for a set time the system automatically shuts down If the time is set at 0 the system will not automatically shut down See the below auto off picture From the Language menu you can choose a language as system language See the following interface picture From the Key To...

Page 46: ...n this interface you can set the current system time and display format Press STOP return to the previous level submenu For example select Time Format to show the following menu There are 2 time formats to choose namely 12 hour format and 24 hour format The system default is 24 hour format Choose Set data the following interface will pop up Choose Set time the following interface will pop up On th...

Page 47: ...on See the below picture You can restore to default settings by using this function See the below picture On this interface you can set a start time for automatic recording For setting time please refer to System Time Setting The second function is the recording duration You can set the recording duration to 30 60 120 minutes or infinite The recording duration setting as follows 9 7 Memory info 9 ...

Page 48: ...te www philips com support The battery is empty please recharge promptly The maximum file number is exceeded or the device s memory is full Please delete some recordings or move them to other storage devices 1 The device may be in lock mode HOLD Slide the HOLD switch to OFF position 2 The battery is empty please recharge 10 1 Cannot switch on the device 10 2 Cannot record with the device 10 3 The ...

Page 49: ...ged battery approx 23 hours Wide Long High 33 4 102 0 8 8 mm Weight with battery 60g PCM REC NOISE CUT REC PCM REC NOISE CUT bit rate 384kbps format WAV PCM REC PCM bit rate 768kbps format WAV Stereo REC HQ bit rate 128kbps format MP3 Long REC SLP bit rate 8kbps format MP3 Temperature 5 45 C Humidity 10 90 no condensation Operating System Windows 8 Windows 7 Vista XP 2000 Mac OS X Linux Port USB F...

Page 50: ...VTR6600 ...

Page 51: ... 2014 Speech Processing Solutions GmbH 版权所有文档版本1 0 2014 05 10 ...

Reviews: