background image

24

•    La luz roja parpadeará dos 

veces después de probar el 

primero o el último código de 

cada conjunto de 10. 

7.  Use el control remoto para volver 

a encender el dispositivo. Pruebe 

los botones en el control para 

ver si el dispositivo responde 

como debería. Si los botones no 

accionan el dispositivo, vuelva al 

Paso 2 y repita este proceso para 

buscar un código que sea mejor.

8.  Repita este proceso para cada 

dispositivo que desee controlar.

Control de dispositivos integrados

En algunos dispositivos integrados (p. ej., 

TV/VCR, TV/DVD, DVD/VCR, etc.) deberá 

programar dos botones diferentes para 

controlar ambas partes del dispositivo. Por 

ejemplo, si tiene un TV/DVD integrados, es 

probable que tenga que programar un código 

en el botón de 

TV

 para controlar la parte del 

TV Y un código separado en el botón de 

DVD


para controlar la parte del DVD.

  Programación del control remoto

Summary of Contents for SRP2014C/27

Page 1: ...User manual v1 12 17 Audio Video SRP2014C 27 SRP2014H 27 SRP9243B 27 ...

Page 2: ...entification 11 Reset to Factory Settings 11 Troubleshooting 12 Warranty 13 FCC Statement 14 Congratulations on your purchase of this Philips branded Universal Remote Control This remote is capable of operating thousands of audio video devices including TVs Blu ray DVD players streaming media players sound bars cable receivers and more Table of Contents For Remote Help byjasco com urccodes ...

Page 3: ... operating properly replace the batteries with new ones Battery Precautions Do not mix old and new batteries Do not mix alkaline standard carbon zinc or rechargeable Ni Cd Ni MH etc batteries Always remove old weak or worn out batteries promptly and recycle or dispose of them in accordance with local and national regulations Battery Saver Your remote automatically turns off if the buttons are depr...

Page 4: ...4 Button Functions SETUP OK INPUT DVD TV STR AUD ENTER 1 1 2 2 3 3 4 4 5 5 6 6 7 7 8 8 9 9 0 0 A B C D VOL CH L A S T STREAM EXIT 7 13 14 17 19 20 21 18 16 3 4 1 8 8 9 9 11 11 2 6 5 15 10 12 ...

Page 5: ...screen menu 10 Record play stop rewind fast forward pause 11 Numbers Enter numbers for direct channel selection 12 Dash Use to select digital channels e g 4 1 13 Enter key Some devices require enter to be pressed after channel selection 14 ABCD Access additional features for DVRs cable and satellite receivers 15 DVD Blu ray open close open close a player or List features on cable satellite receive...

Page 6: ...he Code List included with your remote Find the section for the type of device you wish to control for example TV STR DVD AUD Locate the brand of your device and circle all the remote codes for the brand 2 Press and hold down the SETUP button on the remote until the red light on the remote control turns on Release the SETUP button The red light will remain on NOTE The red light will either be a sm...

Page 7: ...your device There may be another code in the Code List that controls more functions Test other codes in the Code List for more functionality If you do not find a remote code that works your device or there are no codes in the Code List for your device use the Auto Code Search method in the next section to program your remote For combination devices such as a TV DVD combo or TV VCR combo you may ha...

Page 8: ...e you wish to control for example TV DVD STRM AUX The red light will blink once and remain on 4 With the remote pointed at the device press and release the POWER button on the remote The remote will send 10 different codes to the device The red light will blink once for each code and remain on after sending the 10 codes Did the device turn off If YES go to Step 5 If NO repeat Step 4 to test the ne...

Page 9: ...h of 10 codes The red indicator light will flash 2 times after testing the first or last code in each batch of 10 7 Use the remote to turn the device back on Test the buttons on the remote to see if the device responds as you would expect If the buttons do not operate the device return to Step 2 and repeat this process to search for a better code to operate the device 8 Repeat this process for eac...

Page 10: ...ght will remain on 2 Press and release the device button TV AUD etc on the remote for the device you wish to control the volume 3 Press and release the MUTE button 4 Press and release the VOL button The red light will blink twice and turn off Disabling the Primary Audio Control 1 Press and hold down the SETUP button on the remote until the red light on the remote control turns on Release the SETUP...

Page 11: ...es This is the number corresponding to the first digit of the code Repeat the process by pressing the 2 3 and 4 buttons for the remaining digits 5 Press and release the ENTER button to exit this mode Code Identification Reset to Factory Settings 1 Press and hold down the SETUP button on the remote until the red light on the remote control turns on Release the SETUP button The red light will remain...

Page 12: ...L for cable box Try programming the remote with a different code See Direct Code Entry section Remote may not be compatible with your device Remote does not operate some features of your device Sometimes a particular code might operate a few features but not all Try programming the remote with a different code from the Code list See Direct Code Entry section Remote may not be able to operate all f...

Page 13: ...ur Customer Information Center at 1 844 816 0320 to get a Return Authorization Number RA shipping instructions and a prepaid return address label 2 Return the remote freight prepaid to us Remotes returned to us must have an RA included in the mailing address to be accepted 3 The original purchaser will be asked to send the remote a copy of the sales receipt for the product your name address phone ...

Page 14: ...nst harmful interference in a residential installation This equipment generates uses and can radiate radio frequency energy and if not installed and used in accordance with the instructions may cause harmful interference to radio communications However there is no guarantee that interference will not occur in a particular installation If this equipment does cause harmful interference to radio or t...

Page 15: ...15 Manual de usuario v1 12 17 Audio Video SRP2014C 27 SRP2014H 27 SRP9243B 27 ...

Page 16: ...stablecimiento de la configuración de fábrica 28 Resolución de problemas 29 Garantía 30 Declaración de la Comisión Federal de Comunicaciones FCC 31 Felicitaciones por haber comprado este control remoto universal marca Philips Este control remoto puede operar miles de dispositivos de audio video como TV reproductores de DVD Blu ray reproductores de multimedia en línea barras de sonido receptores de...

Page 17: ... normalmente coloque pilas nuevas Precauciones respecto de las pilas No utilice pilas usadas y nuevas al mismo tiempo NO combine el uso de pilas alcalinas comunes de tipo carbono cinc o recargables Ni Cd Ni MH etc Siempre quite las pilas gastadas o agotadas de inmediato y recíclelas o elimínelas de conformidad con las normas locales y nacionales Ahorrador de pilas El control remoto se apaga automá...

Page 18: ...18 SETUP OK INPUT DVD TV STR AUD ENTER 1 1 2 2 3 3 4 4 5 5 6 6 7 7 8 8 9 9 0 0 A B C D VOL CH L A S T STREAM EXIT 7 13 14 17 19 20 21 18 16 3 4 1 8 8 9 9 11 11 2 6 5 15 10 12 Funciones de los botones ...

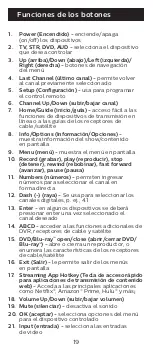
Page 19: ...ast forward avanzar pause pausa 11 Numbers números permiten ingresar números para seleccionar el canal en forma directa 12 Dash raya Se usa para seleccionar los canales digitales p ej 4 1 13 Enter en algunos dispositivos se deberá presionar enter una vez seleccionado el canal deseado 14 ABCD acceder a las funciones adicionales de DVR receptores de cable y satélite 15 DVD Blu ray open close abrir c...

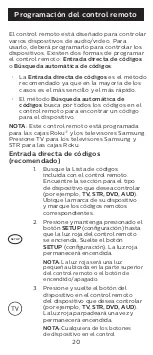
Page 20: ...ores Samsung y STR para las cajas Roku Entrada directa de códigos recomendado 1 Busque la Lista de códigos incluida con el control remoto Encuentre la sección para el tipo de dispositivo que desea controlar por ejemplo TV STR DVD AUD Ubique la marca de su dispositivo y marque los códigos remotos correspondientes 2 Presione y mantenga presionado el botón SETUP configuración hasta que la luz roja de...

Page 21: ...accionan el dispositivo vuelva al Paso 2 y use el siguiente código que marcó para dicho dispositivo 6 Repita estos pasos para cada dispositivo que desee controlar Notas de programación Es posible que algunos códigos solo ejecuten algunas funciones del dispositivo Es probable que haya otro código en la Lista de códigos que ejecute más funciones Pruebe otros códigos de la Lista de códigos para obten...

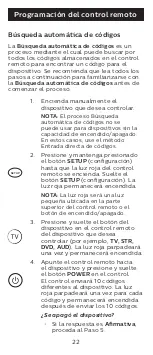
Page 22: ... el control remoto del dispositivo que desea controlar por ejemplo TV STR DVD AUD La luz roja parpadeará una vez y permanecerá encendida 4 Apunte el control remoto hacia el dispositivo y presione y suelte el botón POWER en el control El control enviará 10 códigos diferentes al dispositivo La luz roja parpadeará una vez para cada código y permanecerá encendida después de enviar los 10 códigos Se ap...

Page 23: ... mismo botón de dispositivo que oprimió en el Paso 3 Esta acción almacenará el código en el control remoto Proceda al Paso 7 Si la respuesta es Negativa siga oprimiendo y soltando el botón VOL hasta que se apague el dispositivo para probar los otros 9 códigos del Paso 4 Asegúrese de esperar aproximadamente tres 3 segundos después de cada presión del botón VOL para que el dispositivo tenga tiempo d...

Page 24: ...eso para buscar un código que sea mejor 8 Repita este proceso para cada dispositivo que desee controlar Control de dispositivos integrados En algunos dispositivos integrados p ej TV VCR TV DVD DVD VCR etc deberá programar dos botones diferentes para controlar ambas partes del dispositivo Por ejemplo si tiene un TV DVD integrados es probable que tenga que programar un código en el botón de TV para ...

Page 25: ...roja permanecerá encendida 2 En el control remoto presione y suelte el botón TV AUD etc que corresponda al tipo de dispositivo para el que desea controlar el volumen 3 Presione y suelte el botón MUTE silenciar 4 Presione y suelte el botón VOL La luz roja parpadeará dos veces y se apagará Deshabilitar el control del audio principal 1 Presione y mantenga presionado el botón SETUP configuración hasta...

Page 26: ...el número correspondiente al primer dígito del código Repita el proceso presionando los botones 2 3 y 4 para los dígitos restantes 5 Presione y suelte el botón ENTER para salir de este modo button to exit this mode Identificación de códigos Restablecimiento de la configuración de fábrica 1 Presione y mantenga presionado el botón SETUP configuración hasta que la luz roja del control remoto se encie...

Page 27: ...ntrol remoto usando un código distinto Consulte la sección Entrada directa de códigos Es posible que el control remoto no sea compatible con su dispositivo Algunas funciones de su dispositivo no funciona con el control remoto A veces un código puede servir para algunas funciones del dispositivo pero no todas Intente programar el control remoto con un código distinto de la lista de códigos Consulte...

Page 28: ...0 para obtener un número de autorización de devolución RA así como las instrucciones para el envío y una etiqueta prepagada con la dirección para la devolución Envíenos el control remoto con franqueo pagado A fin de que se acepten los controles remotos devueltos deben incluir el número RA en la dirección postal Se le solicitará al comprador original que envíe el control remoto y una copia del reci...

Page 29: ...zonable contra interferencias perjudiciales en instalaciones residenciales Este aparato genera usa y puede irradiar energía de radiofrecuencias y si no se instala y usa según las instrucciones puede provocar interferencia perjudicial a las radiocomunicaciones No obstante no hay garantías de que no ocurrirá interferencia en una instalación en particular Si este aparato provoca interferencia perjudi...

Page 30: ......

Reviews: