background image

6

Note


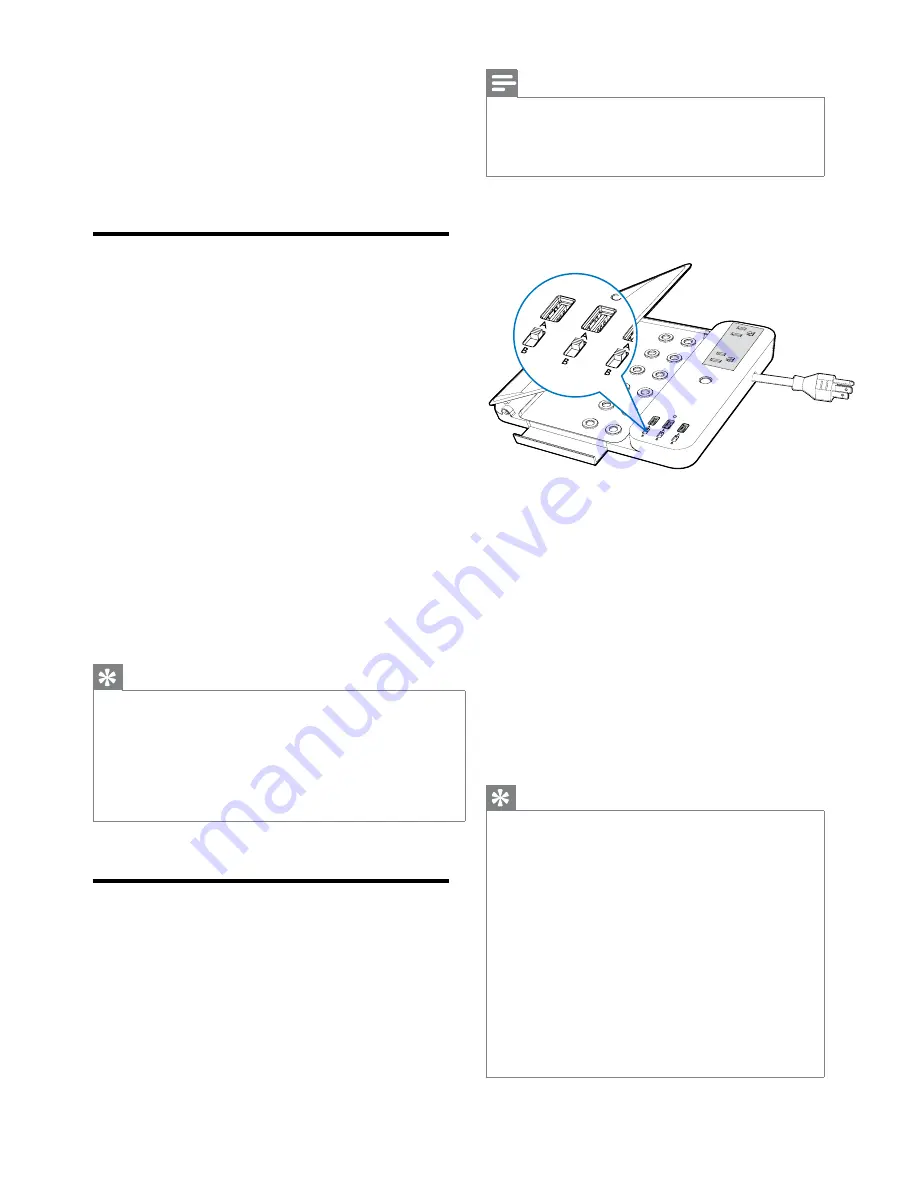
Each USB charging port is controlled by a related USB 

charging configuration switch. You can set the switch to 

for charging iPod, iPhone and iPad and set the switch 

to 

B

 for other USB devices.

Set the USB charging configuration switch 

to 

A

 or 

B

.


Connect your device to the home charging 

station with a proper USB cable (not 

included).

Put your device on the non-slip panel or 

the slide-out stray.

Press 

POWER

 button to turn the home 

charging station on.


»

The LED turns on.


»

The connected device is charged for 

six hours continuously.

Lift up the non-slip panel for easier viewing.

Tip


The home charging station fully turns off automatically 

after six hours. To ensure a full six-hour charging cycle, 

press 

POWER

 button when a new device is plugged 

into this home charging station.


If one device is fully charged within six hours and 

another device needs to be charged, you can press 

POWER

 button, the charging station starts to work for 

another six hours continuously and the LED flashes for 

three times to confirm.


If your device is not charged, try to unplug the USB 

cable, change the related USB charging configuration 

switch, then plug in the USB cable again.


In case a device can only be charged with its original 

adaptor, you can charge from an AC outlet of this 

charging station.

4  Charge your 

devices

Charge from AC outlet

There are two AC outlets in this home charging 

station. 

Plug a proper charging adaptor (not included) 

into the AC outlet.

Connect your device to output of the 

charging adaptor.

Put your device on the non-slip panel or the 

sliding stray.

Press 

POWER

 button to turn the home 

charging station on.


»

The LED turns on.


»

The connected device is charged for six 

hours continuously.

Lift up the non-slip panel for easier viewing.

Tip


The AC output fully turns off automatically after six hours. To 

ensure a full six-hour charging cycle, press 

POWER

 button 

when a new device is plugged into this home charging station.


If one device is fully charged within six hours and another 

device needs to be charged, you can press 

POWER

 button, 

the home charging station starts to work for another six hours 

continuously and the LED flashes for three times to confirm.

Charge from USB port

There are three USB charging ports in this home 

charging station. 

EN

Summary of Contents for SPS6038A

Page 1: ...User manual Register your product and get support at www philips com welcome SPS6038A ...

Page 2: ......

Page 3: ...tains important information about the Philips home charging station Read it carefully before you start the installation and setup Warning Do not operate your home charging station near the rain or wet areas Do not operate your home charging station if liquid of any kind is spilled onto or inside the unit Do not disassemble or repair Do not expose your home charging station to direct sunlight or pl...

Page 4: ... to Philips To fully benefit from the support that Philips offers register your product at www philips com welcome Overview a Non slip panel b POWER button c AC outlet d Power cord e LED f USB charging port g USB charging configuration switch h Cable clip i Slide out tray e EN ...

Page 5: ...ning To avoid any potential hazard use the power source supplied by your local authorities 1 Put the home charging station on a flat surface 2 Plug the home charging station into a properly grounded outlet E ng li s h EN ...

Page 6: ...ice is not charged try to unplug the USB cable change the related USB charging configuration switch then plug in the USB cable again In case a device can only be charged with its original adaptor you can charge from an AC outlet of this charging station 4 Charge your devices Charge from AC outlet There are two AC outlets in this home charging station 1 Plug a proper charging adaptor not included i...

Page 7: ...e clips 1 Lift up the non slip panel 2 Route your cables through the cable clips 3 Fix the cable clips onto the home charging station freely Use the slide out tray The slide out tray can hold the charged device securely 1 Slide out the tray 2 Put the charged device on the tray E ng li s h EN ...

Page 8: ...problems that arise will not be remedied under this warranty These warranties extend only to the original purchaser of the product and are not transferable To exercise your rights under this warranty you must provide proof of purchase in the form of an original sales receipt that shows the product name and the date of purchase For customer support or to obtain warranty service please visit our web...

Page 9: ......

Page 10: ... 2012 Koninklijke Philips Electronics N V All rights reserved SPS6038A_UM_17_V1 1 ...

Reviews: