86BDL3050Q
41
The first ‘p’ defines play mode is immediately stop playing when
boot complete.
The number after ‘p’ defines repeat mode
-
specifying 0 would make the part loop indefinitely till the
device has boot complete.
-
specifying 1 would make the part playback once.
The next number defines the delay time(ms). For example, if set
10, when all image files has been playback, system will delay 10ms.
The part0 and part1 are image folder name.
The above example, the boot animation will play at a resolution of 1920
by 1080 pixels, at a frame rate of 30 fps, starting with the contents of
part0 folder and after playing them in one loop, switching to contents
of part1 folder and playing them continuously till the device boot
complete.
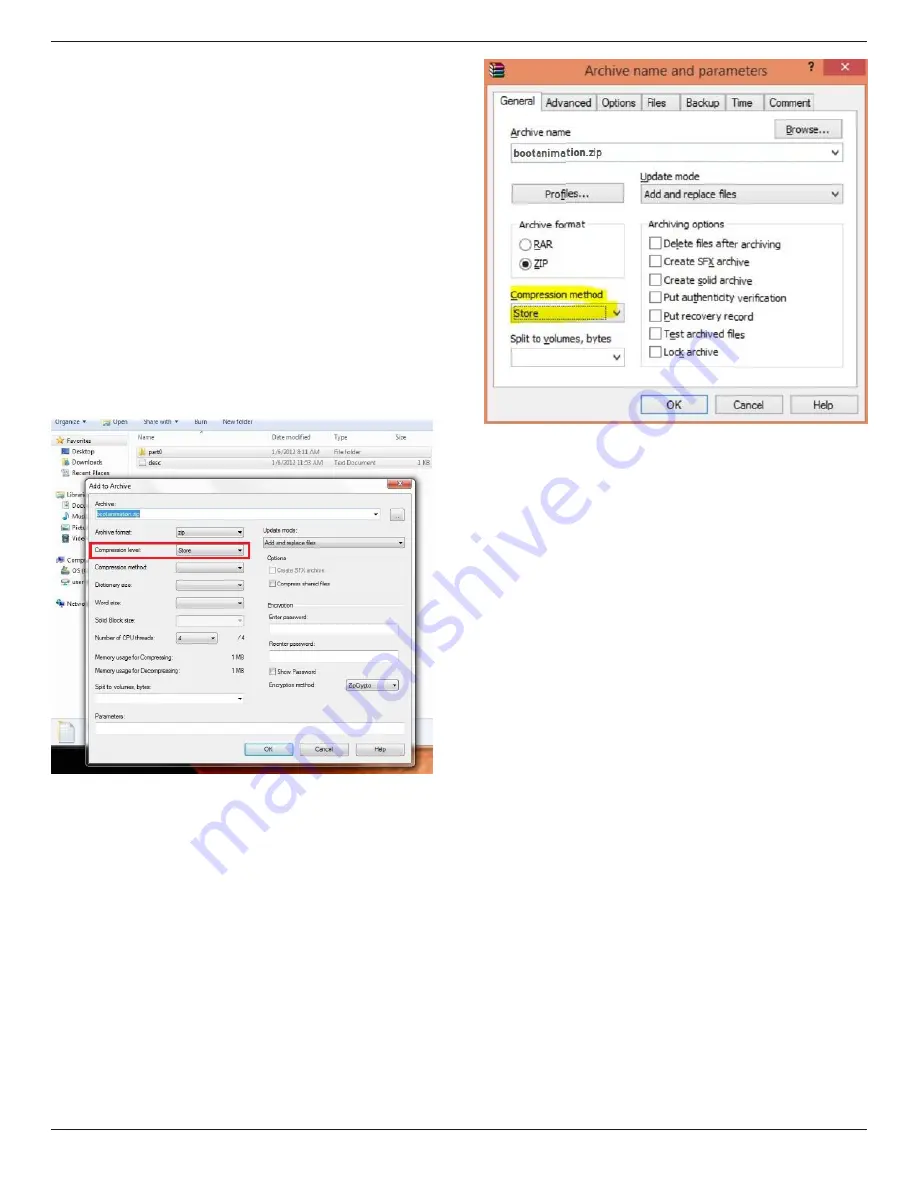
3. Zip file:
Select everything (image folders and desc.txt) inside the Bootanimation
folder and zip them into a new
uncompressed zip archive
using your
favorite compression utility like 7zip or WinRAR and so on.
If using 7zip, set compression level to “Store”
If using WinRAR, set “Compression method” to “Store”
or else bootanimation WON’T work
4. Apply the custom bootanimation
Procedure:
(1). Put your custom bootanimztion.zip file into external SD card or
USB and plug into Phillips PD platform.
(2.) Make sure the Logo option is enabled.
Press Home key on RCU: OSD menu -> Configuration 2 -> Logo
-> set “User”
(3.) Press combination key “Home + 1888” on RCU to go to Admin
mode:
Settings -> Signage Display -> GENERAL SETTINGS -> Boot Logo
(4). The system will find the bootanimation.zip in external SD card or
USB automatically and copy it to /data/local
(5.) Once step 1~4 has been done, restart the system. The new
customized boot animation should be displayed during boot time.


