


75BDL4150D
51
DDC/CI (Command Interface) specifies a means for a computer to
send commands to the monitor, as well as receive sensor data from the
monitor, over the bidirectional link such as DDC2Ab/Bi/B+.
Specific commands to control monitors are defined in a separate
Monitor Control Command Set (MCCS) standard.
DDC/CI monitors are sometimes supplied with an external color
sensor to allow automatic calibration of the monitor’s color balance.
Some tilting DDC/CI monitors support an auto pivot function, where
a rotation sensor in the monitor enables the operating system to keep
the display upright as the monitor is moved between its portrait and
landscape positions.
The following DDC/CI commands should be supported via command
line:
No.
Commands
No.
Commands
1
Set Brightness
6
Get Brightness
2
Set Contrast
7
Get Contrast
3
Set Red Gain
8
Get Red Gain
4
Set Green Gain
9
Get Green Gain
5
Set Blue Gain
10
Get Blue Gain
NOTE: This item is functional for VGA input only.
HDMI with One Wire
CEC control.
• {
Off
}
- Disable CEC.(Default)
• {
On
} - Enable CEC.
Auto signal detection
Choose to let the display detect and display available signal sources
automatically.
• {
Off
} - Once a signal is connected, it can only be selected manually.
If the selected input is no signal, set the display to display the image
automatically according to the search order of each option.
The options are: {
All
}
/
{
PC source only
}
/
{
Video source only
}
/
{
Failover
}
• {
All
}: DP
/
HDMI1
/
HDMI2
/
HDMI3
/
DVI
/
VGA
/
Component
/
OPS.
• {
Failover
}
-
Failover 1-12: User-defined setting. Default: HDMI.
OPS settings
Set the OPS configuration under each power condition.
• {
Auto
} - After selecting {
Card OPS
} for video source input, the
OPS will be set to off when the display power is set to off, or set to
on when the display power is set to on. When set to other video
source inputs, the OPS will always be set to on.
• {
Always off
} - The OPS will always be set to off.
• {
Always on
} - The OPS will always be set to on.
Language
Select the language used in the OSD menu.
The options are: English/Deutsch/
简
体中文
/Français/Italiano/Español/
Pyccкий/Polski/Türkçe/
繁體中文
/
日本語
/Português/
/Danish/
Svenska/Finnish/Norsk/Nederlands.
OSD Transparency
Adjust the transparency of the OSD.
Value: Off(0)-100, default Off.
USB cloning
Import/Export user settings.
• {Import}: Import user settings from USB flash device.
• {Export}: Back up user settings to USB flash device.
Advanced option reset
Reset all settings except {
Date and Time
} in the
Advanced option
menu
to factory preset values.
1. Press [
OK
] or
[ ]
button to enter the submenu.
2. Press
[ ]
or
[ ]
button to select {
Reset
} and press the [
OK
]
button to restore settings to factory preset values.
3. Press the [
] button or select {
Cancel
} and press the [
OK
]
button to cancel and then return to the previous menu.
APM
Power save setting.
• Off (TCP off/WOL off)
- not support WOL / not support wake up
on TCP socket.
• Mode 1 (TCP off/WOL on)
- support WOL / not support wake
up on TCP socket.
• Mode 2 (TCP on/WOL off)
- not support WOL / support wake up
on TCP socket.
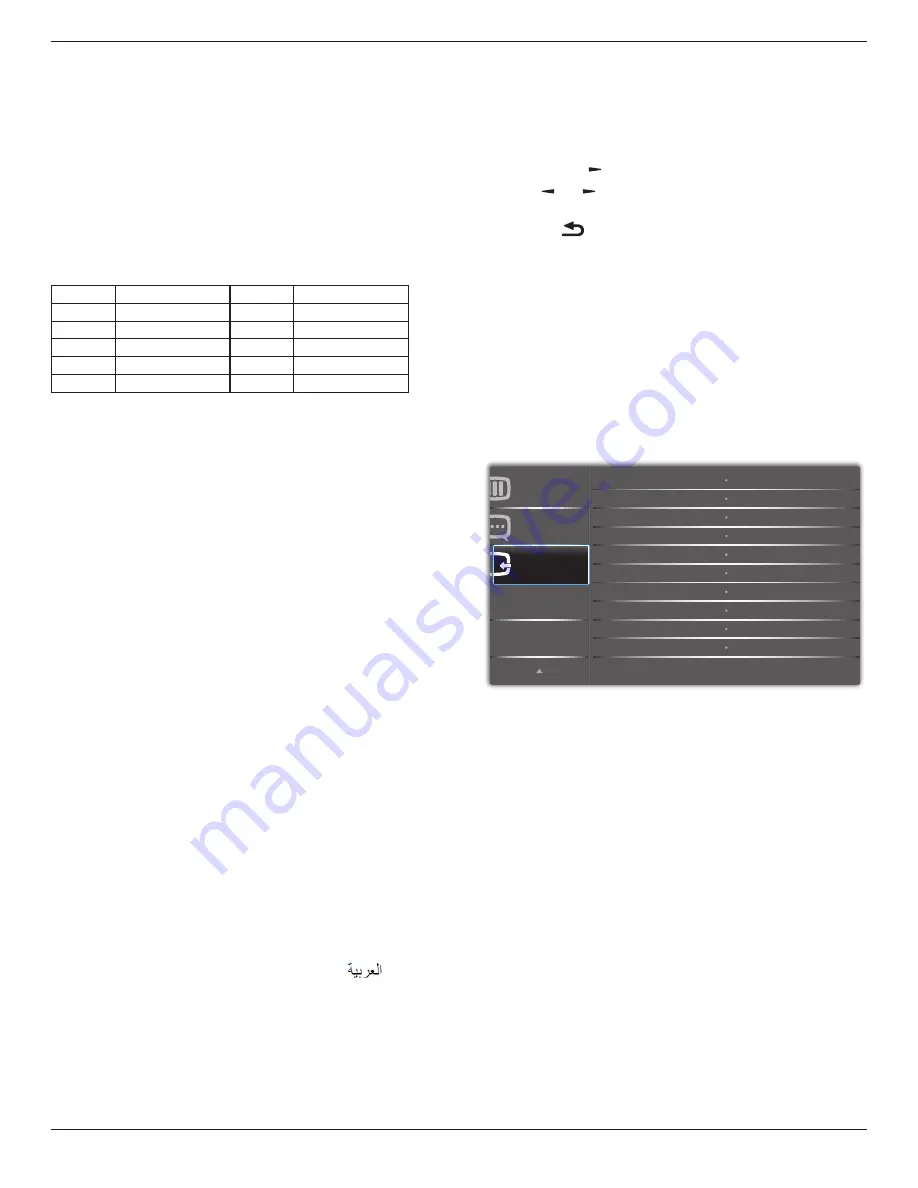
6.2.8. Input menu
Input
Advanced option
Configuration 2
Sub 1
Sub 2
Audio source
PIP audio
Video source
Sub 3
Card OPS audio
Input reset
VGA
VGA
VGA
VGA
Digital
Cancel
Audio 1
Main
Video source
Select a video input source.
Choose from:
{Displayport} / {DVI-D} / {VGA} / {HDMI1} / {HDMI2} /
{HDMI3} / {Media Player} / {BROWSER} / {SmartCMS} / {PDF Player}
/ {Custom} / {Card OPS}.
Sub 1
Select the input signal for the sub Win1 picture.
Choose from:
{Displayport} / {DVI-D} / {VGA} / {HDMI1} / {HDMI2} /
{HDMI3} / {Media Player} / {BROWSER} / {SmartCMS} / {PDF Player}
/ {Custom} / {Card OPS}.
Sub 2
Select the input signal for the sub Win2 picture.
Choose from:
{Displayport} / {DVI-D} / {VGA} / {HDMI1} / {HDMI2} /
{HDMI3} / {Media Player} / {BROWSER} / {SmartCMS} / {PDF Player}
/ {Custom} / {Card OPS}.


