— 36 —
A
DVANCED
O
PERATIONS
(C
ONTINUED
)
When two programmes
overlap
The Prog-
ramme
Review
screen will
appear with
a magenta
line blink-
ing on the
newly set
timer recor-
ding, while the other overlapped
programme blinking.
1 Press
5
or
∞
to move
the mage-
nta line
among the
two over-
lapping
program-
mes.
2 Press
OK/STATUS
to view
the detail information of the
programme you want to change.
3 Go to step 4 through 9 of “Timer
Recording” on page 35 to modify the
selected programme. To cancel any
timer recording, press
CLEAR
.
• If you do not modify the overlapping
programmes, the VCR will record the
earlier programme completely. Only the
remaining part of the later programme
number will be recorded.
If the START time for the two pro-
grammes are same, the lower programme
number will be recorded.
DAILY PROGRAM (MON-FRI)
PROGRAM
1
TV PROG +/-
12
START+/-
08:00
STOP +/-
10:00
REC SPEED
SP
VPS/PDC
ON
DATE +/-
21/07/00
FRIDAY
ERASE : CLEAR
CONFIRM : OK
END : TIMER
PR CH START STOP
DATE
1 12
08:00 10:00 D21/07
2 25 11:00 13:00 10/08
3 03
09:00 11:00W14/07
4 45 03:00 03:15W15/10
5
6
7
8
SELECT :
5∞
CONFIRM : OK
Useful function for Timer
Recording: Auto Tape Speed
With this function activated, the VCR can
change the tape speed and record the
programme in LP mode if not enough
tape remains for recording in SP mode.
1 Press
VCR
.
2 Press
MENU
.
3 Press
5
or
∞
to select “VCR SET
UP”, then press
OK/STATUS
.
4 Press
5
or
∞
to select “AUTO SP
=
LP TIMER.”
5 Press
4
.
Each time you press the button, the
setting changes.
ON:
Select this to allow the VCR to
change the tape speed from SP to
LP when there is not enough tape
length remaining.
OFF:
Select this not to allow the VCR to
change the tape speed.
6 Press MENU to exit from the menu
operations.
Notes:
• The Auto SP
=
LP Timer feature is not
available during OTR (One Touch
Recording) and the feature will not work
properly with any tapes longer than E-
180 or with some tapes of shorter lengths.
• If you have programmed the recorder to
timer-record 2 or more programmes, the
second programme and those hereafter
may not fit on the tape if you set “AUTO
SP
=
LP TIMER” to “ON”. In this case,
make sure the mode is not engaged, then
set the tape speed manually during timer
programming.
• In order to ensure that the recording fits on
the tape, this feature may leave a short non-
recorded section at the end of the tape.
• There may be some picture noise and sound
disturbance at the point on the tape where
the recorder switches from SP to LP mode.
• If you perform timer recording with both
VPS/PDC and the Auto SP
=
LP Timer
activated, and the programme goes
beyond its originally scheduled length,
there may be times when the programme
cannot be recorded in its entirety.
Turbo Timer
This function allows you to set the
timer recording program without going
through the regular set up with the on
screen. The extent of programming is
24 hours from the current time.
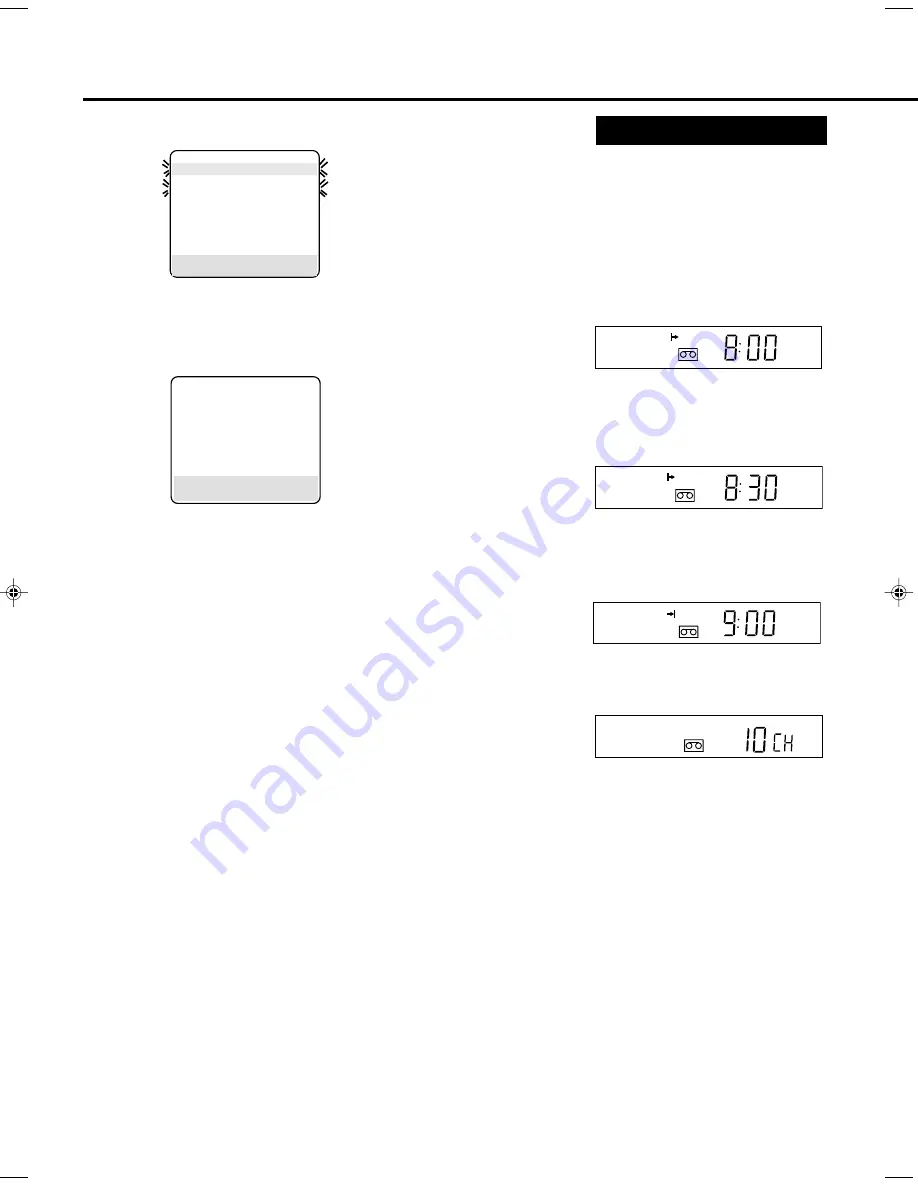
1 Insert a tape into the VCR and press
the “TURBO TIMER” button on the
remote control. Current time will
appear on the display panel.
2 To change the START time, press the
5
or
∞
( if you press and hold the
button, the time changes in
30 minute increments) then press
OK/STATUS.
3 To change the STOP time, press the
5
or
∞
( if you press and hold a
button, the time changes in
30 minute increments) then press
OK/STATUS.
4 To change the CHANNEL position,
press the
5
or
∞
, then press
OK/STATUS.
5 The data input will be memorized
and the Turbo Timer mode will be
finished so that normal display
appears.
6 Turn off the VCR.
Notes:
• To exit Turbo Timer mode at any step,
press the TURBO TIMER button.
• If “Err” appears on the display panel,
all eight programmes have been set
and Turbo Timer will not proceed. To
remove the error message, press the
TURBO TIMER button again.
• Settings of Turbo Timer will appear
on the display panel only and not on
the screen.
• Programmes Overlap Warning does
not function with Turbo Timer.
• DAILY or WEEKLY programming
are not available on Turbo Timer.
• Tape speed and VPS/PDC recording
mode (
✈
P.37)
can be selected
anytime during steps 2 through 4.
SP
VCR
SP
VCR
SP
VCR
SP
VCR
VR1600/58-EN
16/08/2000, 14:57
36


