background image

77

EN

Start time

: select a start time using the numerical

keys or the 

u

or 

i

key to modify the default time

in steps of 

1

hour.

End Time

: select an end time using the numerical

keys or the 

u

or 

i

key to modify the default time

in steps of 

1

hour.

Timer Type

: select Recording or Reminder

Frequency

: select Once for a single recording at

the selected time and date,

Daily

to record once

every day,

Weekly

to record once every week,

Monday to Friday

, or 

Monday to Saturday

using the 

u

or 

i

key.

5

Press 

OK

to confirm, or 

EXIT

to go back to the

timer list screen.

When a recording timer is active, you cannot change
digital channels, but you can switch to analogue TV
using the TV/STB key and zap through analogue channels.

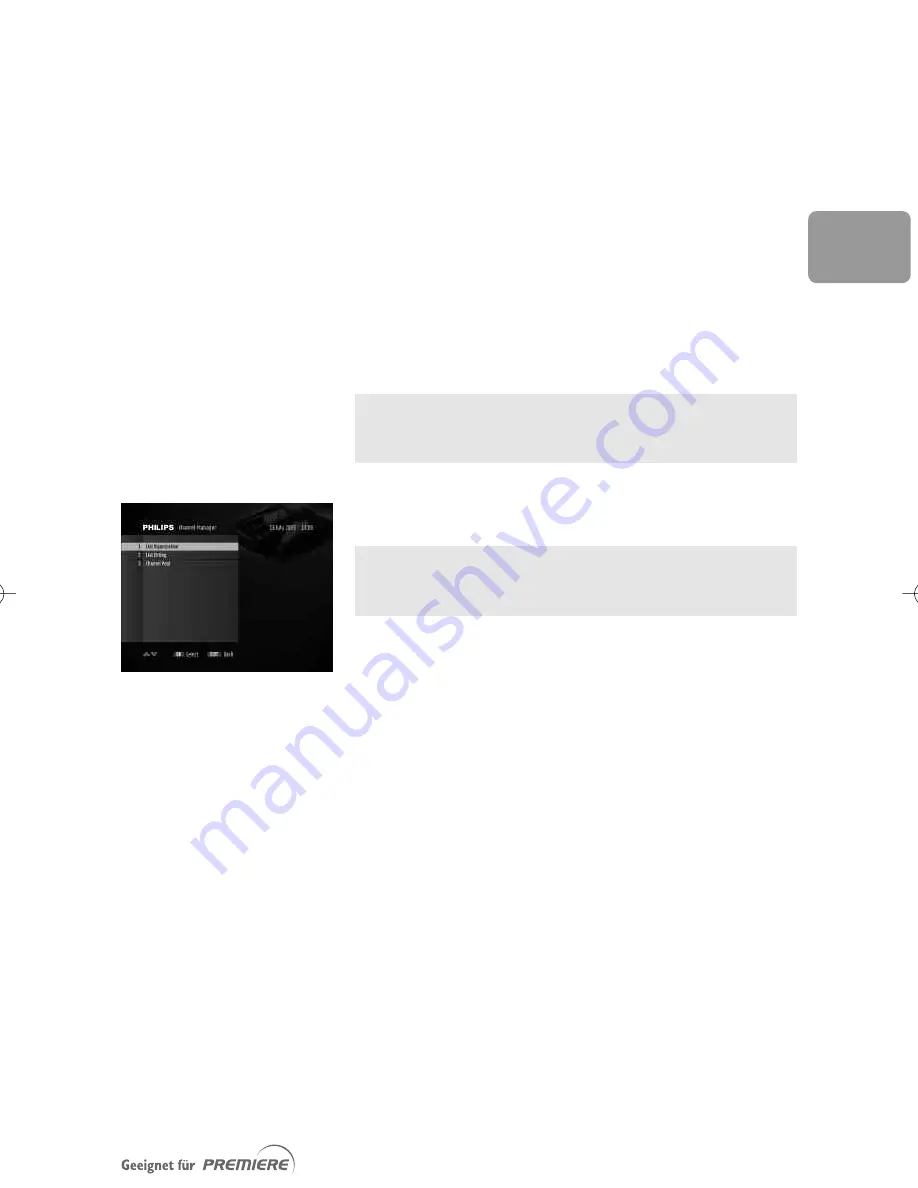
10.2 Channel Manager

During installation, a Main TV channel list and bouquet
lists are built up according to your cable TV supplier’s
presets.

The Main TV or Radio list is made up of three sub-sets:

• a list you can customize according to your

preferences: channels 

1

to 99 (this list is empty

after first installation)

• a list containing all Premiere channels if available:

channels 

1

00 to 

1

99

• a list containing all the channels found: from

channel 200 onwards.

The Channel Manager sub menu includes the following items:

o List Organization
o List Editing
o Channel Pool

10.2.1 List Organization

This item is used to activate or de-activate bouquet lists.

1

Select TV or Radio channel lists using the

TV/RADIO

key.

2

Scroll to the list you want to activate or de-activate
using the 

ty

keys.

3

Press the red colour key to activate or de-activate
the list.

4

Press 

EXIT

to confirm and exit.

DCR 2021_Premiere_indice 1b  7/03/06  11:45  Page 77

Summary of Contents for PREMIERE DCR 2021

Page 1: ...DCR 2021 Benutzerhandbuch 2 DE User manual 48 EN ...

Page 2: ...e variety of theme channels for all your moods and interests with documentaries interactive advice programmes children s programmes music channels and adult channels as well as the best programmes for fans of sci fi thrillers action and classic movies On PREMIERE DIREKT you can easily book by telephone SMS or via the Internet the best current films exclusive sports events special events and adult ...

Page 3: ...driver The batteries supplied do not contain hazardous substances such as Mercury Cadmium or Lead However they must not be disposed of with your household waste but to a local separate collection system 5 Reconnect your TV set and recorder to the mains Do not connect your receiver to the mains yet 6 Switch on your TV set and select a channel 7 Plug the receiver s power supply cord into the mains T...

Page 4: ...ss OK a new screen appears indicating that a search for new software is in progress 12 Press EXIT to stop searching and tune the receiver to the first channel in the main TV list 13 Alternatively wait for software detection and then proceed as described in paragraph 10 5 5 2 For detailed information on first installation see chapter 5 ...

Page 5: ...al rules and do not dispose of your old products with your normal household waste The correct disposal of your old product will help prevent potential negative consequences for the environment and human health The Material recyclability symbol affixed on package cardboard and user manual means these parts are recyclable So do not dispose of them with your normal household waste The Material recycl...

Page 6: ...s such as newspapers table clothes curtains etc Do not install this equipment near any heat sources such as radiators stoves or other apparatus that produce heat Protect it from direct sunlight When installing the receiver ensure there is a gap of approximately 2 cm around it to enable air to circulate freely and prevent overheating Leave access to the AC adaptor in case emergency shutdown is requ...

Page 7: ...alogue or digital 61 4 3 Connecting of a video projector to watch digital TV 62 5 First installation 63 5 1 First installation settings 63 5 2 Channel scan 63 5 3 Search failure 64 6 Day to day operation 65 6 1 Using Low Power mode 65 6 2 Switching from watching digital TV to listening to digital radio 65 6 3 Changing channels while watching digital TV or listening to digital radio 66 6 4 PIN code...

Page 8: ...Menu 74 9 1 PIN Code Change 74 9 2 Smartcard 74 9 3 System 74 9 4 Scan 74 9 5 Display 75 9 6 Dolby Digital 75 9 7 Wake up channel 75 10 Setting your receiver 76 10 1 Timer Manager 76 10 2 Channel Manager 77 10 3 Settings 79 10 4 For Parents 80 10 5 Advanced settings 81 10 6 Channel Search 83 11 Other settings 84 11 1 Restoring factory settings 84 11 2 Changing the remote control configuration 84 1...

Page 9: ...nking red it indicates that an upgrade of your receiver is taking place Do not interrupt this operation Wait for the LED to blink green indicating successful download You can then continue as normal When your receiver is in low power mode software functions are no longer supported Therefore EPG data may not be up to date when waking up from low power see paragraph 6 8 Indicator LED Mode Low power ...

Page 10: ...r video recorder or DVD player recorder 6 Digital audio cinch output used to connect your HiFi audio receiver system 7 IR Not active on this receiver system 8 L R Left Right analogue audio cinch outputs used to connect your HiFi audio receiver system The label showing the type and serial number is underneath the receiver 1 SCART is also called Euroconnector or Peritel Safety Extra Low Voltage Note...

Page 11: ...sert the smartcard with the golden chip facing up Push the smartcard into the slot as far as it will go Approximately 1 cm of the card will be visible outside the slot New and updated information may be downloaded onto the smartcard from time to time The smartcard status can be checked from the Smartcard item of the Premiere menu 2 Inserting your Smart Card ...

Page 12: ...me information Then close banner TIMER Set a recording timer when watching digital TV or from the EPG Note press TIMER then 0 to delete the active timer EXIT Recall last channel while watching digital TV or listening to the radio Or go back one step in the menu TV RADIO Toggle between digital TV and digital Radio Wake up the receiver from standby 0 9 Select a channel while watching digital TV or l...

Page 13: ...current wiring because you might keep existing connections of your current Audio Video setup 3 Choose the relevant connection method for incorporating your Digital Receiver into your existing audio video setup 4 1 Connecting to a TV and VCR both fitted with SCART sockets Incorporate your receiver in your existing installation as described below 4 Connecting your Digital receiver to AC outlet TV se...

Page 14: ...tch play back from your VCR 4 2 Connecting to your audio equipment analogue or digital Depending on your audio equipment you might have several options to connect your Digital Receiver ANALOGUE CONNECTION A Connect the L R audio output sockets to the relevant L R audio input sockets of your audio equipment using a double CINCH cable not supplied Consult the user manual of your audio equipment to l...

Page 15: ... equipment 4 3 Connecting of a video projector to watch digital TV Connect the TV SCART socket of your Digital Receiver to your video projector Video projectors are often fed with S Video format video signals If this is the case with your projector follow the instructions below for connection and installation 1 Connect a SCART S Video adapter to the TV SCART of your receiver not supplied and conne...

Page 16: ...process the following information is reported on screen number of TV and radio channels detected scanning progress indicated as a percentage strength of the signal and the quality of reception Channel scan may take up to twenty minutes If you press EXIT during the scanning process you interrupt the scanning In this case none of the channels found are stored When scanning has been successfully comp...

Page 17: ...ded antenna cable antenna connection to your receiver see chapter 4 1 number of channels available from your cable TV supplier 1 Press EXIT to return to the First installation screen 2 Press OK to launch a new scan If the same failure message appears after a while refer to chapter Troubleshooting Contact your cable TV supplier if the problem remains ...

Page 18: ... power mode press the front panel button the LED indicator remains orange and power consumption drop to 2 W At this stage if you press the P or P key of the remote control to wake up your receiver the command will be ignored because the receiver is in Low Power mode To wake up your receiver first press the front panel button and then press the P or P key To wake up your receiver from Low Power pre...

Page 19: ...l you want to select using the t or y key Scroll from one page to another using the white or blue remote control key 4 Press OK to preview the selected channel on the right hand side of the screen or listen to the selected radio channel 5 Press OK again to watch in full screen view 6 4 PIN code Child protection is a high priority By entering your PIN code you can watch programmes that have been lo...

Page 20: ... time you change channel the banner appears at the bottom of the screen 1 To display the banner anytime while watching digital TV or listening to digital radio press INFO 2 For more info about the current programme while the banner is on press INFO a second time 3 To close the banner press INFO a third time 6 6 Volume control While watching digital TV or listening to digital radio Press to decreas...

Page 21: ...s t or y to move the highlight to the previous or next programme respectively Press the u or i key to view the previous or next day programme list respectively Press P or P to view the previous or next channel programme list respectively 4 Press OK to watch listen to the selected programme in full screen view EPG information has to be updated regularly Updates are performed automatically every tim...

Page 22: ...y the front LED lit in dimmed green in TV or Radio mode or dimmed orange if your receiver is in standby To delete the active timer 1 If your receiver is in standby press P P or any number key of the remote control 2 Press the key sequence TIMER then 0 The LED is no longer dimmed and you can change channels When a recording timer is active you cannot change digital channels but you can switch to an...

Page 23: ...etext decoder To consult teletext pages your TV set must be fitted with teletext decoder and be connected to the TV SCART socket of your receiver using the SCART cable supplied Refer to the user manual of your TV set to check how to access teletext pages 6 12 How do I reset my receiver in case of unstable or frozen picture 1 Press the button on the receiver front panel for at least 5 seconds Your ...

Page 24: ...emote control to open the Options screen 2 Scroll to the option you want to set using the t or y key 3 Select the sports programme using the u or i key 4 Press OK to confirm and exit the Options screen 7 2 PREMIERE DIREKT PREMIERE DIREKT presents various programmes at various times that you can order individually All the information about the programmes on offer prices and the process of ordering ...

Page 25: ...m timer list List organisation activate or de activate a TV or Radio channel list List editing Channel pool Display options Banner duration Transparency Channel number input latency Timer warning duration Remote control configuration Language options Decoder lock Password Change TV settings TV SCART output VCR SCART output Dolby Digital Recorder control Default volume on analogue audio System sett...

Page 26: ... return towatching TV 8 2 2 Changing settings Once you highlighted an adjustable item or sub item you can then access the values and make changes using u or i to select an option and numerical keys to enter numerical values To open a locked menu item indicated by a icon you will need to enter your PIN Code 8 2 3 Cancelling storing changes Either press the EXIT key to exit the screen without storin...

Page 27: ...screen 9 2 Smartcard This screen is used to display information about your smartcard 9 3 System This screen is used to display information about your receiver including the Serial Number and software version 9 4 Scan This screen is used to view the date and results of the last scan performed It may also be used to launch a new scan Press the green colour key to scan the KDG network Alternatively p...

Page 28: ... Do not modify it unless your TV does not support RGB AV Control for proper operation it is recommended to keep this setting to ON 2 Press EXIT to exit the screen 9 6 Dolby Digital This screen is used to enable disable automatic selection of Dolby Digital sound When Dolby Digital is disabled you can still get stereo sound in digital format PCM 9 7 Wake up channel This screen is used to set the cha...

Page 29: ...by your recorder Refer to paragraph 11 3 To delete an existing timer 1 Scroll to the timer you want to delete 2 Press the red colour key to delete it from the timer list 3 Press OK to confirm deletion 4 Press EXIT to exit the screen To set a new timer or edit an existing timer 1 Scroll to the timer you want to edit and press OK to select it from the timer list Alternatively press the green colour ...

Page 30: ...alogue channels 10 2 Channel Manager During installation a Main TV channel list and bouquet lists are built up according to your cable TV supplier s presets The Main TV or Radio list is made up of three sub sets a list you can customize according to your preferences channels 1 to 99 this list is empty after first installation a list containing all Premiere channels if available channels 100 to 199...

Page 31: ...screen to appear To add channels to the editable part of the Main TV list Add Channels 1 Scroll to the channel you want to add using the ty keys 2 Press OK to add the channel to the list 3 Repeat this operation as needed 4 Press EXIT to exit the screen To remove channels from the editable part of the Main TV list Remove Reorder Channels 1 Press the red colour key to remove all channels from the li...

Page 32: ...hannel you want to lock or unlock 2 Press the yellow colour key to lock it A mark appears indicating that the channel is locked 3 Alternatively press the yellow colour key to unlock a locked channel 4 Repeat this operation as needed 5 Press EXIT to exit the screen 10 3 Settings Settings is used to set o Display options o Language options 10 3 1 Display options This screen is used to set display op...

Page 33: ... Hearing viewers or Off to disable subtitles Subtitles Language select subtitles language 2 Press OK confirm 10 4 For Parents This screen is used to enable Parental Lock and change your receiver password The password is a 4 digit code used to lock channels and features of the receiver This code is different from the PIN code which is a 4 digit code used to prevent access to inappropriate Premiere ...

Page 34: ...ress OK to confirm 10 5 2 System Settings This screen is used to set your receiver audio video output settings 1 Select values for the following TV VCR SCART Output select the SCART output format supported by your TV set and VCR refer to your TV and VCR user manual for more information Dolby Digital select Yes to enable Dolby Digital sound If you enable Dolby Digital sound make sure you use the di...

Page 35: ...to reset your receiver to the factory settings 1 Press OK to reset your receiver to the factory settings 2 When prompted press the red colour key to confirm you want to reset the receiver 10 5 5 Decoder Status The Decoder Status sub menu menu includes the following items o System Information o Software Upgrade 10 5 5 1 System Information This screen is used to display information about your receiv...

Page 36: ...n both cases press OK to exit the upgrade process You can also launch a search for new software from the screen described above using the red colour key 10 6 Channel Search This item is used to search for new channels It is recommended not to change the predefined settings Start frequency 306 MHz Stop frequency 442 MHz Constellation Auto Band width 8000 KHz Press OK to start searching for new chan...

Page 37: ...he setting of your receiver Refer to paragraph 10 3 1 11 2 2 To change the configuration of your remote control 1 Simultaneously press number keys 1 and 3 and hold them for at least 3 seconds 2 Simultaneously release the two keys 3 Enter the new setting within the next 60 seconds 5 for alternative setting corresponding to setting 38 1 for the default factory setting corresponding to setting 39 4 P...

Page 38: ...r Connect the VCR DVD SCART socket of your Digital Receiver to the EXT2 SCART socket of your VCR called IN or DECODER using a SCART lead Connect the EXT1 SCART socket of your VCR called OUT to the EXT2 SCART socket of your TV using a SCART lead 4 Plug all your equipment excluding your Digital Receiver into the mains Read section Quick installation to proceed with the channel scan if not already do...

Page 39: ...le Set your VCR or DVD to Prepare Record or Record Link to allow control by your Digital Receiver 11 3 3 Recording with the VCR DVD Recorder Control feature Your Digital Receiver TV and VCR or DVD are connected and set according to paragraph 11 1 You have set a timer on your Digital Receiver At timer start your VCR or DVD starts recording and at timer end it stops recording under the control of yo...

Page 40: ...87 EN ...

Page 41: ...reception signal Check that the power cord with AC adapter is correctly connected Disconnect this cord and reconnect it to ensure it is in place Check that the power is available at the wall socket Press on the front panel Press P P or any number key of the remote control Check the connections at the wall socket and receiver Check signal quality using the Scan item of the Premiere menu Press TV ST...

Page 42: ...Refer to paragraph 10 5 2 Refer to your TV user manual Use the SCART cable supplied with your receiver Check the receiver TV screen format setting following the information in paragraph 10 5 1 If you have a wide screenTV you may also need to check the settings on yourTV Enter your password to access the channel or remove it as a locked channel Select another channel There is no channel correspondi...

Page 43: ...r CA CA system Nagravision Note a subscription is required to watch Premiere and other Pay TV programmes Connections RF connections input IEC 169 2 female 75 Ohm output IEC 169 2 male 75 Ohm TV SCART Output CVBS Controlled audio L R RGB Fast blanking Slow blanking VCR SCART Input CVBS Slow blanking Audio L R RGB Fast blanking Output CVBS Audio L R Slow blanking during timer if Prepare Record mode ...

Page 44: ...3111 176 53011 ...

Reviews: