English
8
Connections
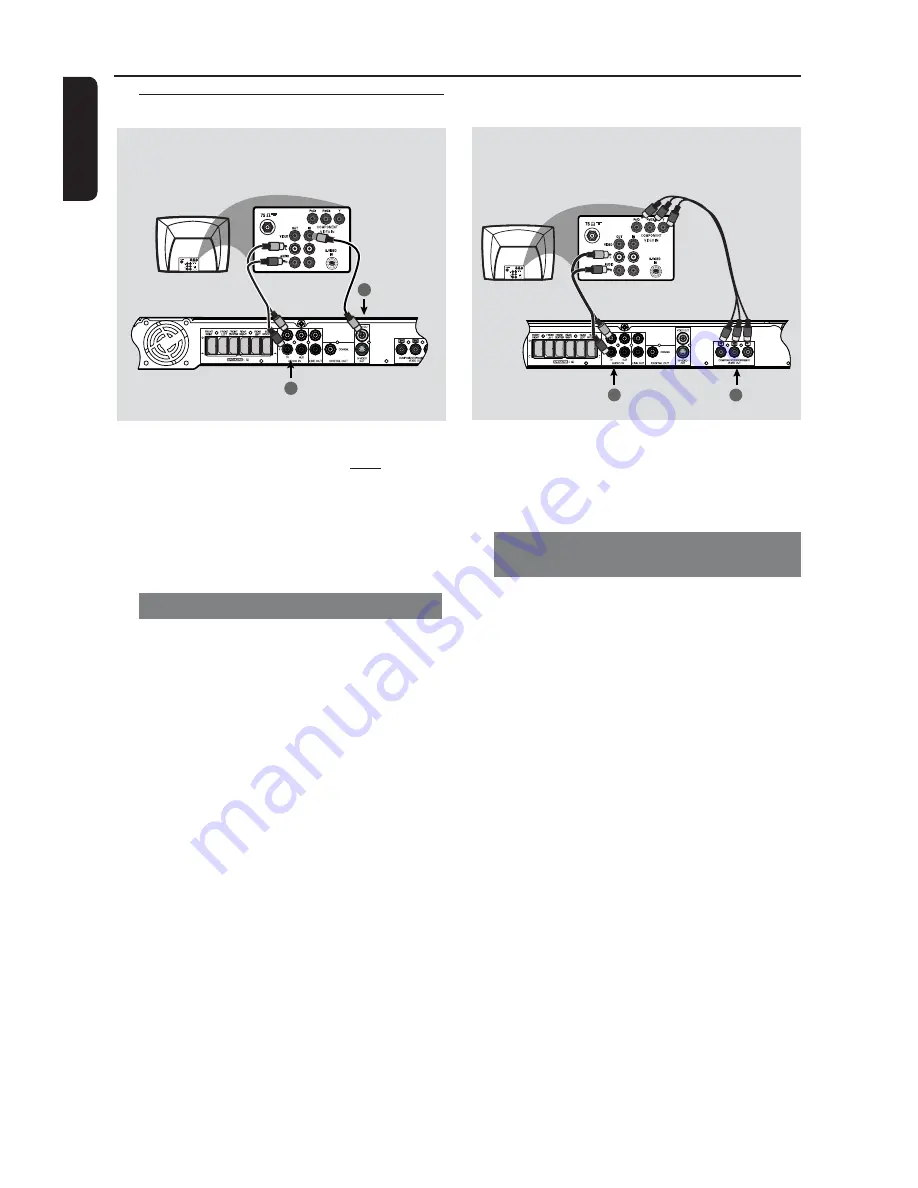
Step 3: Connecting TV
* IMPORTANT!
– You only need to make one video
connection from the following
options, depending on the
capabilities of your TV.
– Connect the DVD system directly
to the TV.
Using Composite Video jack
1
Use the supplied composite video cable
(yellow) to connect the DVD system’s
VIDEO OUT
jack to the video input
jack (or labelled as A/V In, Video In,
CVBS, Composite or Baseband) on the
TV.
2
To hear the TV channels through this
DVD system, use the supplied audio
cables (white / red) to connect
AUDIO
IN-TV)
jacks to the corresponding
AUDIO OUT jacks on the TV.
3
Before starting operation, press
TV
on
the remote to select “
TV
” in order to
activate the input source.
* IMPORTANT!
– The progressive scan video quality
is only possible when
using Y Pb Pr,
and a progressive scan TV is
required.
Using Component Video jacks
(Y Pb Pr)
1
Use a component video cables (red/blue/
green - not supplied) to connect the
DVD syst
em’s
Y Pb Pr
jacks to the
corresponding Component video input
jacks (or
labelled as Y
Pb Pr or YU
V) on
the TV.
2
To hear the TV channels through this
DVD system, use the supplied audio
cables (white/red) to connect AUDIO IN-
TV jacks to the corresponding AUDIO
OUT jacks on the TV.
3
Before starting operation, press
TV
on
the remote to select “
TV
” in order to
activate the input source.
4
If y
ou are using a Progressive Scan TV (TV
must indicate Progressive Scan or
ProScan capability), to activate TV
Progressive Scan
, please refer to your
TV user manual. For DVD receiver
Progressive Scan function through
SYSTEM MENU, See page 25.
Helpful Hint:
– If your TV does not support Progressive
Scan, you will not be able to view the picture.
Press and hold
OPEN/CLOSE
key, and
press ‘1’ to deactivate progressive scan.
Option 1
Option 2
1
2
4
2
1
4


