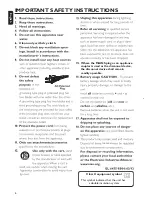
background image

English

19

WARNING
Under no circumstances should you try to repair the system yourself, as this will invalidate the 
warranty.  Do not open the system as there is a risk of electric shock.

,IDIDXOWRFFXUVÀUVWFKHFNWKHSRLQWVOLVWHGEHORZEHIRUHWDNLQJWKHV\VWHPIRUUHSDLU,I\RX

are unable to remedy a problem by following these hints, consult your dealer or service centre.

Problem

Solution

CD OPERATION

´ƍƮGLVFµLVGLVSOD\HG

Insert a disc.

Check if the disc is inserted upside down.

Wait until the moisture condensation at the lens 
has cleared.

Replace or clean the disc, see “Maintenance”.

² 8VHDÀQDOLVHG&'5:&'5RU03&'

RADIO RECEPTION

Radio reception is poor.

Increase the distance between the Micro HiFi 
System and your TV or VCR.


GENERAL

The system does not react when buttons

Remove and reconnect the AC power plug and

are pressed.

switch on the system again.

Sound cannot be heard or is of poor 

Adjust the volume.

quality. 

Check that the speakers are connected correctly.

Check if the stripped speaker wire is clamped.

The left and right sound outputs are

Check the speaker connections and location.

reversed.

Troubleshooting

The remote control does not function

Reduce the distance between the remote control 
and the system.

Insert the batteries with their polarities 
(+/– signs) aligned as indicated.

Replace the batteries.

Point the remote control directly toward
IR sensor on the front of the system.

The timer is not working.

Set the clock correctly.

Press

 TIMER

 in standby mode to switch on the 

timer.

If a recording is in progress, stop the recording.

The Clock/Timer setting is erased.

Power has been interrupted or the power cord 
has been disconnected. Reset the clock/timer.

Summary of Contents for Micro Hi-Fi System MCM285

Page 1: ...e rapide de début et Manuel de l utilisateur regorgent d astuces destinées à simplifier l utilisation de votre produit Philips Toutefois si vous ne parvenez pas à résoudre votre probléme vous pouvez accéder à notre aide en ligne à l adresse www philips com welcome Gracias por escoger Philips Necesita ayuda inmediata Lea primero la Guía rápida del comienzo o el Manual del usuario en donde encontrar...

Page 2: ...nications This Class B digital apparatus complies with Canadian ICES 003 Français Cet appareil numérique n émet pas de bruits radioélectriques dépassant les limites applicables aux appareils numériques de Classe B prescrites dans le Règlement sur le Brouillage Radioélectrique édicté par le Ministère des Communications du Canada Cet appareil numérique de la classe B est conforme à la norme NMB 003 ...

Page 3: ...3 5 6 7 3 8 1 2 3 4 5 6 7 8 9 0 ...

Page 4: ...English 4 ...

Page 5: ...English 5 ...

Page 6: ... equipment symbol This symbol indicates that the unit has a double insulation system Clean only with dry cloth Where the MAINS plug or an appliance coupler is used as the disconnet device the disconnet device shall remain readily operable materials 9 ...

Page 7: ...ssage within a track 13 Playing an MP3 WMA disc 13 Discs for playback 14 LIIHUHQW SOD PRGHV 6KXIÁH DQG 5HSHDW 14 Programming track numbers 14 Erasing the programme 14 Radio Reception Tuning to radio stations 15 Programming radio stations 15 Automatic programming Manual programming Tuning to preset radio stations 15 External Sources Connecting external equipment 16 Clock Timer Setting the clock 16 ...

Page 8: ...m batteries or discs to excessive moisture rain sand or heat sources caused by heating equipment or direct sunlight M 1R QDNHG ÁDPH VRXUFHV VXFK DV OLJKWHG FDQGOHV should be placed on the apparatus M 1R REMHFWV ÀOOHG ZLWK OLTXLGV VXFK DV YDVHV VKDOO be placed on the apparatus M The apparatus shall not be exposed to dripping or splashing M Install this unit near the AC outlet and where the AC power...

Page 9: ...lly under extreme conditions If this happens let the system cool down before reusing it not available for all versions B Speakers Connection Front Speakers Connect the speaker wires to the SPEAKERS terminals right speaker to R and left speaker to L red wires to and black wires to M Fully insert the stripped portion of the speaker wire into the terminal as shown Notes For optimal sound performance ...

Page 10: ...ies into the remote control Insert 2 batteries type AAA into the remote control with the correct polarity as indicated by the and symbols inside the battery compartment CAUTION Do not mix old and new batteries Do not mix alkaline standard carbon zinc or rechargeable ni cad ni mh etc batteries Batteries contain chemical substances so they should be disposed of properly Remove batteries if they are ...

Page 11: ...Plugs in a headphone 0 MP3 LINK 3 5mm audio input jack PRESET í ë skips to the beginning of a current track previous next track sets the hours and minutes for the clock and timer selects a preset radio station VOLUME adjusts the volume level ALBUM TUNING 5 6 selects an album tunes to a radio station press and hold fast searches back and forward within a track disc STOP 9 stops CD playback or erase...

Page 12: ...tomatic standby The power saving feature automatically switches to standby 15 minutes after CD playback has ended and no control is operated Adjusting volume and sound 1 Adjust theVOLUME control knob or press VOLUME 3 4 on the remote con trol to increase or decrease volume Display shows the vol ume level UOL and a num ber from 0 40 2 Press DBB to switch bass enhancement on or off Display shows DBB...

Page 13: ...D playback will also stop when the CD door is opened the disc has reached the end you select another source TUNER or MP3 LINK you select standby Selecting a different track M Press PRESET í ë í ë on the re mote once or repeatedly until the desired track number appears in the display Finding a passage within a track 1 Press and hold down ALBUM TUNING 5 6 5 6 on the remote The disc is played at high...

Page 14: ...re no longer displayed M You can also press STOP 9 to cancel your play mode Programming track numbers Programme in the STOP position to select and store your disc tracks in the desired sequence If you like store any track more than once Up to 20 tracks can be stored in the memory 1 In the STOP position press PROGRAM on the remote control to enter the programming mode 2 Use PRESET í ë í ë on the re...

Page 15: ...u can store up to 40 radio stations FM 20 AM 20 in the memory Automatic programming 1 In tuner mode press and hold PROGRAM for 2 seconds to activate the automatic program mode AUTO auto is displayed and begins to blink OO DYDLODEOH UDGLR VWDWLRQV ZLWK VXIÀFLHQW VLJ nal strength will be stored automatically To stop automatic programming M Press STOP9 Note If no preset number is selected automatic p...

Page 16: ...old DISPLAY CLOCK 7KH FORFN GLJLWV IRU WKH KRXUV ÁDVK 2 Press PRESET í ë í ë on the remote to set the hours 3 Press DISPLAY CLOCK 7KH FORFN GLJLWV IRU WKH PLQXWHV ÁDVK 4 Press PRESET í ë í ë on the re mote to set the minutes 5 Press DISPLAY CLOCK WR FRQÀUP WKH WLPH Note If the last selected source is MP3 LINK AUX you cannot use the remote control to set the clock in standby mode External Sources C...

Page 17: ...emote control The last timer setting is shown 2 Press TIMER again for more than 2 seconds 7KH FORFN GLJLWV IRU WKH KRXUV ÁDVK 3 Press PRESET í ë í ë on the re mote to set the hours 4 Press TIMER again 7KH FORFN GLJLWV IRU WKH PLQXWHV ÁDVK 5 Press PRESET í ë í ë on the remote to set the minutes 6 Press TIMER WR FRQÀUP WKH WLPH The timer is now activated and display shows Note If the last selected s...

Page 18: ...ing Discs M When a disc becomes dirty clean it with a cleaning cloth Wipe the disc from the centre out M Do not use solvents such as ben zene thinner commercially avail able cleaners or antistatic spray intended for analogue records Cleaning the disc lens M After prolonged use dirt or dust may accumu late at the disc lens To ensure good playback quality clean the disc lens with Philips CD Lens Cle...

Page 19: ...L The system does not react when buttons Remove and reconnect the AC power plug and are pressed switch on the system again Sound cannot be heard or is of poor Adjust the volume quality Check that the speakers are connected correctly Check if the stripped speaker wire is clamped The left and right sound outputs are Check the speaker connections and location reversed Troubleshooting The remote contr...

Page 20: ...ASS 1 LASER PRODUCT Philips Consumer Lifestyle A Division of Philips Electronics North America Corporation P O BOX 671539 Marietta GA 30006 0026 Meet Philips at the Internet http www philips com welcome MCM285_07_UM_V1 1 ...

Reviews: