background image

English

31

System Menu Options

Basic operations

1

Press 

SYSTEM

 to enter the Setup Menu.

2

Press 

1 2

 to select a page to be set.

3

Press 

3 4

 to highlight an option.

4

Enter its submenu by pressing 

2

 or 

OK

.

5

Move the cursor by pressing 

3 4

 to highlight

the selected item.

In cases of value setting, press 

1 2

 to adjust

values.

6

Press 

OK 

to confirm.

To return to the upper-level menu

Press 

1

 or 

OK

 (in cases of value adjustment).

To exit from the menu

Press 

SYSTEM

 again.

The settings will be stored in the player’s

memory even if the player is switched off.

Note:
– Some of the features in the System Menu
Options are described in “Getting Started”.

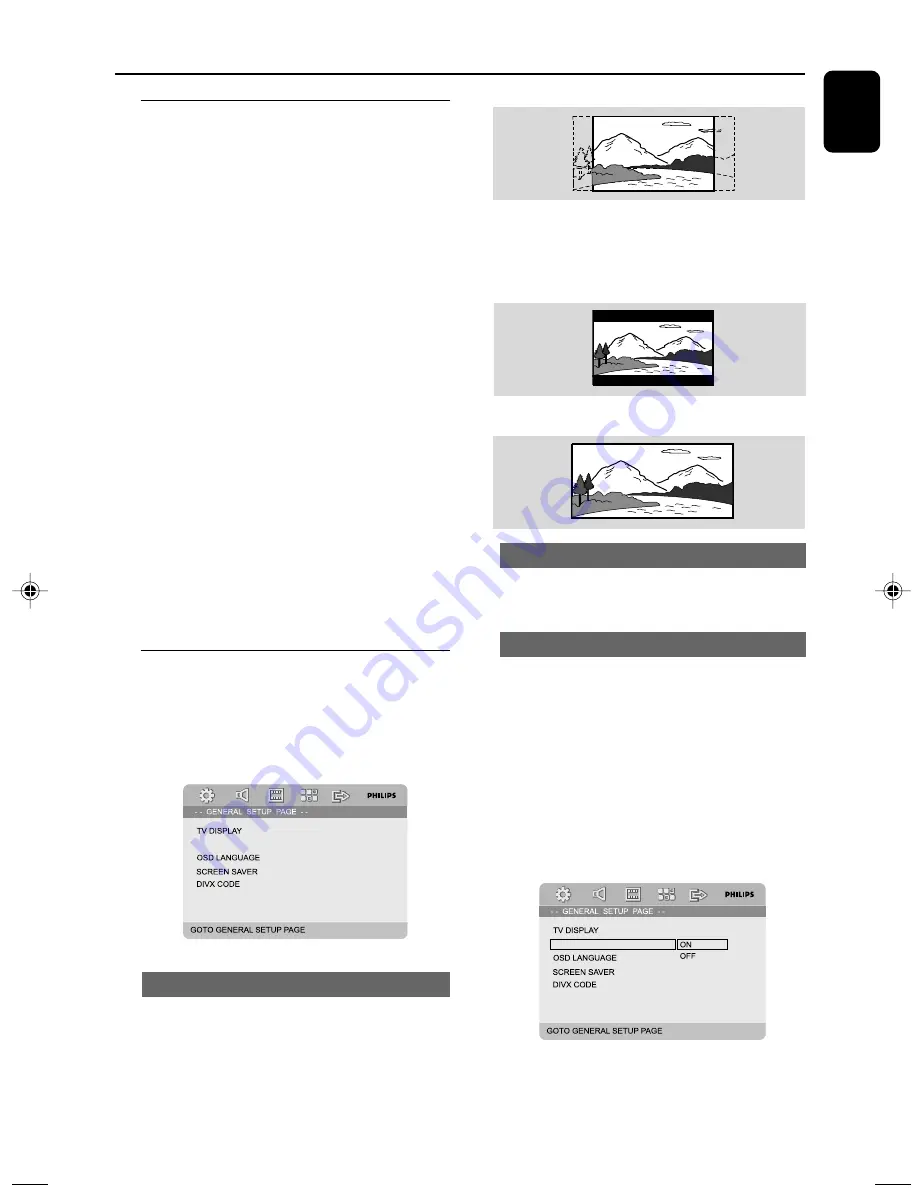
GENERAL SETUP PAGE

The options included in GENERAL SETUP PAGE
are: “TV  DISPLAY”, “OSD  LANGUAGE”,
“CLOSED CAPTIONS”, “SCREEN SAVER”and
“DIVX CODE”.

CLOSED CAPTIONS

CLOSED CAPTIONS

TV DISPLAY

Set the aspect ratio of the DVD Player according
to the TV you have connected.

NORMAL/PS

: If you have a normal TV and

want both sides of the picture to be trimmed or
formatted to fit your TV screen.

4:3 NORMAL/LB

: If you have a normal TV.

In this case, a wide picture with black bands on
the upper and lower portions of the TV screen
will be displayed.

WIDE

: If you have a wide-screen TV.

OSD LANGUAGE

See “Getting Star ted-Step 3: Setting language
preference”.

CLOSED CAPTIONS

Closed captions are data that are hidden in the
video signal of some discs. Captions are different
from subtitles because captions hearing are
impaired by showing the sound effects (e.g.,
"phone ringing" and "footsteps"), while subtitles
do not.
Before you select this function, please ensure
that the disc contains closed captions
information and your TV set also has this
function.

CLOSED CAPTIONS

CLOSED CAPTIONS

Summary of Contents for MCD 908

Page 1: ...umber Les Guide d utilisation rapide et Manuel de l utilisateur regorgent d astuces destinées à simplifier l utilisation de votre produit Philips Toutefois si vous ne parvenez pas à résoudre votre probléme vous pouvez accéder à notre aide en ligne à l adresse www philips com usasupport Veillez à avoir votre produit à portée de main et model serial nombre Lea primero la Guía de uso rápido o el Manu...

Page 2: ...ans le Règlement sur le Brouillage Radioélectrique édicté par le Ministère des Communications du Canada CAUTION Use of controls or adjustments or performance of procedures other than herein may result in hazardous radiation exposure or other unsafe operation ATTENTION L utilisation des commandes ou réglages ou le non respect des procédures ci incluses peuvent se traduire par une exposition dangere...

Page 3: ...3 ...

Page 4: ...4 IMPORTANT SAFETY INSTRUCTIONS Class II equipment symbol This symbol indicates that the unit has a double insulation system Clean only with dry cloth materials ...

Page 5: ...ation Reserve engineering or disassembly is prohibited DivX DivX Certified and associated logos are trademarks of DivXNetworks Inc and are used under license Windows Media is a trademark of Microsoft Corporation HDMI High Definition Multimedia Interface is a digital interface that allows pure HD digital video transmission without the loss of image quality The integrated control bus allows system c...

Page 6: ...h 7585 Lao 7679 Latina 7665 Latvian 7686 Letzeburgesch 7666 Limburgan Limburger 7673 Lingala 7678 Lithuanian 7684 Luxembourgish 7666 Macedonian 7775 Malagasy 7771 Magyar 7285 Malayalam 7776 Maltese 7784 Manx 7186 Maori 7773 Marathi 7782 Marshallese 7772 Moldavian 7779 Mongolian 7778 Nauru 7865 Navaho Navajo 7886 Ndebele North 7868 Ndebele South 7882 Ndonga 7871 Nederlands 7876 Nepali 7869 Norsk 78...

Page 7: ...tle and Disc Menu language Basic Functions Switching the system on off 23 Switching the system to Eco Power Standby mode 23 Power saving automatic standby 23 Volume control 23 Sound control 23 Bass enhancement Treble adjustment LOUDNESS Dimming the display screen 23 Demonstration mode 24 Disc Operations Playable Discs 25 Playing discs 25 Using the Disc Menu 26 Basic playback controls 26 28 Pausing...

Page 8: ...NIGHT MODE VIDEO SETUP PAGE 33 35 COMPONENT TV MODE QUALITY HDMI SETUP PREFERENCE PAGE 35 36 PARENTAL DEFAULT PASSWORD SETUP PAGE 36 PASSWORD MODE PASSWORD Other Functions Radio reception 37 Tuning to radio stations Presetting radio stations Listening to preset radio stations Setting the clock 38 Setting sleep wake up timer 38 Sleep timer setting Wake up timer setting Specifications 39 Troubleshoo...

Page 9: ...an immersive sound experience like an audiophile The built in vacuum tube preamplifier enables you to experience the highest quality sound normally you can only find in premium Hi Fi audio equipment Music is dynamic and is played to be heard by human ears The analogue nature of tube gives a more pleasing sound to the nonlinear human ear brain hearing system Tube sound has less distortion than soli...

Page 10: ... colour discs The lens may cloud over when the player is suddenly moved from cold to warm surroundings making it impossible to play a disc Leave the player in the warm environment until the moisture evaporates Supplied accessories Remote control with two AAA batteries AM loop antenna FM wire antenna Audio white red and composite video yellow cables 2 in 1 Control cable 2 front speakers including 2...

Page 11: ...n Connections Speaker right Speaker left FM antenna AM antenna AC power Step 1 Placing the speakers Front speaker left Front speaker right VIEWING AREA Place the front left and right speakers at equal distances from theTV set and at an angle of approximately 45 degrees from the listening position Notes To avoid magnetic interference do not position the front speakers too close to yourTV set Allow ...

Page 12: ... Speaker wire connection on main set 1 2 Speaker wire connection on speakers Notes Ensure that the speaker cables are correctly connected Improper connections may damage the system due to short circuit For optimal sound performance use the supplied speakers Do not connect more than one speaker to any one pair of speaker jacks Do not connect speakers with an impedance lower than the speakers suppli...

Page 13: ...can or ProScan capability to activateTV Progressive Scan please refer to yourTV user manual For DVD system Progressive Scan function see Getting Started Setting up Progressive Scan feature Note If yourTV does not support Progressive Scan you will not be able to view the picture Press SYSTEM on the remote to exit the system menu and then DISC and 1 to exit progressive scan Using S Video jack IMPORT...

Page 14: ...tor to the Antenna IN jack on theTV 3 Connect the Antenna or CableTV service signal to the ANTENNA IN or RF IN jack on the RF modulator It may have been connected to your TV previously Disconnect it from the TV Step 5 Connecting FM AM antennas AM 1 Connect the supplied AM loop antenna to the AM jack Place the AM loop antenna on a shelf or attach to a stand or wall 2 Connect the supplied FM antenna...

Page 15: ...e AUDIO OUT jacks on the other audio visual device such as aTV VCR Laser Disc player or cassette deck Before starting operation press SOURCE on the front panel to select AUX or press AUX on the remote in order to activate the input source Using theVCR for recording DVDs B Connect one of the system s VIDEO jack to the correspondingVIDEO IN jack and AUDIO OUT L R jacks to the AUDIO IN jacks on the V...

Page 16: ...Projector Adaptor It may take a while for the DVD player and input device to communicate and initialise Playback starts automatically HDMI IN HDMI IN HDTV E Notes Proceed to Setup Menu Options VIDEO SETUP PAGE HDMI SETUP for detailed HDMI setup If you are using the HDMI as audio source make sure that DIGITAL OUTPUT is set to PCM only see Setup Menu Options AUDIO SETUP PAGE DIGITAL AUDIO SETUP To s...

Page 17: ...activates the demonstration 6 Disc skips to the previous next chapter title track Tuner tunes to a higher lower radio frequency press and hold then release the key to start automatic search for a radio frequency downward upward 7 OPEN CLOSE ç opens or closes the disc tray 8 n connect a headphone 9 SOURCE selects the respective sound source DVD AUX TUNER FM AM switches the system on 0 IR SENSOR poi...

Page 18: ...STEM disc mode only enters or exits the system menu 7 DISC MENU disc mode only DVD VCD enters or exits the disc contents menu VCD2 0 switches the playback control mode on or off MP3 WMA switches between Album and Filelist 8 4 3 2 1 selects an item in a menu moves an enlarged picture up down left right 9 OK confirms a selection 0 ZOOM DVD VCD Picture CD enlarges or reduces a picture or active image...

Page 19: ...displays the system clock Eco power mode displays the system clock and switches to the standby mode DIM selects different levels of brightness for the display screen SUBTITLE selects a subtitle language ANGLE selects a DVD camera angle DISPLAY displays information onTV screen during playback AUDIO forVCD DivX sets Stereo Mono Left or Mono Right sound mode for DVD selects an audio language A B repe...

Page 20: ...rVIDEO See yourTV manual for more details Or you may go to channel 1 on yourTV then press the Channel down button repeatedly until you see theVideo In channel Or theTV Remote Control may have a button or switch that chooses different video modes Or set theTV to channel 3 or 4 if you are using an RF modulator Selecting the colour system that corresponds to yourTV This DVD Player is compatible with ...

Page 21: ...Progressive ScanTV only The progressive scan display twice the number of frames per seconds than interlaced scanning ordinary normalTV system With nearly double the number of lines progressive scan offers higher picture resolution and quality IMPORTANT Before enabling the progressive scan feature you must ensure 1 YourTV can accept progressive signals a progressive scanTV is required 2 You have co...

Page 22: ...TEM 2 Press 1 2 to select GENERAL SETUP PAGE 3 Use 1 2 3 4 on the remote to navigate in the menu Move to OSD LANGUAGE and press 2 4 Select a language and press OK To exit from the menu Press SYSTEM again Getting Started Setting the Audio Subtitle and Disc Menu language 1 Press SYSTEM in stop mode 2 Press 1 2 to select PREFERENCE PAGE 3 Press 3 4 to highlight the following in the Preference Page AU...

Page 23: ...a disc has stopped playing Volume control Turn VOLUME clockwise or anticlockwise or press VOLUME on the remote to increase or decrease the volume level VOL XX is displayed on the display panel XX denotes the volume level To switch off the volume temporarily Press MUTE on the remote Playback will continue without sound and MUTING flashes To activate sound reproduction you can press MUTE again adjus...

Page 24: ...s features offered by the system To activate the demonstration In standby mode press STOP 9 on the system to activate the demo mode Demonstration will begin To deactivate the demonstration Press STOP 9 on the system again DEMO OFF is displayed Note Even if you remove the AC power cord and reconnect it to the wall socket the demonstration will remain off until you activate it again Basic Operations...

Page 25: ...C DLF M3U PLS WAV Non English Album Title name The discs recorded under Joliet format MP3 Pro and MP3 with ID3 tag Disc Operations Region Codes DVDs must be labeled as shown below in order to play on this DVD system You cannot play discs that are labeled for other regions Note If you are having trouble playing a certain disc remove the disc and try a different one Improper formatted disc will not ...

Page 26: ...e previous chapter track 3 To go directly to any chapter track title enter the chapter track title number using the Numeric Keypad 0 9 Resuming playback from the last stopped point DVD VCD CD In stop mode and when a disc has not been removed pressÉ Å To cancel resume mode In stop mode press STOP 9 again Zoom DVD VCD DivX JPEG Zooming allows you to enlarge or reduce the video image during playback ...

Page 27: ...o switch the menu between Album and Filelist 2 When Filelist is on the screen press 3 4 to select the files and press PROG to add the files to the program list 3 Press DISC MENU to display the program list 4 Press PROG to delete unwanted files from the program list Forward Reverse Searching DVD VCD DivX CD MP3 WMA 1 Press à á on the remote during playback to select the required speed 2X 4X 8X 16X ...

Page 28: ...atedly to select different subtitle languages Playing MP3 WMA JPEG Picture CD IMPORTANT You have to turn on yourTV and set to the correctVideo In channel See Setting up theTV Playing MP3 WMA disc IMPORTANT For DRM protected WMA files use Windows Media Player 10 or later for CD burning conversion Visit www microsoft com for details about Windows Media Player andWM DRM Windows Media Digital Rights M...

Page 29: ...lder and Filelist Special JPEG features Preview function JPEG This function shows the content of the current folder or the whole disc 1 Press STOP 9 during playback Thumbnails of 12 pictures appears on theTV screen 2 Use 1 2 3 4 to highlight one of the pictures Slide Show and press OK to start playback slide show To enter the remote key function menu Use 1 2 3 4 to highlight Menu and press OK To d...

Page 30: ... contains external subtitles the subtitle menu will appear on theTV screen for your selection In this case pressing SUBTITLE on the remote control will turn on or off the subtitle If multilingual subtitles are embedded on the DivX disc pressing SUBTITLE will change the subtitle language during playback Note Subtitle files with the following filename extensions srt smi sub ssa ass are supported but...

Page 31: ...ONS SCREEN SAVER and DIVX CODE CLOSED CAPTIONS CLOSED CAPTIONS TV DISPLAY Set the aspect ratio of the DVD Player according to the TV you have connected NORMAL PS If you have a normalTV and want both sides of the picture to be trimmed or formatted to fit yourTV screen 4 3 NORMAL LB If you have a normalTV In this case a wide picture with black bands on the upper and lower portions of theTV screen wi...

Page 32: ...DIVX Code then press 2 or OK to ener its submenu and press OK again to confirm The registration code will appear 2 Press OK to exit 3 Use the registration code to purchase or rent the videos from DivX VOD service at www divx com vod Follow the instructions and download the video onto a CD R for playback on this DVD player Notes All the downloaded videos from DivX VOD can only be played back on thi...

Page 33: ...ual surround sound experience using just two speakers OFF CONCERT LIVING ROOM HALL BATHROOM CAVE ARENA and CHURCH HDCD The option included in HDCD High Definition Compatible Digital is FILTER FILTER Sets the audio output cutoff frequency point when playing an HDCD disc OFF 44 1K and 88 2K NIGHT MODE In this mode the high volume outputs are softened and low volume outputs are brought upward to an a...

Page 34: ...yellow to connect the DVD micro system to yourTV S VIDEO Select this if you have connected the DVD micro system to yourTV using S Video jack Pr Cr Pb CbY Select this if you have connected the DVD micro system to yourTV using Component video jacks NoteS When the player is set toY Pb Pr YUV some TV may not properly synchronise with the player on the SCART connector This option is available only when...

Page 35: ...isc cover The rating level feature does not work for such Discs Rating explanations 1 KID SAF Kids material recommended especially for children and viewers of all ages 2 G General Audience recommended as acceptable for viewers of all ages HDMI SETUP The options included in HDMI SETUP Page are HDMI and RESOLUTION HDMI This option is used to enable disable HDMI output ON Enables HDMI output OFF Disa...

Page 36: ... been changed the parental and disc lock code will also be changed The default password 1234 is always active even the password has been changed 3 PG Parental Guidance suggested 4 PG 13 Material is unsuitable for children under age 13 5 6 PGR R Parental Guidance Restricted recommended that parents restrict children under 17 from viewing or allow to view only when supervised by a parent or adult gu...

Page 37: ...tations You can preset up to 40 stations 20 in each band regardless of the reception Automatic progamming Press PROG on the remote for more than two seconds to activate programming All available stations are programmed Manual progamming 1 Tune to your desired radio station refer to Tuning to radio stations 2 Press PROG on the remote PROG icon flashes 3 Press PRESET or on the remote to select the d...

Page 38: ... repeatedly to select a preset time The selections are as follows time in minutes 00 10 20 30 40 50 60 70 80 90 00 2 When you reach the desired length of time stop pressing SLEEP TIMER appears To deactivate the sleep timer Press SLEEP TIMER repeatedly until 00 is displayed or press ECO POWER STANDBY ON B B on the remote In standby mode the timer setting enables the system to switch on automaticall...

Page 39: ... Weight 2 3 kg AMPLIFIER Rated output power THD 10 2x75W 4Ω Frequency response 100Hz 20kHz 0 5 2 dB S N Ratio 60dB Loaded impedance 4 Ω Dimensions 250 W x 90 H x 180 D mm Weight 4 35 kg TUNER FM Frequency range 87 5 108 MHz FM Noise limit sensitivity 20µV M FM S N 46dB AM wave range 520 1710 kHz AM Noise limit sensitivity 3 0mV m AM S N 40dB Specifications SPEAKER Impedance 4 Ω Input power 75W Sen...

Page 40: ...on the remote Set yourTV to the correctVideo In channel This channel is usually near channel 00 Or you may have a button on theTV remote control that selects Auxiliary or A V IN channel See yourTV owner s manual for details Or change channels at the TV until you see DVD screen on theTV If the progressive scan feature is activated but the connectedTV does not support progressive signals or the cabl...

Page 41: ...he disc type colour system and regional code Check for any scratches or smudges on the disc Press SYSTEM MENU to turn off the setup menu screen Cancel the parental control rating function or change the rating level Moisture has condensed inside the system Remove the disc and leave the system turned on for about an hour Disconnect the power plug from the outlet and insert again Multi language sound...

Page 42: ...e to the player Remove any possible obstacles Replace the batteries with new ones Check that the batteries are loaded correctly Press DIM again Place the DVD micro system as far away as possible from electrical devices that may be causing interference Check all speakers for correct polarity Check that the output of the video signal is switched to Pr Cr Pb CbY Check the connection between the TV an...

Page 43: ...g three or more channels Parental control A function of the DVD to limit playback of the disc by the age of the users according to the limitation level in each country The limitation varies from disc to disc when it is activated playback will be prohibited if the software s level is higher than the user set level PCM Pulse Code Modulation A system for converting analog sound signal to digital sign...

Page 44: ...44 ...

Page 45: ...i Polski Printed in China PDCC JS_JW 0704 CLASS 1 LASER PRODUCT PHILIPS CONSUMER ELECTRONICS NORTH AMERICA P O Box 671539 Marietta GA 30006 0026 Meet Philips at the Internet http www philips com http www philips com support MCD908 C Royal Philips Electronics N V 2007 All rights reserved ...

Reviews: