3 - 2
Pr
eparations
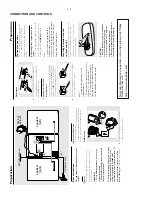
AM
aerial
A
UX in
RIGHT
LEFT
LR
speak
er
(r
ight)
speak
er
(left)
A
B
C
AC
po
w
er cord
FM wire antenna
AM loop
antenna
Rear connections
The type
plate
is
located
at
the
rear
of
the
system.
A
Po
w
e
r
Bef
ore connecting
the
A
C
po
wer cord
to
the
wall outlet,
ensure that all other connections
ha
ve
been made
.
W
ARNING!
–F
or optimal
performance
,
use
only
the
original po
wer cable
.
–N
ev
er mak
e or change connections with
the po
wer
switched on.
To
av
oid o
verheating of the system,
a safety
circuit has
been
built
in.
Therefor
e
, your
system may
switch
to
Standb
y
mode
automatically under e
xtr
eme conditions
. If
this happens
, let
the
system
cool
do
wn
befor
e r
eusing
it
(not av
ailab
le
for
all
ver
sions)
.
B
Antennas Connection
Connect the
supplied
AM loop
antenna and
FM
antenna to
the
respectiv
e
ter
minals.
Adjust the
position of the antenna f
or optimal reception.
AM
Antenna
●
Position the antenna as far as possib
le from a
TV
,
VCR or
other
radiation
source
.
Pr
eparations
FM Antenna
1
2
●
For bett
er FM st
ereo rec
eption,
connect
an
outdoor FM antenna to the FM
AERIAL (FM
ANTENNA) ter
minal.
C
Speak
ers Connection
Fr
ont Speak
ers
Connect the
speak
er
wires to
the
SPEAKERS
ter
minals,
r
ight speak
er to "
RIGHT
" and left
speak
er to "
LEFT
", colored (mar
ked) wire to
"
+
" and b
lack (unmar
ked) wire to "
-
".
1
2
●
Full
y inser
t
the
str
ipped
por
tion
of
the
speak
er
wire into the ter
minal as sho
wn.
Notes:
–F
or optimal sound perf
ormance
, use the
supplied speak
er
s.
–
Do not connect mor
e than one speak
er to any
one pair of
+
/
-
speak
er terminals
.
–
Do not connect speak
er
s with an impedance
lo
wer than the speak
er
s supplied.
Please r
ef
er to
the SPEC
IFIC
ATIONS se
ction of
this ma
nual.
Optional connection
The optional equipment and connecting cords
are not
supplied.
Ref
er to the
oper
ating
instr
uctions of
the
connected
equipment
for
de
ta
ils.
Connecting other
equipment
to
y
our
system
Connect the
audio
left
and r
ight
OUT
ter
minals
of a
TV
,
VCR,
Laser Disc pla
yer
, D
VD pla
y
er or
CD Rec
order
to the
A
UX IN
ter
minals.
Note:
–
If you ar
e connecting equipment with a
monaur
al outpu
t (a sin
gle audi
o out te
rminal),
connect
it to th
e
A
UX IN le
ft termi
nal.
Alternat
ively
,
you can
use
a
“single to double
” cinc
h cable
(the
output
sound
still
r
emain
monaur
al).
Inser
ting batteries into the
remote contr
ol
Inser
t tw
o batter
ies (type R03 or
AAA) into the
remote control with the cor
rect polar
ity as
indicated b
y the "
+
" and "
-
" symbols inside
the batter
y
compar
tment.
CA
U
TION!
–R
emo
ve
batteries
if
the
y
ar
e
exhausted
or
will
not
be used for
a long
time
.
–D
o not
use
old and
ne
w
or
differ
ent
types of batteries in
combination.
–
Batteries contain chemical substances
, so
the
y should be
disposed
off
pr
operly
.
CONNECTION AND CONTROLS
For mor
e inf
ormation onoperation instruction please visit Philips
Audio internet site :
http://www
.audio
.philips.com
Summary of Contents for MC-M250
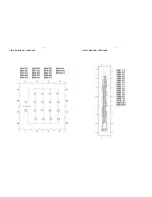
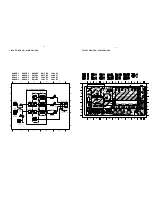
Page 13: ...6 1 6 1 CIRCUIT DIAGRAM LED BOARD LAYOUT DIAGRAM LED BOARD ...
Page 15: ...7 2 7 2 LAYOUT DIAGRAM FRONT BOARD ...
Page 16: ...7 3 7 3 LAYOUT DIAGRAM FRONT BOARD ...
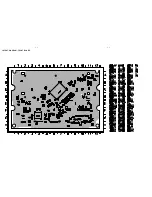
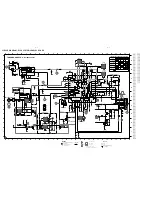
Page 29: ...11 4 11 4 LAYOUT DIAGRAM COMBI BOARD ...
Page 30: ...11 5 11 5 3583 LAYOUT DIAGRAM COMBI BOARD ...
Page 34: ...COMBI BOARD LAYOUT DIAGRAM For production after week 0303 11 9 11 9 ...
Page 35: ...11 10 11 10 COMBI BOARD LAYOUT DIAGRAM For production after week 0303 ...

