INSTRUCTIONS FOR USE
3-6
PCS 104 683
Tuner
Tuning to radio stations
1
Press
TUNER
to select
Tuner mode
.
‹
“
TUNER
” will be displa
yed and then follo
w
ed
by
the
cur
rent
radio
frequency
.
2
Press
BAND
(
TUNER
) to
select
the
desired
wa
veband :
FM or
AM.
3
Press and hold
S
or
T
until "
SEARCH
" is
displa
yed.
‹
"
SEARCH
" will star
t flashing until a radio
station
with
suff
icient
signal
strength
is
found.
l
Repeat
this
procedure
until
the
desired
station
is
reached.
l
To tune to a w
eak station,
br
iefly press
S
or
T
repeatedly until the displa
y sho
ws the
desired
frequency
or
when
the
best
reception
has
been
obtained.
Storing pr
eset stations
You
can
store
up
to
20
for
FM
and
10
for
AM
radio stations in the memor
y.
When a preset
radio
station
is
selected,
the
preset
number
appear
s on the displa
y.
Man
ual pr
ogramming
1
Press
TUNER
.
2
Press
BAND
(
TUNER
) to
select
the
desired
wa
veband:
FM
or
AM.
3
Press
S
or
T
to tune to the desired
frequency
.
4
Press
PROGRAM
.
‹
PROG
will
star
t flashing.
‹
The cur
rent preset n
umber will be display
ed
for
selection.
5
If y
ou wish to store the r
adio station to another
preset number
, press
Å
1
or
2
Å
to select the
desired
preset
number
.
6
Press
PROGRAM
again to store the r
adio
station.
‹
“
STORED
” will be displa
yed.
l
Repeat
steps
3
to
6
to
store
other
preset
radio
stations.
Note: –
Dur
ing pr
ogr
amming,
if no button is pressed
within
5
seconds
, the
system
will
exit
pr
og
ramme
mode
automatically
.
Tuning
to
pr
eset
radio
stations
l
Press
Å
1
or
2
Å
to select the desired preset
number
.
‹
The
preset
number
, r
adio
frequency
, and
wa
veband
will
appear
on
the
displa
y.
Mono/Ster
eo
l
Press
STEREO/V
OCAL
repeatedl
y
to
select
mono or stereo mode
.
‹
When STEREO mode is selected,
STEREO
will
appear on the displa
y.
Note: –
You
ar
e
able
to
select
mono
or
stereo
mode
in
FM
band
only
.
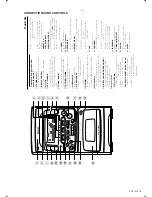
CLOCK
TIMER ON/OFF
SET
OPEN/ CLOSE
STEREO/ VOCAL
O
S
D/D
IM
iR
SENSOR
SHUFFLE
REV.
MODE
BAND
RECORD
PROGRAM
MIC
REPEAT
•DEMO
STOP
•CLEAR
SEARCH
•TUNING
VOLUME
ST
ANDBY ON
MC
-55
VIDEO
CD
MICR
O
SY
STEM
DIGITAL
SOUND
CONTROL
4
PRESET
3
DIRECTION
PLAY
•PAUSE
1
2
3
VCD
TUNER
TAPE
Tape Operation/Recor
ding
Loading
a
ta
pe
1
Press
#
OPEN
to open
the tape deck door
.
2
Inser
t a
recorded
tape
and
close
the
tape
door
.
l
Load the tape with the open side down.
Ta
pe
pla
yback
1
Press
TAPE
to select
Tape mode
.
2
Press
Å
1
or
2
Å
to select the direction f
or
playback.
‹
"
PLAY
" with pla
yback direction indicator will
appear on the displa
y.
l
To inter
rupt pla
yback,
press the last selected
Å
1
or
2
Å
b
utton.
‹
"
PAUSE
" will be display
ed.
l
To resume playback,
press
Å
1
or
2
Å
again.
3
To stop playback,
press
9
.
Auto Re
verse
l
Press
REV
. MODE
(
TAPE
) repeatedl
y
to
select the diff
erent playback modes.
å
: playback on one side of the tape onl
y.
∂
: both
sides
are
pla
yed
once
.
∫
: both sides are pla
yed repeatedly
, up
to 10 times each side unless you press
Ç
.
CLOCK
TIMER ON/OFF
SET
OPEN/ CLOSE
STEREO/ VOCAL
O
S
D/D
IM
iR
SENSOR
SHUFFLE
REV.
MODE
BAND
RECORD
PROGRAM
MIC
REPEAT
•DEMO
STOP
•CLEAR
SEARCH
•TUNING
VOLUME
ST
ANDBY ON
MC
-55
VIDEO
CD
MICR
O
SY
STEM
DIGIT
AL
SOUND
CONTROL
OPEN
DIGITAL
SOUND
CONTROL
4
PRESET
3
DIRECTION
PLAY
•PAUSE
1
2
3
VCD
TUNER
TAPE
Re
wind/F
ast forwar
d
1
Press
S
or
T
to rewind or fast forward the
tape
.
‹
"
TAPE
" with the direction indicator will
appear on the displa
y.
2
Press
Ç
to
stop
rewinding
or
fast
forwarding.
l
The
tape
will
stop
automatically
at
the
end
of
the rewinding or fast forwarding.
General
inf
ormation
on
recor
ding
l
Recording is per
missib
le if copyr
ight or other
rights of third par
ties are not infr
inged upon.
l
If
you
do
not
intend
to
record
via
the
microphone
, unplug
the
microphone
to
av
oid
accidental
mixing
with
other
recording
source
.
l
For recording,
use only tape of IEC type I
(nor
mal tape).
l
The
recording
lev
el
is
set
automatically
,
regardless of the position of the
Volume
, DSC
and so for
th.
l
The
tape
is
secured
at
both
ends
with
leader
tape
. At the beginning and end of the tape
,
nothing
will
be
recorded
for
six
to
sev
en
seconds.
l
To
prevent
accidental
recording,
break
out
the
tab on the left shoulder of the tape side y
ou
want to protect.
l
If “
ERROR
” or
“
TAPE PROTECTED
” is display
ed,
the
protection
tab
has
been
brok
en.
Put
a
piece
of clear adhesive tape o
ver the opening.
Recor
ding
1
Load a recordab
le tape into the tape deck.
2
Press
REV
. MODE
(
TAPE
) repeatedly
to
select a recording mode
.
‹
å
for recording on one side onl
y.
‹
∂
∂
∂
∂
∂
for recording on both sides.
3
Press
VCD
or
TUNER
to select the recording
source
.
4
Press
RECORD
.
‹
“
REC
< >
”
will be display
ed and
REC
star
ts
flashing.
5
Press
Å
1
or
2
Å
to star
t and select the
direction f
or recording.
‹
REC
will remain on the displa
y.
l
To stop recording,
press
Ç
.
‹
The selected recording source will contin
ue
pla
ying.
Summary of Contents for MC-55
Page 4: ......
Page 6: ......
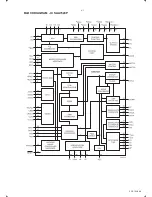
Page 13: ...PCS 104 686 4 1 BLOCK DIAGRAM IC SAA7324P ...
Page 14: ...BLOCK DIAGRAM 4 2 PCS 104 687 ...
Page 15: ...WIRING DIAGRAM 5 1 5 1 PCS 104 688 ...
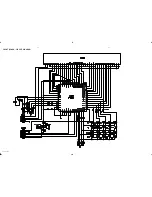
Page 16: ...FRONT BOARD CIRCUIT DIAGRAM 6 1 6 1 PCS 104 689 ...
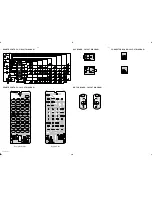
Page 17: ...FRONT BOARD LAYOUT DIAGRAM 6 2 6 2 PCS 104 690 ...
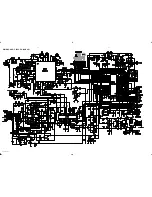
Page 18: ...MAIN BOARD CIRCUIT DIAGRAM 7 1 7 1 PCS 104 691 ...
Page 19: ...MAIN BOARD LAYOUT DIAGRAM 7 2 7 2 PCS 104 692 Component Side Copper Side ...
Page 20: ...POWER SUPPLY BOARD CIRCUIT DIAGRAM 8 1 8 1 PCS 104 693 ...
Page 21: ...POWER SUPPLY BOARD CIRCUIT DIAGRAM 8 2 8 2 PCS 104 694 ...
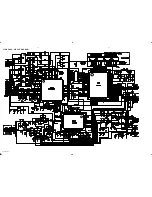
Page 22: ...VCD BOARD CIRCUIT DIAGRAM 9 1 9 1 PCS 104 695 ...
Page 23: ...VCD BOARD LAYOUT DIAGRAM 9 2 9 2 PCS 104 696 Top View Bottom View ...


