background image

Need Help? Call us at 1.800.54.AVENT or visit www.aventamerica.com

Before you begin pumping, make sure you have washed, sanitized and carefully
assembled the ISIS Manual Pump. Consult the ‘Preparing to Pump’ on page 7 for tips
about stimulating let-down and milk flow.

18

17

2

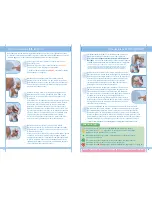
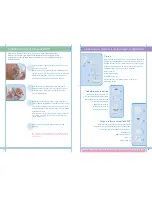
Initiate let-down: Squeeze the handle with shallow,

quick strokes, until milk starts to flow. Do not use full

compression on the handle.

3

Begin Pumping: When you see milk beginning to flow,

you can establish a comfortable pumping rhythm 

and level of suction. Create a natural breastfeeding

rhythm by holding down on the handle for 3 seconds,

then releasing, and repeating that pattern for 

each compression.

Note: You do not need to compress the handle fully, only until it
feels comfortable. The further you compress the handle, the more
suction the pump will provide.

4

After milk is collected, unscrew the pump body 

from the base.

Caution: Do not continue pumping for more than five minutes 
at a time if no result is achieved. Try expressing at another time
during the day.

1

Wash your hands thoroughly and make sure your 

breasts are clean.

Form a Seal: Press the pump against your breast, so 

that your nipple fits into the funnel. A seal should form

between the pump and your breast.

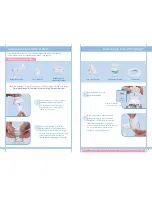
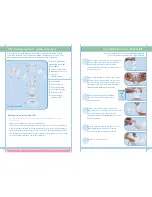
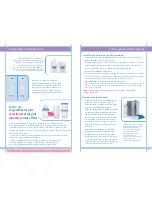
Storage Base 

After sanitizing all parts, click the 

sealing disc into the screw ring.

Screw the ring onto the reusable base.

Screw ring (r)

Sealing disc (t)

Reusable base (e) 

AVENT Natural Shape Nipple

After sanitizing all parts, click the

nipple into the screw ring. Screw the

travel cover into the ring. Attach the

dome cap over the top of the nipple.

Dome cap (p)

Screw ring (r)

Nipple (q)

Travel cover (s)

d

e

g

h

p

q

r

r

s

s

t

Using the ISIS

Manual Pump

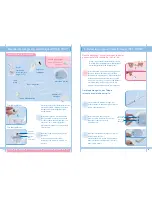
Keeping Parts Clean and Compact for Travel

Pump 

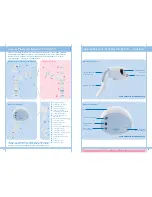
After sanitizing all parts, insert the white valve and

diaphragm into the pump body. Clip the funnel cover

over the Let-down Massage Cushion

and screw the

travel cover onto the bottom of the pump body. Then

put the assembled items in the gray drawstring bag.

Travel cover (s)

Pump body (d)

Let-down Massage Cushion (g)

Funnel cover (h) (also used as a stand when pumping)

Summary of Contents for ISIS iQ DUO

Page 1: ...LE RETOURNEZ PAS au détaillant Veuillez plutôt communiquer sans frais avec notre service à la clientèle au 1 800 54 AVENT où nos représentants se feront un plaisir de vous aider NOTE La présente garantie ne s applique pas à tout dommage causé par accident abus mauvaise utilisation usage impropre négligence ou usure normale GARANTÍA LIMITADA Este es un producto de cuidado personal y por eso no se l...

Page 2: ...ntrol Control Handle Pump Motor Light Control Cable Socket Power Socket Twin Tubing Port Control Cable Socket Tubing Port NEVER SANITIZE OR IMMERSE IN WATER NEVER SANITIZE OR IMMERSE IN WATER On Off Switch Control Handle Need Help Call us at 1 800 54 AVENT or visit www aventamerica com When assembled parts b g make up an assembled pump body When the Control Handle a is added to this assembled pump...

Page 3: ...ter or other liquid Do not reach for a product that has fallen into water Unplug from electrical outlet immediately Close supervision is necessary when this product is used near children or persons with disabilities Do not allow children or pets to play with the pump motor tubing power supply or accessories as these parts may pose a choking or strangulation danger There are no serviceable parts in...

Page 4: ...ned to hold the washable components of the ISIS iQ DUO and the entire ISIS Manual Pump 5 Make sure that ISIS iQ pump motor is turned off and unplugged before disassembling parts See section titled ISIS iQ DUO Pump Parts Guide on page 1 for a description of the First Control Pump and Second Pump 6 Need Help Call us at 1 800 54 AVENT or visit www aventamerica com a c d e g h i l m b Second Pump On t...

Page 5: ...h and relaxation can encourage milk flow Try expressing after a bath or shower 6 Try expressing from one breast while your baby is feeding on the other or continue expressing just after a feed 7 Reposition the pump on your breasts from time to time This can stimulate your milk ducts How quickly will the milk flow begin When pumping with the ISIS iQ DUO your milk should begin to flow after a few co...

Page 6: ...the white valve into the pump body so that it fits securely into the small round hole Make sure the pointed side of the valve is facing down Fit the clear silicone diaphragm into the pump body Ensure a perfect seal around the rim by pressing down with your fingers This is easier if assembled while the diaphragm is wet Screw the pump body onto the reusable base until securely in place The Let down ...

Page 7: ...dle Transparent Tubing Port Control Cable Socket Push the double pumping connector onto the pump body so that it sits firmly on top of the silicone diaphragm Securely attach the other transparent tube to the double pumping connector When ISIS iQ DUO is fully assembled the Second Pump will mimic simultaneously the speed and suction of the First Control Pump If you are single pumping you can keep th...

Page 8: ...l necessary parts before the next use Next time you turn your pump on Resuming Saved Session Turn on the pump as in Step 1 Complete Step 2 Press the blue One Touch Memory Control This engages the automatic pumping mode The pump will continue with the rhythm of the last two saved compressions of the milk expression phase Continue pumping as described in Step 4 Need to re establish let down If you n...

Page 9: ...of the ISIS Manual Breast Pump are sterilizer safe Sanitize in a steam sterilizer electronic electric or microwave or by boiling in water for 10 minutes 1Wash your hands thoroughly Click the white valve into the pump body so that it fits securely into the small round hole Make sure the pointed side of the valve is facing down 2 3Twist the reusable base onto the pump body until securely in place To...

Page 10: ... minutes at a time if no result is achieved Try expressing at another time during the day 1 Wash your hands thoroughly and make sure your breasts are clean Form a Seal Press the pump against your breast so that your nipple fits into the funnel A seal should form between the pump and your breast Storage Base After sanitizing all parts click the sealing disc into the screw ring Screw the ring onto t...

Page 11: ... first expression or store it in the freezer DO NOT add fresh breast milk to already frozen milk Note Only milk collected with a clean sanitized pump should be stored to be fed to your baby Sanitize Breast Milk Storage Containers before use or express milk directly into VIA Disposable Cups Never immerse a frozen bottle or liner in boiling water as this may cause it to crack split Transporting Expr...

Page 12: ...ssing of the control handle Ensure the pump is correctly assembled and switched on with the power indicator illuminated GREEN Make sure the cables between the electric wall socket and the pump are correctly connected Pump light flashing RED If the pump stops working and the power light is flashing RED then a fault has been detected 3 flashes delay 3 flashes etc the ISIS iQ has detected a vacuum fa...

Page 13: ...ineux Prise pour câble pilote Prise de courant Port pour double tube Prise pour câble pilote Port pour double tube NE JAMAIS DÉSINFECTER OU IMMERGER DANS L EAU NE JAMAIS DÉSINFECTER OU IMMERGER DANS L EAU Interrupteur marche arrêt 1 poignée de commande Besoin d aide Appelez nous au 1 800 54 AVENT ou visitez www aventamerica com Les pièces b à g assemblées forment un des bols du tire lait Lorsque l...

Page 14: ...e cordon d alimentation dans l eau ou autre liquide Ne saisissez pas un appareil qui est tombé à l eau Débranchez le immédiatement Une étroite surveillance s impose lorsqu on utilise cet appareil en présence d enfants ou de personnes handicapées Ne laissez pas les enfants ou les animaux domestiques jouer avec le moteur les tubes le bloc d alimentation ou les accessoires puisque ces éléments pourra...

Page 15: ...RATIQUE Les stérilisateurs vapeurs électronique électrique ou micro ondes AVENT sont conçus spécifiquement pour les pièces lavables du tire lait ISIS iQ DUOet pour le tire lait manuel ISISMD 27 Mettez le tire lait ISIS iQ hors tension et débranchez le avant de le démonter Consultez la section intitulée Guide des pièces d ISIS iQ DUO à la page 23 pour la description du tire lait régulateur et du se...

Page 16: ...nflés 5 Votre lait coule mieux quand vous êtes détendue et que vous êtes au chaud Essayez d en tirer après un bain ou une douche 6 Essayez de tirer d un sein quand votre bébé tète de l autre ou bien tirez juste après une tétée 7 Changez la position du tire lait de temps en temps pour stimuler le canal galactophore Le lait commencera t il à s écouler rapidement Lorsque vous pompez avec ISIS iQ DUOM...

Page 17: ...tonnoir à l envers et poussez fermement la petite valve blanche dans le fond du bol de l entonnoir Assurez vous que le côté pointu de la valve est en dessous Enfoncez le diaphragme en silicone transparent dans le bol les bords bien repliés sur le pourtour Pressez les doigts sur toute la circonférence pour assurer que l étanchéité est parfaite La tâche est facilitée quand le diaphragme est mouillé ...

Page 18: ... elle soit fixée solidement au diaphragme en silicone Ce bol assemblé devient le tire lait régulateur doté des composants électroniques Branchez le câble pilote sur la prise de la poignée Insérez solidement un des tubes transparents au port de la poignée de contrôle Port pour tube transparent Prise pour câble pilote Insérez le double connecteur à pompage dans le second bol de manière à ce qu il so...

Page 19: ...le gobelet à ras bord Lavez et désinfectez toutes les pièces avant la prochaine utilisation La prochaine utilisation du tire lait Poursuivre la séance mémorisée Mettez le tire lait en marche comme à l étape 1 Terminez l étape 2 Appuyez sur la touche de commande bleue qui active le mode automatique Le tire lait reproduit les paramètres gardés en mémoire des deux dernières compressions Continuez de ...

Page 20: ...é après chaque usage Toutes les pièces du tire lait manuel ISIS peuvent être stérilisées dans un stérilisateur vapeur électronique électrique ou à micro ondes ou en les faisant bouillir dans l eau durant 10 minutes 1 2 3 4 5 6 Tire lait manuel ISIS c d e f f g h h u v w u v w c d e f g h Socle blanc ISIS MD Tire lait manuel Guide des pièces Assembler le tire lait manuel ISIS MD Lavez vos mains soi...

Page 21: ...sion à votre confort Plus vous pressez la poignée plus l aspiration augmente Après avoir recueilli votre lait dévissez le bol du gobelet Mise en garde Ne continuez pas à pomper plus de 5 minutes à la fois même si vous n obtenez aucun résultat Essayez plutôt à un autre moment Gobelet de conservation Après avoir désinfecté toutes les pièces insérez un disque d étanchéité dans la bague d étanchéité e...

Page 22: ...ait doit être utilisé en l espace de 48 heures à partir de la première extraction ou il doit être congelé NE RAJOUTEZ PAS de lait fraîchement tiré à du lait congelé Note Seul du lait recueilli à l aide d un tire lait nettoyé et stérilisé devrait être conservé pour nourrir bébé Désinfectez les contenants de conservation de lait maternel avant usage ou tirez du lait directement dans un gobelet jetab...

Page 23: ...toyer et désinfecter ISIS iQ DUOMD à la page 28 du mode d emploi Contactez AVENT pour des pièces de rechange Appelez 1 800 54 AVENT ou visitez notre site à www aventamerica com Assurez vous que le tire lait est correctement assemblé et qu il est sous tension le témoin VERT indique que l appareil est en marche Assurez vous que le cordon d alimentation est bien branché au tire lait et dans la prise ...

Page 24: ...de electricidad Puerto de tubo gemelo Puerto de tubos Enchufe del cable de control NUNCA DESINFECTE NI SUMERJA AL AGUA NUNCA DESINFECTE NI SUMERJA AL AGUA Interruptor Encender Apagar Manivela de Control Necesita ayuda Llámenos al 1 800 54 AVENT o visite www aventamerica com Cuando está montado las piezas b g forman un cuerpo de extractor montado Cuando la Manivela de Control a está sujetada a este...

Page 25: ...ontrol adaptador eléctrico o cable que conecta a la pared en agua u otro líquido No intente alcanzar un producto que se ha caído al agua Desenchufe del tomacorriente inmediatamente Se requiere vigilancia de cerca cuando se utiliza este producto cerca de niños o personas con discapacidades No permita que niños o mascotas jueguen con el motor del extractor los tubos la fuente de electricidad o las a...

Page 26: ... diseñados para contener los componentes lavables del ISIS iQ DUO y el Extractor Manual ISIS entero 49 Asegure que el motor del extractor ISIS iQ esté apagado y desenchufado antes de desmontar las piezas Vea la sección Guía de Piezas del Extractor ISIS iQ DUO en la página 45 para una descripción del Primer Extractor Extractor de Control y el Segundo Extractor 50 Necesita ayuda Llámenos al 1 800 54...

Page 27: ...tente extraer leche después de bañarse o ducharse 6 Intente extraer leche de un seno mientras su bebé amamanta del otro o siga extrayendo justo después de una alimentación 7 Cambie la posición del extractor en los senos de vez en cuando Esto puede estimular los conductos de leche Con qué rapidez empezará el flujo de leche Al extraer leche con el ISIS iQ DUO su leche debe empezar a fluir después de...

Page 28: ...rpo del extractor metiéndola seguramente en el pequeño agujero redondo Asegure que el extremo puntiagudo de la válvula dé hacia abajo Coloque el diafragma de silicona transparente en el cuerpo del extractor Asegure que forme un cierre perfecto alrededor del borde apretándolo con los dedos Esto será más fácil si lo monta cuando el diafragma está mojado Rosque el cuerpo del extractor a la base reuti...

Page 29: ...ente firmemente encima del diafragma de silicona Este montaje se convierte en el Primer Extractor Extractor de Control que contiene los electrónicos del extractor Encaje el cable de control al enchufe de la manivela de control Luego sujete seguramente uno de los tubos transparentes al puerto en la manivela de control Puerto de tubo transparente Enchufe del cable de control Empuje el conector de do...

Page 30: ...ón automática El extractor seguirá con el ritmo de las últimas dos compresiones guardadas de la etapa de extracción de leche Continúe extrayendo como se describe en el Paso 4 Necesita restablecer la bajada de leche Si necesita establecer la bajada de leche prenda el extractor igual que en el Paso 1 Complete el Paso 2 Apriete la manivela con compresiones rápidas y superficiales y continúe como se d...

Page 31: ...del Extractor Manual ISIS están a prueba del esterilizador Desinfecte en un esterilizador de vapor electrónico eléctrico o de microondas o hirviéndolo en agua por 10 minutos 1Lávese completamente las manos Introduzca la válvula blanca al cuerpo del extractor para que quepa seguramente en el pequeño agujero redondo Asegure que el extremo puntiagudo de la válvula dé hacia abajo 2 3Gire la base reuti...

Page 32: ...la manivela tanta más succión será proveída por el extractor Después de acumular la leche desenrosque el cuerpo del extractor de la base Precaución No continúe extrayendo por más de 5 minutos a la vez si no logre ningún resultado Intente extraer leche en otro momento del día Base Para Conservación Después de desinfectar todas las piezas encaje el disco de sellado en la rosca Enrosque la rosca a la...

Page 33: ...consérvela en el congelador NO le agregue leche materna fresca a leche ya congelada Note Sólo debe alimentarle a su bebé leche que haya sido extraída con un extractor limpio y desinfectado Desinfecte Contenedores de Conservación de Leche Materna antes del uso o extraiga leche directamente en los Vasitos Desechables VIA Nunca sumerja un biberón congelado o una bolsa congelada en agua hirviendo como...

Page 34: ... pueden dañar el plástico Combinaciones de detergentes productos de limpieza solución desinfectante agua descalcificada y fluctuaciones de temperatura pueden bajo ciertas circunstancias hacer que el plástico se agriete Si esto ocurre no utilice el producto Los cuerpos del extractor y contenedores para leche materna son a prueba del lavavajillas pero colorantes alimenticios los pueden decolorar Sig...

Reviews: