3 - 1
3 - 1
DISASSEMBLY INSTRUCTIONS
Dismantling of the USB+MP3 Board, Loudspeaker boxes and Top Trim Aluminum
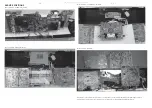
1) Loosen 4 screws “G” on the top of USB & MP3 Board as shown in fi gure 8.
2) Loosen 8 screws “H” & “I” to remove the left & right Loudspeaker boxes as shown in fi gure 9 & 10.
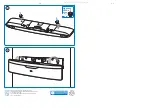
3) Loosen 11 screws “J” to remove the Top Trim Aluminum as shown in fi gure 11 .
Figure 3
Dismantling of the Front Assembly
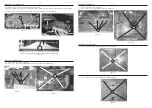
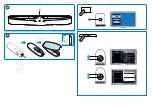
1) According to fi gure 1, the mark to remove wire cover left & right.
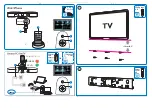
2) Loosen 4 screws “A” to remove the Foot Stand assembly as shown in fi gure 2.
3) Loosen 14 screws “B” at the back cover as shown in fi gure 3.
4) Loosen 8 screws “C” to remove the PCBA/Brackets assembly as shown in fi gure 4.
Figure 2
Figure 4
Figure 8
Dismantling of the Blu-ray Loader
1) Loosen 4 screws “D” at the Blu-ray Loader as shown in fi gure 5.
Figure 9
Figure 5
A
B
C
E
Figure 6
G
J
H
I
Figure 10
Figure 11
D
Figure 1
Dismantling of the Touch Board
1) Loosen 8 screws “E” to remove touch panel assembly as shown in fi gure 6.
2) Loosen 5 screws “F” as shown in fi gure 7.
F
Figure 7
All manuals and user guides at all-guides.com
all-guides.com


