background image

36


EN

6 Adjust sound

Control the volume

Press 

VOL 

+-


to increase or decrease 

the volume level.

To mute the volume, press 

H

.

To restore the volume, press 

H

 again 

or press the volume button.

Adjust Bass/Treble

Press 

BASS / TREBLE

.

Press 

VOL 

+-

repeatedly to set the 

level for low (BASS) or high (TREBLE) 
tone.

 Note

If the volume control is not used within 10 seconds, it 
resumes normal volume control function. 


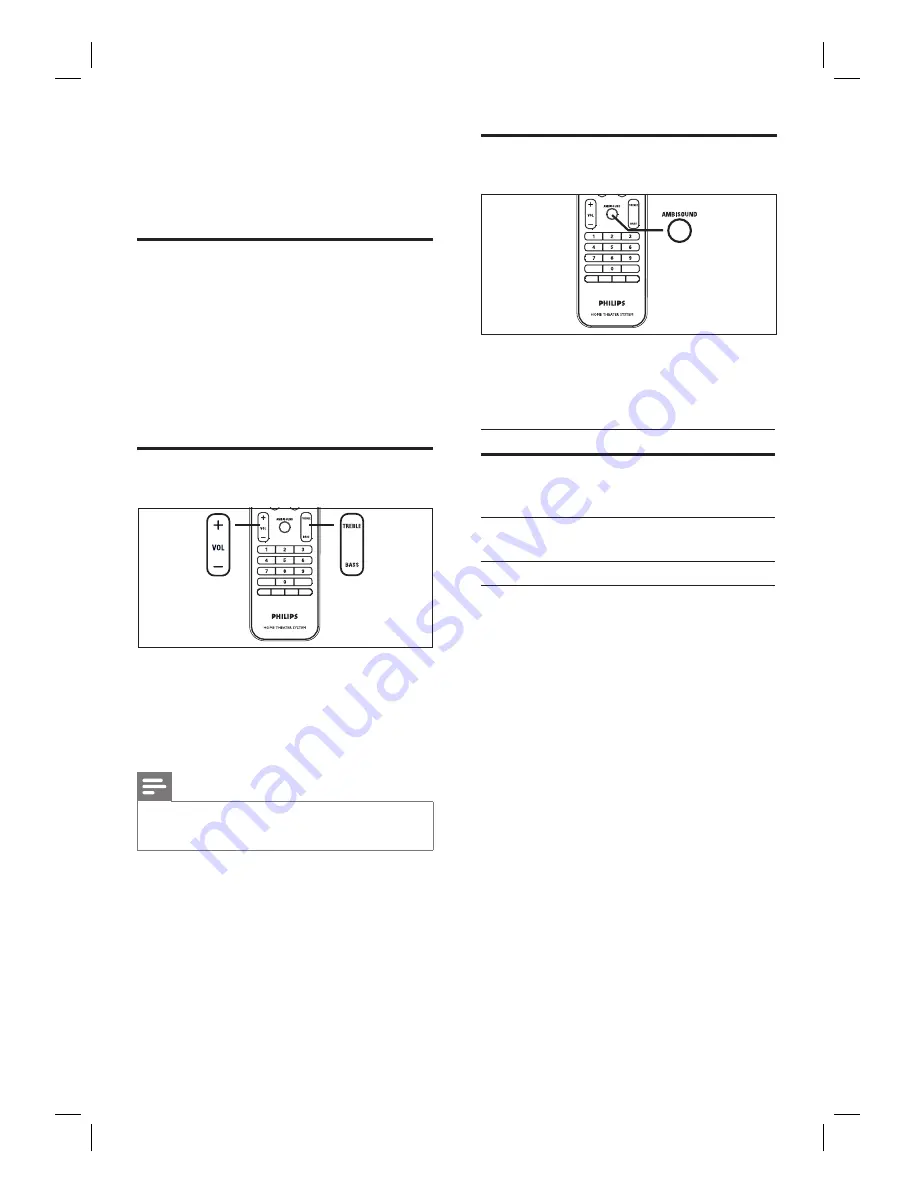
Select Ambisound

Press 

AMBISOUND 

repeatedly to select a 

best Ambisound output that most suits the 
video or music you play.

Options

Descriptions

AUTO

The surround output will be 
selected based on the audio 
stream of the played content.

MULTI-
CHANNEL

Multi-channel surround sound.

STEREO

Stereo sound.

Summary of Contents for HTS6100

Page 1: ...HTS6100 Register your product and get support at www philips com welcome EN DVD Home Theater System 5 ...

Page 2: ...deo Recorder LCD Projector Wireless Audio System Audio System Home Theatre System Digital Photo Display Photo Frame Digital Set Top Box U 1 1 Y Ye ea ar r Free Replacement at your Retailer Portable Audio MP3 players DVD Players DVD VCR Combo Players DVD Recorders without HDD Portable DVD LCD players UConditions of Repair Warranty 1 All claims for warranty service should be made to your nearest Phi...

Page 3: ...anty valid for all new products purchased after 1st January 2007 2 U A Au ut th ho or ri is se ed d S Se er rv vi ic ce e C Ce en nt tr re e N Ne et tw wo or rk k Customer support is provided in Australia by our trained call centre staff For assistance with product features and specifications please call U T Te ec ch hn no ol lo og gy y C Ca ar re e C Ce en nt tr re e Please record the following i...

Page 4: ...dia files and the DivX Media Format Windows Media and the Windows logo are trademarks or registered trademarks of Microsoft Corporation in the United States and or other countries HDMI and HDMI logo and High Definition Multimedia Interface are trademarks or registered trademarks of HDMI licensing LLC The USB IF Logos are trademarks of Universal Serial Bus Implementers Forum Inc iPod is a trademark...

Page 5: ... 20 Start Ambisound setup 20 Turn on Progressive Scan 22 Activate EasyLink control 23 Select a play source 24 5 Play 25 Play from disc 25 Play video 26 Play music 29 Play photo 30 Play from USB device 31 Play from portable media player 32 Play from iPod 32 Play from radio 34 6 Adjust sound 36 Control the volume 36 Adjust Bass Treble 36 Select Ambisound 36 Select a preset sound effect 37 7 Adjust s...

Page 6: ...g or disassembly is prohibited 1 Important Safety and important notice Warning Risk of fire or electric shock Ensure that air can circulate freely through the ventilation holes on this unit Allow at least 5 10 cm clearance around the unit Never expose this unit to direct sunlight naked flames or heat Never place this unit on other electrical equipment Keep away from this unit during lightning stor...

Page 7: ...l to share functionality with all HDMI CEC compliant devices over HDMI It enables the connected devices to control each other with a single remote control Note Philips does not guarantee 100 interoperability with all HDMI CEC devices Ambisound Philips Ambisound technology reproduces multi channel surround sound with fewer speakers to give an embracing surround experience without the hassle of sett...

Page 8: ...band AUX DI MP3 LINK switch to AUX1 INPUT AUX2 INPUT AUX3 INPUT DIGITAL INPUT or MP3 LINK that corresponds to the jack you used to connect the external device DOCK switch to the iPod that is connected to the docking station d INFO Display the current status or disc information Display photo files in 12 thumbnails view e OPTIONS Access or exit Options menu this menu provides various setting options...

Page 9: ...ess left or right for fast backward or forward search RADIO press up or down to tune the radio frequency RADIO press left or right to start auto search n BACK TITLE Return to the previous display menu For DVD go to title menu For VCD version 2 0 or SVCD with PBC turned on return to the menu during playback o í ë Previous Next Skip to the previous or next title chapter track RADIO select a preset r...

Page 10: ... PLAY PAUSE u Start or pause disc play RADIO start auto radio installation only available for first time setup STOP x Stop disc play RADIO erase the current preset radio station e OPEN CLOSE Z Open or close the disc compartment f Display panel g Disc compartment Note The following connections are located at the left side panel of the unit h MP3 LINK jack To connect portable audio player i USB jack...

Page 11: ...e or change any connections ensure that all the devices are disconnected from the power outlet Place the unit Place this unit on top of a table or mount it on the wall see chapter Mount the DVD Home Theater unit Never place this unit in an enclosed cabinet Install this unit near the AC outlet where the AC power plug can be easily reached 1 Place this DVD Home Theater unit near to the TV Place it a...

Page 12: ...omponent video jack for a standard TV or Progressive Scan TV Option 3 Connect to video CVBS jack for a standard TV Note You must connect this unit directly to a TV Before you connect 1 Push up the catches at the bottom of the rear cover and lift it up 2 Connect the cables to the corresponding jacks and direct the cables to the CABLE OUT point 3 Once complete close the rear cover Note All the cable...

Page 13: ...VI connection An extra audio connection is needed to complete this connection To route the audio from your TV to this DVD Home Theater unit connect an audio cable from the audio input on this unit to the audio output on your TV This type of connections provide best picture quality Option 2 Connect to component video jack COMPONENT VIDEO OUT 1 Connect the component video cables not supplied from th...

Page 14: ...ay be labeled as A V IN VIDEO IN COMPOSITE or BASEBAND This type of connections provide standard picture quality Connect subwoofer TO SUBWOOFER LOUDSPEAKERS 1 2 3 1 Unwind the subwoofer s interconnect cable at TO MAIN UNIT 2 Connect the white end of the interconnect cable to the LOUDSPEAKERS jack on this unit 3 Connect the gray end of the interconnect cable to the TO SUBWOOFER jack on this unit ...

Page 15: ...wer cord when all the required connections are complete and you are ready to enjoy this DVD Home Theater unit Connect audio cables other devices This section describes how you can route the sound from other devices to this DVD Home Theater unit in order to enjoy sound output or audio play with multi channel surround capabilities Connect audio from TV also used for EasyLink control 1 Connect an aud...

Page 16: ...anel Connect to digital jack COAXIAL DIGITAL IN 1 Connect a coaxial cable not supplied from the DIGITAL IN COAXIAL jack on the subwoofer to the COAXIAL DIGITAL OUT jack on the device Note To listen to the audio output from this connection press AUX DI MP3 LINK repeatedly until DIGITAL INPUT is displayed on the display panel Connect portable media player MP3 1 Connect a 3 5mm stereo audio cable not...

Page 17: ... Theater unit only support audio play from your iPod To listen to the audio output from this connection press DOCK Mount the DVD Home Theater unit Caution Risk of personal injury and damage to the unit Allow only qualified persons to mount the unit 1 Ensure all the required cables are connected to this unit and close the rear cover 2 Attach the supplied knobs to the rear of this unit 3 Turn this u...

Page 18: ...to the holes Tips To mount this DVD Home Theater unit below your TV leave at least 10cm 4 inches of space between the TV and the bracket 6 Secure the bracket onto the wall with screws not supplied 7 Hook the DVD Home Theater unit firmly onto the mounted bracket Slide the knobs through the key holes and lock into position ...

Page 19: ...he batteries Control a play source 1 Select the source you wish to control by pressing the DISC USB RADIO or AUX DI MP3 LINK or DOCK button 2 Then select the desired function for example í ë Navigate through the menu 1 Point the remote control directly at the remote sensor on this unit and select the desired function 2 Use the following buttons on the remote control to navigate through the on scre...

Page 20: ...ow to select the correct input on your TV Start Ambisound setup When you turn on this unit for the first time follow the instructions on the TV to complete the Ambisound setup in order to obtain the best possible surround sound effect Note Before you start ensure that you have made all the required connections Complete the Ambisound setup for this unit before you insert a disc to play 1 Press DISC...

Page 21: ... placed Select Height Back Change High 1 2m 47in Low 0 8m 32in Default 0 8 1 2m 32 47in 8 Select the height of which the DVD Home Theater unit SoundBar is placed then press B Listening Position menu is displayed Select the distance between your listening position and the SoundBar system Select Listening Position Back Change Near 2m 78in Far 3m 118in Default 2 3m 78 118in 9 Select the distance betw...

Page 22: ... On then press OK A warning message is displayed 6 To proceed select OK in the menu and press OK The progressive setup is complete Note If a blank distorted screen is displayed wait for 15 seconds for the auto recover If no picture displayed turn off the progressive scan mode as follows 1 Press Z to open the disc compartment 2 Press B 3 Press SUBTITLE 7 To exit the menu press OPTIONS 8 You can now...

Page 23: ...le to render the audio signals from the active source It switches automatically to the corresponding audio input and output the sound from its speaker system Before you can enjoy this function you have to map the audio inputs to the connected devices You can use any HDMI CEC TV device remote control to adjust the volume Note To enable one touch play function a video disc must be placed in the disc...

Page 24: ... connected to this audio input then press OK Repeat steps 8 9 to map other connected devices 10 To exit the menu press OPTIONS Select a play source On the main unit 1 Press SOURCE button repeatedly to select DISC USB DOCK RADIO FM RADIO AM MW DIGITAL INPUT AUX1 INPUT AUX2 INPUT AUX3 INPUT MP3 LINK DISC On the remote control Press DISC to switch to DISC mode Press USB to switch to USB mode Press RA...

Page 25: ...bjects other than discs into the disc compartment Never touch the disc optical lens inside the disc compartment 1 Press Z to open the disc compartment 2 Insert a disc with its label facing up For double sided disc load the side to play faces up 3 Press Z to close the disc compartment and start disc play To view disc play turn on the TV to the correct viewing channel for this DVD Home Theater unit ...

Page 26: ...or VCD only forward play is possible Change video play 1 Play a title 2 Use the remote control to change the video play Button Action Change audio language Only applicable to discs with multiple audio language or channel Change subtitle language Only applicable to discs with multiple subtitle language Toggle through various repeat shuffle play mode or turn off repeat mode Repeat options vary depen...

Page 27: ...arts play from the first title During playback you can press BACK to return to the menu if the PBC mode is on Tips The default setting for PBC is on To change the default setting see chapter Adjust settings Preference Setup PBC for details Sync audio output with video play If the video play is slower than the audio output sound does not match with the pictures you can delay the audio output to mat...

Page 28: ...ss DISC or USB A contents menu is displayed 3 Select a title to play then press u 4 Use the remote control to control the title Button Action Change subtitle language Change audio language track Stop play For DivX Ultra video press this button again to display the contents menu Display DivX Ultra video information Note Only those DivX videos that were rented or purchased using the DivX registratio...

Page 29: ...files with mp3 or wma extensions 1 Insert a disc or USB that contains the MP3 WMA music 2 Press DISC or USB A contents menu is displayed 3 Select a folder then press OK 4 Select a track to play then press u To return to the main menu press v until Previous folder is selected then press OK Note For CDs recorded in multiple sessions only the first session is played This unit does not support MP3PRO ...

Page 30: ... due to the large number of songs photos compiled onto one disc If the JPEG photo is not recorded with an exif type file the actual thumbnail picture will not be shown on the display It will be replaced with a blue mountain thumbnail picture This unit can only display digital camera pictures according to the JPEG EXIF format typically used by almost all digital cameras It cannot display Motion JPE...

Page 31: ...w MP3 WMA DivX Ultra or JPEG files that are stored on such devices 1 Connect a USB flash drive or USB memory card reader to the USB jack on this unit 2 Press USB A contents menu is displayed 3 Select a file to play then press u For more information see chapters Play music Play photo Play video for details 4 To stop play press x or remove the USB device Tips If the device does not fit into the USB ...

Page 32: ... playback is only possible on your portable media player Stop play on the portable media player before you switch to other play media source Play from iPod Simply connect your iPod to the Philips universal docking station supplied to enjoy your iPod play through this DVD Home Theater unit List of supported iPod range audio tracks only iPod Mini iPod Nano 1st gen iPod Touch iPod Nano 2nd gen iPod C...

Page 33: ... 2 Dock your iPod to the docking station and turn it on 3 Press DOCK It may require longer time to authenticate the compatibility of certain iPod range 4 Start play on your iPod 5 During playback you can use the remote control to control the music play Button Action Change the volume level Select a predefined sound effect Select an Ambisound effect Go to the previous next track m M Search backward...

Page 34: ...m your TV VCR or other radiation source to prevent unwanted interference First time tuning The first time when you access RADIO mode follow the instructions to install the radio stations 1 Press RADIO AUTO INSTALL PRESS PLAY is displayed 2 Press u All detected radio stations are stored Once complete it tunes to the first preset radio station To stop auto tuning press x Note This unit can store up ...

Page 35: ...and store radio stations individually 1 Press RADIO repeatedly to select FM or AM MW band 2 Press m M The radio frequency indication starts to change until a radio station is detected 3 Repeat step 2 until you tune to the radio station you wish to store To finetune the radio frequency press vV 4 Press PROGRAM If no action is carried out within 20 seconds after the above step it exits the preset mo...

Page 36: ...to set the level for low BASS or high TREBLE tone Note If the volume control is not used within 10 seconds it resumes normal volume control function Select Ambisound 1 Press AMBISOUND repeatedly to select a best Ambisound output that most suits the video or music you play Options Descriptions AUTO The surround output will be selected based on the audio stream of the played content MULTI CHANNEL Mu...

Page 37: ... JAZZ Clear mid and high range Recreates the atmosphere of a live club with the artist just in front of you Good for Jazz music and watching dramas CONCERT CLASSIC Flat and pure sound mode Ideal for listening to classical music and watching live concert DVDs GAMING PARTY Slightly enhanced low range and strong mid range ideal for party music and video gaming SPORTS Moderate mid range and surround e...

Page 38: ...ture is only applicable if this unit is connected to HDMI CEC compliant TV device It enables all the linked devices response or react to certain commands simultaneously with one touch control Options Descriptions Auto Wake up TV It wake ups your TV automatically when you press PLAY to power up this unit and start disc play if a video disc is found in the disc compartment To disable this feature se...

Page 39: ...next time you want to play this disc you need to enter the password Unlock all discs can be played Tips To set or change your password go to Preference Setup Password Display Dim Change the brightness level of the display panel to suit the lighting in your room 100 normal brightness 70 medium brightness 40 dimmest display The LEDs and display icons will not be shown OSD Language Select the default...

Page 40: ...ess B 3 Select an option then press OK Audio Setup Ambisound Setup HDMI Audio Night Mode 4 Select a setting then press OK To return to the previous menu press BACK To exit the menu press OPTIONS Ambisound Setup Change the Ambisound setup Options Descriptions Setup Guide Select this if you want to go through the complete Ambisound settings Room Acoustics Select the type of walls that surround your ...

Page 41: ...ugh this speaker system Night Mode Make loud sound level softer and soft sound level louder so that you can watch the DVD movies at a low volume without disturbing others On for quiet viewing at night DVDs only Off enjoy surround sound with a full dynamic range Video setup 1 Press OPTIONS General Setup menu is displayed 2 Press V to select Video Setup then press B 3 Select an option then press OK ...

Page 42: ...customize the color setting Set the level of brightness contrast tint and color saturation in the menu then press OK HDMI Setup When you connect this unit and TV with HDMI cable select the best HDMI setup that your TV can support Wide Screen Format define the wide screen format for disc play Options Descriptions Superwide Center position of the screen is stretched less than the side This setting i...

Page 43: ...ort progressive signals you can activate the progressive scan mode of this unit On turn on progressive scan mode Off disable progressive scan mode Tips See chapter Get Started Turn on Progressive Scan for detailed information Preference Setup 1 Press OPTIONS General Setup menu is displayed 2 Press V to select Preference Setup then press B 3 Select an option then press OK Preference Setup Parental ...

Page 44: ...l discs to play select 8 Some DVDs have ratings printed on them but are not recorded with ratings This function has no effect on such DVDs Tips To set or change your password go to Preference Setup Password PBC For VCDs SVCDs recorded with PBC playback control you can access the disc contents through an interactive menu On an index menu is displayed when you load a disc for play Off skip the menu ...

Page 45: ...Russian Serbian Greek Greek Hebrew Hebrew Note Ensure that the subtitle file has the exact same file name as the movie file If for example the filename of the movie is Movie avi then you will need to name the text file Movie sub or Movie srt Version Info Display the software version of this unit Tips This information is required when you want to find out if a newest software version is available a...

Page 46: ...version is higher than the software version of this unit download it and store onto a CD R or USB flash drive 6 Insert the CD R or USB flash drive to this unit 7 Press DISC or USB then follow the instruction on the TV to confirm update operation Note Do not remove the CD R or USB when software updating is in progress 8 Once software update is complete this unit turns off to standby automatically N...

Page 47: ...Hz AM MW 531 1602 kHz 9 kHz AM MW 530 1700 kHz 10 kHz 26 dB quieting sensitivity FM 22 dBf AM 5000μV m IF rejection ratio FM 60 dB AM 24 dB Signal to noise ratio FM 50 dB AM 40 dB Harmonic distortion FM 3 AM 5 Frequency response FM 180 Hz 9 kHz 6dB Stereo separation FM 26 dB 1 kHz Stereo Threshold FM 23 5 dB USB Compatibility Hi Speed USB 2 0 Class support UMS USB Mass Storage Class iPod docking s...

Page 48: ...ting you have to switch to its default mode Press Z to open the disc compartment Press B for progressive scan or b for TV type Press SUBTITLE 1 2 3 No picture on HDMI connection Check if the HDMI cable is faulty Replace a new HDMI cable If this happens when you change the HDMI video resolution press HDMI repeatedly until the picture appears Warning Risk of electric shock Never remove the casing of...

Page 49: ...DivX video files cannot be played Ensure that the DivX file is encoded according to the Home Theater Profile with the DivX encoder Ensure that the DivX video file is complete The aspect ratio of the screen is not aligned with the TV display setting The aspect ratio is fixed on the DVD DivX subtitle are not displayed correctly Ensure that the subtitle file name is the same as the movie file name Se...

Page 50: ...cation that provides a secure transmission of digital contents between different devices to prevent unauthorized copyright JPEG A very common digital still picture format A still picture data compression system proposed by the Joint Photographic Expert Group which features small decrease in image quality in spite of its high compression ratio Files are recognised by their file extension JPG or JPE...

Page 51: ...585 Lao 7679 Latina 7665 Latvian 7686 Letzeburgesch 7666 Limburgan Limburger 7673 Lingala 7678 Lithuanian 7684 Luxembourgish 7666 Macedonian 7775 Malagasy 7771 Magyar 7285 Malayalam 7776 Maltese 7784 Manx 7186 Maori 7773 Marathi 7782 Marshallese 7772 Moldavian 7779 Mongolian 7778 Nauru 7865 Navaho Navajo 7886 Ndebele North 7868 Ndebele South 7882 Ndonga 7871 Nederlands 7876 Nepali 7869 Norsk 7879 ...

Page 52: ...52 ...

Page 53: ...53 ...

Page 54: ... 2008 Philips Consumer Lifestyle All right reserved sgpjp 0821 75 1 ...

Reviews: