2 - 2
2 - 2
REPAIR INSTRUCTIONS(main unit)
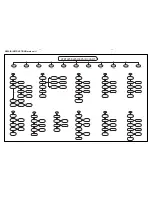
HTB7225/9225 REPAIR CHART
A
All function
No working
Check all system
all cable is loose
or bad INT
Panel stanby LED
show working or Not
Re-insert and fix
the cable
Check back power PCB
F901 bad cause damage
Change F901
Check CN903 JK401
And Its Conjoint parts
Check IC162
And Its Conjoint parts
Check 3m cable
REPAIR ok
Check All DC TO DC IC
OUT Voltage approx
Check repair
And Its Conjoint parts
Check IC721 IC162
OUT Voltage 3.3V
Check IC101 Pin12 pin13
OSC frequency 8MHz
Repair main pcb between
IC201 Q202
And Its Conjoint parts
YES
NO
NO
BAD
NO
OK
YES
WORK
NO
CORRECT
YES
YES
All Function
No Sound
Check POWER IC
Voltage +18V ~ +33V
Yes
See Contents B
Check IC721 FB721
And Its Conjoint Part
Yes
No
Check IC 4103 Pin9/14
Pin35/50 V3.3v
OK
No
A
All Function
No Working
B
Power Supply
No Working
C
All Function
No Sound
D
Key board
No Function
VFD board
E
No Function
G
MP3 In
No Sound
H
BT In
No Sound
J
Tuner No Sound
Check BD Board
See Contents BD Board
OK
Check CN201 Pin
And Its Conjoint Part
Check Power Ic
Voltage 12V
Check IC131
Pin 1,2,22
YES
OK
I
Optical In
No Sound
Check JK831 CN805
RB303 INT or No
Change this jk
OK
INT
MP3 In
No Sound
Optical
No Sound
INT
OK
Check JK303
INT OR NO
REPAIR ok
Check And Repair
R343
No
Check IC305Pin11/12
OK
f=24.576MHz
Check JK303 pin1
3.3V
Yes or No
OK
Tuner No Sound
Output
Check Check TUNER PACK
Check CN3 CN301
No
And Its Conjoint Parts
Yes
Check JK301
Check IC304 Pin5/14/36
INT or No
5V Pin46 approx
Check R312 R313 R377
Change this jk
OK
No
OK
Check CN201
Yes
INT
Yes
+3.3V Yes or No
Loose or bad INT
AUX IN
No Output
Check repair touch
PCB Standby circuit
OK
And Its Conjoint Part
Key board
No Function
Check IC1 Pin12
Voltage 3.3V
YES
OK
Check the cable connect
CN207 CN600 loose or bad INT
Check R125
And Its Conjoint parts
No
Check IC1 Pin7(DAT)
OK
Check IC1 Pin6(CLK)
Check CN601.CN1 And
Their Conjoint Parts
No
Check IC1
OK
And Their Conjoint Parts
B
C
D
F
G
I
J
Re-insert and fix
the cable
Check IC304 Pin5/14/36
5V Pin46 approx
Check R312 R313 R377
Re-insert and fix
OK
Check CN201
Yes
Yes
+3.3V Yes or No
Loose or bad INT
Check R314 R358 R375
OK
Check IC305 Pin3 /19/22
No
3.3V
And Its Conjoint Parts
Re-insert and fix
the cable
Check BD Board
See Contents BD Board
And Its Conjoint Parts
the cable
Check BD Board
See Contents BD Board
Check BD Board
See Contents BD Board
Pin5 3.3V
No
Check IC304 Pin5/14/36
5V Pin46 approx
Check R312 R313 R377
Re-insert and fix
OK
Check CN201
Yes
Yes
+3.3V Yes or No
Loose or bad INT
And Its Conjoint Parts
the cable
Check BD Board
See Contents BD Board
K
Subwoofer No Sound
Subwoofer
No Sound
Check POWER IC
Voltage +18V ~ +33V
Yes
Check CN904 RB5201
Check IC721 ZD5201
And Its Conjoint Part
Yes
No
Check IC 5202 Pin9/14
Approx V3.6v
OK
No
Check IC4013
See Contents C
OK
Check CN903 JK401
And Its Conjoint Part
Check Power Ic
Voltage 12V
Check R5226
Pin 1,21,22,23,44
YES
OK
And Its Conjoint Part
K
INT or No
INT
REPAIR ok
Check CN881 CN883
RB303 INT or No
Change this jk
OK
INT
BT In
No Sound
H
Check BT881 Pin18
Check L300
Check BT881 Q881 Q882
Yes
+3.3V Yes or No
And Its Conjoint Part
And Its Conjoint Parts
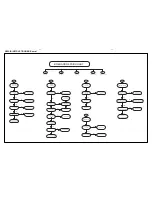
OP
Power Supply
No working
All Voltage
No Output
Check F901
Bad Cause Damage
Check BKVCC
Working or Not
No
YES
No
+32V Voltage
No Output
Check Repair IC901 IC903
Q901 IC904 D921 And Its
+14V Voltage
No Output
Check Q902 Q903 IC905
D923 And Its Conjoint Part
Check D921 Q901
And Its Conjoint Part
No
BKVCC Voltage
No Output
Check R919 D921 Q904
And Its Conjoint Part
CONN CIRCUIT
+5V +12V -12V -24V
AUX IN
F
No Sound
VFD board
No Function
Check IC600 Pin14/33/45
Voltage 5V
YES
OK
Check the cable connect
CN207 CN600 loose or bad INT
Check IC600
And Its Conjoint parts
No
Check IC600 Pin6(DAT)
OK
Check IC600 Pin9(CE)
Check R604/603/602
And Their Conjoint Parts
No
Check DP600
OK
And Their Conjoint Parts
E
Re-insert and fix
the cable
Check IC600 Pin34
Voltage approx -24V
Check IC600 Pin8(CLK)
Summary of Contents for HTB9245D
Page 17: ...4 2 4 2 WIRING DIAGRAM V1 V4 V2 V3 V5 SV2 V10 CN901 AC SOCKET SV1 LCD ...
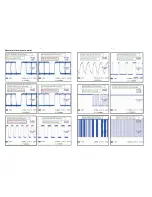
Page 25: ...6 3 6 3 Waveforms for measure point ...
Page 27: ...6 5 6 5 Waveforms for measure point IB612 QJO55 INDV TEB ...
Page 28: ...7 1 7 1 TOUCH BOARD TABLE OF CONTENTS Circuit Diagram 7 2 PCB Layout Top Bottom View 7 3 ...
Page 35: ...9 1 9 1 LCD BOARD TABLE OF CONTENTS Circuit Diagram 9 2 PCB Layout Top Bottom View 9 3 ...
Page 40: ...11 1 REVISION LIST Version 1 0 Initial release ...


