background image

C

2

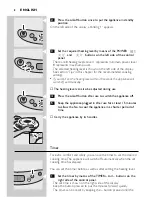
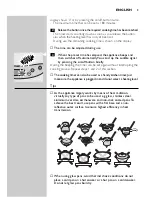
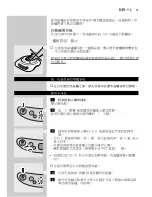
Press the on/off button once to put the appliance in standby

position.

On the left side of the display a blinking '1' appears.

C

3

Set the required heating level by means of the POWER 

and 

buttons on the left side of the control

panel.

- There are 8 heating levels. Level 1 represents minimum power, level

8 represents maximum power.

- The selected heating level is shown on the left side of the display.
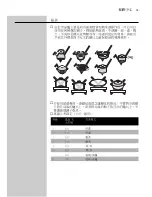
- See section 'Tips' in this chapter for the recommended cooking

settings.

B

If you don't set the heating level within 30 seconds, the appliance will
switch off automatically.

The heating level can also be adjusted during use.

C

4

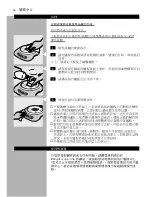
Press the on/off button after use to switch the appliance off.

5

Keep the appliance plugged in after use for at least 15 minutes

to allow the fan to cool the appliance in a shorter period of
time.

C

Carry the appliance by its handles.

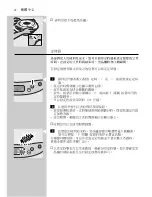
Timer

For extra comfort and safety, you can use the timer to set the desired
cooking time.The appliance will switch off automatically when the set
cooking time has elapsed.

You can set the timer before as well as after setting the heating level.

C

1

Set the timer by means of the TIMER 

¢

and 

£

buttons on the

right side of the control panel.

- The set time is shown on the right side of the display.
- Keep the button pressed to put the minutes forward quickly.
- The timer can be reset by keeping the 

£

button pressed until the 

ENGLISH

8

Summary of Contents for Haloplate HD4415

Page 1: ...Haloplate HD4415 ...

Page 2: ...2 ...

Page 3: ...3 ...

Page 4: ...4 ...

Page 5: ...ENGLISH 6 12 HD4415 ...

Page 6: ...ins cord to come into contact with the plate and the pan standing on the plate when they are hot Never immerse the appliance in water or any other liquid Leave a free space of about 10cm around the appliance to prevent damage due to radiated heat Place the pan properly in the centre of the plate Be careful the handgrips of small pans may become hot Do not put plastic containers or aluminium foil o...

Page 7: ...iently the appliance will automatically heat up to the selected heating level again When the appliance has overheated due to a defect or misuse e g covering of the ventilation slots the appliance automatically switches off completely Automatic shut off The appliance switches off automatically after approximately 180 minutes Plate hot indication C After you have switched the appliance off the plate...

Page 8: ...n also be adjusted during use C 4 Press the on off button after use to switch the appliance off 5 Keep the appliance plugged in after use for at least 15 minutes to allow the fan to cool the appliance in a shorter period of time C Carry the appliance by its handles Timer For extra comfort and safety you can use the timer to set the desired cooking time The appliance will switch off automatically w...

Page 9: ...y During the beeping the timer can be set again without interrupting the cooking process Repeat steps 1 and 2 of this section The cooking timer can also be used as a handy kitchen timer Just make sure the appliance is plugged in and do not select a heating level Tips As the appliance largely works by means of heat radiation virtually any type of pan can be used e g glass stainless steel aluminium ...

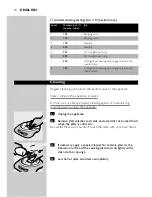
Page 10: ...m Be careful Make sure you don t touch the plate with your bare hands C 3 If necessary apply a special cleaner for ceramic glass to the lukewarm surface of the cooking plate and rub lightly with a clean cloth or sponge 4 Let the hot plate cool down completely ENGLISH 10 Job Keeping warm Keeping warm Stewing Stewing Stir frying Deep frying Stir frying Deep frying Grilling Quick heating up bringing ...

Page 11: ...have to be repeated several times to be effective Household items made of plastic spoons bowls dishes etc must on no account be placed on the hot cooking surface The plastic will melt and stick to the hot surface Should this occur the surface is to be scraped clean at once while the plate is still hot Do not use sponges or cloths which have already been used for other purposes Guarantee service If...

Page 12: ...A E B F C G D H 12 ...

Page 13: ...C 1 C 2 C 3 B C 4 5 13 ...

Page 14: ...C C 1 2 C 3 14 ...

Page 15: ...15 ...

Page 16: ...16 1 C 2 C 3 4 C 5 ...

Page 17: ...17 ...

Page 18: ...18 ...

Page 19: ...19 ...

Page 20: ...u 4222 002 00031 www philips com ...

Reviews: