background image

34

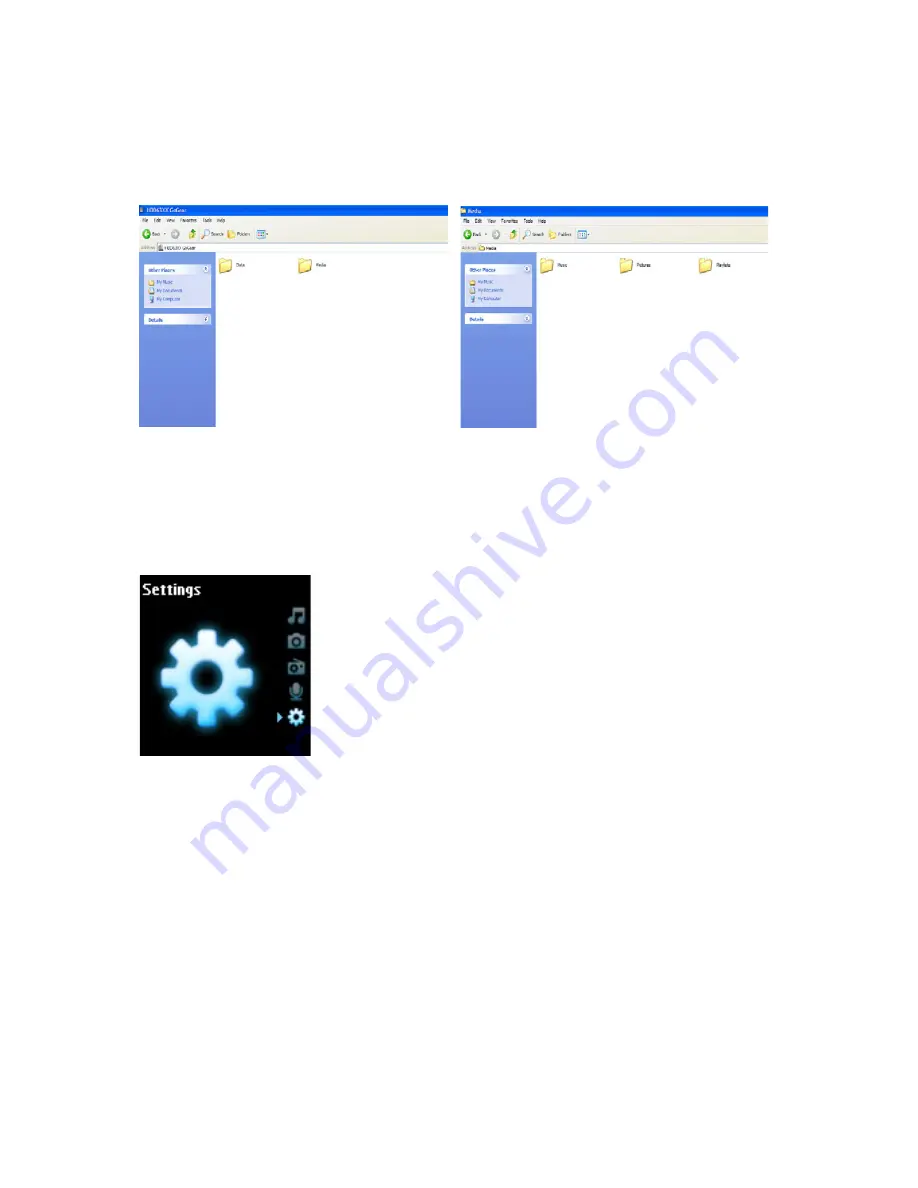
Upload your recordings to the computer

1. Connect your player to your computer.
2. Your player will be identified as 

Philips GoGear

 in 

Windows Explorer

.

3. Go to 

Media

 > 

Recordings

. You will find 

FM recordings

 and 

Voice recordings

 folders.

4. Drag and drop your files to any desired location on your computer.

Settings

1. From the main menu, select 

Settings

.

2. Use the 

VERTICAL TOUCH STRIP

 to select an option.

3. Press 

§

 to go to the next level or 

J(

 to return to previous level.

4. Press 

§

 to confirm your selection.

5. Press 

J(

 to exit the


Settings


menu.

Data

Summary of Contents for GoGear HDD1420

Page 1: ... Manuel d utilisation Benutzerhandbuch Manual del usuario Gebruikershandleiding Manuale per l utente Manual do usuário Användar handbok Micro jukebox HDD1420 HDD1430 HDD1620 HDD1630 HDD1635 HDD1820 HDD1830 HDD1835 ...

Page 2: ...g materials such as user manual flash tutorial the latest software upgrades and answers to frequently asked questions Or call our Customer Care Helpline 0906 1010 017 0 15 min where our professional support team will be pleased to assist you in solving any issues you may have with your player ii ...

Page 3: ...van aankoop modelnummer en serienummer Norway 2270 8250 Lokal tariff Datoen da du kjøpte produktet modellnummer serienummeret Portugal 2 1359 1440 Preço local A data de compra número do modelo e número de série A data de compra número do modelo e número de série Switzerland 02 2310 2116 Ortstarif Sweden France 08 9165 0006 0 23 La date d achat la référence et le numéro de série du produit Finland ...

Page 4: ... 8 Pictures 16 Detailed operation 22 Music mode 22 Pictures 27 Radio 30 Recordings 32 Settings 34 Using your player to store and carry data files 36 Updating your player 37 Manually check whether your firmware is up to date 37 Troubleshooting 39 My player skips tracks 39 My Player is not recognised by Windows 39 My player cannot power ON 39 There is no Music on my player after transfer 41 There ar...

Page 5: ...ii Safety and Maintenance 43 Notice for the USA 45 Notice for Canada 45 Notice for the European Union 45 Technical data 46 ...

Page 6: ...d with your player FM radio is only available for certain regions It is not available for Europe Headphones provided with 3 different sizes of rubber caps Combined charger USB cable Protective pouch For Europe and other regions CD ROM with Windows Media Player Philips Device Manager Philips Device Plug in User manuals Tutorials and Frequently Asked Questions For US Easy start CD 1 and 2 with Windo...

Page 7: ...ly recommend that you register your product in order to gain access to free upgrades To register your product please log on to www philips com register so that we can inform you as soon as new updates become available More information Please visit www philips com support or www usasupport philips com for U S residents Enter your product model number to view FAQ Frequently Asked Questions Latest Us...

Page 8: ...n press and hold y POWER button for 3 seconds until the player resumes to its last state or the PHILIPS screen appears To power off press and hold y POWER button for 3 seconds until the player shuts down Reset In the unlikely event that your player hangs do not panic Simply press and hold y POWER and VOLUME buttons at the same time until the player shuts down NOTE Your player automatically powers ...

Page 9: ...n press and hold y POWER button for 3 seconds until the player resumes to its last state or the PHILIPS screen appears To power off press and hold y POWER button for 3 seconds until the player shuts down Reset In the unlikely event that your player hangs do not panic Simply press and hold y POWER and VOLUME buttons at the same time until the player shuts down NOTE Your player automatically powers ...

Page 10: ...songs J Back Fast rewind Select Fast forward VOLUME Control volume VERTICAL TOUCH STRIP Scroll through lists MENU Access list of menu options VIEW Switch between library and play screen PLAYLIST Add song to Playlist on the go Recording Microphone Hold Headphone plug Volume up down keys Play Pause key Menu View Power Playlist Select Fast Forward Back Fast Rewind ...

Page 11: ...r Europe Menu To MUSIC Play your digital music tracks PICTURES View pictures RADIO Listen to radio RECORDINGS Create or listen to recordings SETTINGS Customise the settings of your player TIP Press and hold VIEW to return to the main menu Action Description Function Tap Lightly touch the top or bottom end of the touch strip Move up or down step by step Hold Press and hold finger on the top or bott...

Page 12: ...albums or genres a Superscroll letter the first alphabet of the song artist album or genre will be displayed in highlight to give you information about where you are in the list Swipe Fast swipe up or down List will scroll quickly like a wheel Fly wheel and then slow down gradually Tap Tap in the middle To stop list from spinning ...

Page 13: ...w to successfully transfer music and pictures to your player For more information please refer to Windows Media Player Help on your computer Music Add songs to Windows Media Player Library Songs that are already on your computer 1 Start Windows Media Player by clicking the following icon on your desktop 2 Select Library tab to access media library ...

Page 14: ...opy of the music on your PC first This is called ripping 1 Start Windows Media Player 2 Insert the Audio CD 3 Select Rip tab to display a list of music tracks on your CD 4 If your computer is connected to the Internet the album information will be automatically obtained so that you don t have to enter the song titles and other information manually 5 If this does not happen check that you are conne...

Page 15: ...onnect the player to your computer for the first time Windows Media Player will start Device Setup Wizard You can choose to synchronise your player with Windows Media Player library automatically or manually Automatic synchronisation When you start Windows Media Player and connect your player to the computer the contents on your player will be updated automatically according to the sync settings y...

Page 16: ...k Sync settings or Setup Sync 4 Synchronisation settings dialog box will be displayed 5 Select Synchronise device automatically check box 6 Select the check boxes that correspond to the playlists you want to synchronise 7 Click OK ...

Page 17: ...Media Player 2 Connect the player to your computer using the supplied USB cable 3 Select Sync tab 4 In the pull down menu on the right pane select Philips or Philips GoGear as the destination 5 If they are not in the list click F5 to refresh and try again ...

Page 18: ...13 6 Select Library tab to access media library 7 Click to highlight the song you want to copy 8 Right click on the song and select Add to Sync List ...

Page 19: ...hronisation The progress will be displayed just above the Start Sync button TIP We recommend that you always use Windows Media Player to transfer music to your player However if you prefer to use Windows Explorer always make sure to copy your music into the Media Music folder otherwise the songs will neither show nor play on your player ...

Page 20: ...ur player via the automatic synchronisation option of Windows Media Player See Setting up automatic synchronisation on page 10 for step by step instructions 1 Select Sync tab 2 Click Sync settings or Setup Sync select Synchronise device automatically check box and select the playlists to be synchronised with the player TIP To select more than one track press and hold the Ctrl key of your keyboard ...

Page 21: ...g in the search field 3 Click Search to start searching 4 A list of tracks containing the search string will be displayed 5 You can play transfer delete add to sync list etc Pictures Enable picture support 1 Start Windows Media Player 2 Go to Tools Options Player 3 Make sure Enable picture support for devices check box is selected TIP It is not possible to delete playlists that are on your GoGear ...

Page 22: ...yer Library 1 Start Windows Media Player 2 Select Library tab to access media library 3 Click Add to Library on the bottom left corner of the screen 4 Choose Add Folder 5 Select the folder in which you have kept your pictures and press OK ...

Page 23: ...ab 4 In the pull down menu on the right pane select Philips or Philips GoGear as the destination 5 If they are not in the list click F5 to refresh and try again IMPORTANT Pictures can only be transferred using Windows Media Player If they were dragged and dropped using Windows Explorer they will not show on your device ...

Page 24: ...19 6 Select Library tab to access media library 7 Click All Pictures on the left pane to display the list of pictures 8 Click to highlight a picture you want to copy to your player ...

Page 25: ...elect Add to Sync List 10 Or drag and drop the picture into the Sync List on the right pane 11 Click Start Sync button at the bottom of the screen to start synchronisation The progress will be displayed just above the Start Sync button ...

Page 26: ...21 12 A pop up message will be displayed notifying you of the synchronisation progress 13 When the pop up disappears the transfer is completed and you can disconnect your player ...

Page 27: ...rn to previous level 4 Press 2 to play your selection Playlists 2 Playlist on the go 2 Tracks listed in play order Most played Tracks listed in most played order Playlists in alphabetical order All tracks 2 Shuffle All Alphabetically listed tracks Artists 2 Alphabetically listed artists 2 All tracks 2 Tracks in album order Albums in alphabetical order Albums 2 Alphabetically listed albums 2 Tracks...

Page 28: ...p or down the options 3 Press to select an option 4 Press again to deselect an option While you are playing music you can see the following active play mode screen To Do this Play Pause music Press 2 Go to next track Press Go to previous track Press J Forward search Press and hold Backward search Press and hold J Access options menu Press MENU Return to browsing Press VIEW TIP You can also access ...

Page 29: ...esired equalizer setting by adjusting the individual settings for bass B low L mid M high H and treble T Playlist on the go Playlist on the go is a playlist that can be created on the player while on the move All songs will be displayed and listed in play order in the playlist New songs are automatically added to the end of the playlist Adding songs to playlist on the go You can add your favorite ...

Page 30: ...You can save Playlist on the go It will be saved under a different name and Playlist on the go will be emptied 1 During music playback press MENU 2 Select Save playlist on the go 3 A message Save playlist on the go will be displayed 4 Select Save to confirm 5 A message Playlist on the go saved as Playlist on the go YYYY MM DD XX will be displayed Delete songs from Playlist on the go You can delete...

Page 31: ...Settings Music library settings Reset play count Other playlists You can transfer playlists to the player using Windows Media Player Please refer to Transfer playlists on page 15 for details Delete playlist from your player You cannot delete the playlist on your player via Windows Media Player We recommend that you do it via the player itself 1 Play the playlist you want to delete 2 Press MENU 3 S...

Page 32: ...art Windows Media Player the rating of your songs in Windows Media Player will be updated with the information from your player Now Playing You can browse your music library or pictures while you are listening to music To return to the play screen press VIEW Pictures You can view your favorite pictures on your player While you are browsing your pictures you can listen to music or radio at the same...

Page 33: ... menu you will see a list of all picture albums 2 Select the picture album you wish to view You will see a thumbnail view of all pictures in that album 3 Use the VERTICAL TOUCH STRIP to scroll and select a picture to see its a full view 4 You can also browse through your pictures in full view mode by tapping on the top or bottom of the VERTICAL TOUCH STRIP to go to the next or previous picture ...

Page 34: ...gs You can choose to play any playlist during a slideshow 1 From the main menu select Pictures 2 Press MENU and select Slide show settings Slideshow music and choose one of the playlists Customising slideshow settings You can customise slideshow settings using Slide show settings menu NOTE During a slideshow you cannot pause skip or fast forward rewind your music Settings Options Descriptions Slid...

Page 35: ...g from the last played station 1 To find the radio stations with the strongest signals available in your area press MENU and select Auto tune 2 The player will search for the stations with the strongest signals and save them as presets You can preset a maximum of 20 radio stations FM radio is only available for certain regions It is not available for Europe Region Frequency range Tuning steps Euro...

Page 36: ...m or top of the VERTICAL TOUCH STRIP to tune step by step 2 The frequency bar indicates the change in frequency 3 Press and hold the top bottom end of the VERTICAL TOUCH STRIP to search for the previous next available station 4 A message Searching will be displayed and stops when a station with strong signal is found Saving a station as preset 1 In radio mode press MENU and select Save preset 2 Se...

Page 37: ...ing 3 Your player will display the following recording screen 4 Press J to stop and save the voice recording 5 The player will display the saving progress 6 Your voice recording will be saved on your player as a PCM file wav extension You can find this file under Recordings Recordings Library MIC recordings FM radio is only available for certain regions It is not available for Europe ...

Page 38: ...ordings library The following options are available Recordings 1 Select the recording you want to hear 2 Press 2 to play the recording of your choice Delete your recording 1 While playing back a recording press MENU 2 Select Delete recording 3 A message Delete recording name will be displayed 4 Press to confirm 5 A message Recording recording name deleted will be displayed FM radio is only availab...

Page 39: ...cordings You will find FM recordings and Voice recordings folders 4 Drag and drop your files to any desired location on your computer Settings 1 From the main menu select Settings 2 Use the VERTICAL TOUCH STRIP to select an option 3 Press to go to the next level or J to return to previous level 4 Press to confirm your selection 5 Press J to exit the Settings menu Data ...

Page 40: ... Levels 1 6 Choose contrast level to adjust brightness Skins Skin one Skin two Personalise your player with your favorite skin Album Art On Off Select ON to display album art for the song that you are playing Sleep timer 15 Min 30 Min 60 Min 90 Min 120 Min Off Choose sleep timer to turn off your player automatically after 15 30 60 90 or 120 minutes Time and date Set time Set date Show time in head...

Page 41: ... player via Windows Explorer Music library settings Reset play count Reset play count for My most played playlist to zero Radio settings Europe Americas Asia Choose the region in which you operate the FM Demo mode Start Start demo mode press power for 4 seconds to exit this mode Factory settings Restore Factory settings Restore to default factory settings ...

Page 42: ...VKQP HQT VJKU PUVCNN Philips Device Manager HTQO VJG UWRRNKGF QT FQYPNQCF VJG NCVGUV XGTUKQP HTQO YYY RJKNKRU EQO UWRRQTV QT YYY WUCUWRRQTV RJKNKRU EQO HQT 7 5 TGUKFGPVU XGT VKOG QW EQPPGEV QWT RNC GT VQ QWT EQORWVGT Philips Device Manager YKNN CWVQOCVKECNN EQPPGEV VQ VJG PVGTPGV CPF EJGEM HQT WRFCVGU Manually check whether your firmware is up to date 2QYGT QWT RNC GT YKVJ VJG UWRRNKGF CFCRVGT QPP...

Page 43: ...T C PGY HKTOYCTG KU CXCKNCDNG QP VJG KPVGTPGV CPF KPUVCNN KV QP QWT RNC GT 9JGP Update completed CRRGCTU QP VJG UETGGP ENKEM OK CPF FKUEQPPGEV VJG RNC GT OGUUCIG Updating firmware YKNN DG FKURNC GF QWT RNC GT KU TGCF HQT WUG CICKP CHVGT TGUVCTV ...

Page 44: ...ayer is not recognised by Windows CMG UWTG QWT 2 KU TWPPKPI 9KPFQYU 2 My player cannot power ON QWT FGXKEG DCVVGT OC DG QWV QH RQYGT FWG VQ NQPI RGTKQF QH PQP WUCIG JCTIG QWT RNC GT P ECUG QH FGXKEG GTTQT EQPPGEV QWT RNC GT VQ VJG EQORWVGT CPF WUG Philips Device Manager VQ TGUVQTG QWT RNC GT CWPEJ Philips Device Manager HTQO Start Programs Philips Device Manager 5GNGEV QWT FGXKEG 5GNGEV Repair VCD...

Page 45: ...ocess will start 6 Click Yes to proceed IMPORTANT All your contents will be erased from your player Therefore please back up your files before repairing After repair simply synchronise your player again to transfer music to your player ...

Page 46: ... format Other formats will not playback on the player There are no pictures on my player after transfer If you cannot find the pictures that you have transferred to your player check the following 1 Did you transfer your pictures using Windows Media Player Files transferred via other means will not appear on your device 2 Is Philips Device Plug in installed on your computer Immediately after you h...

Page 47: ...st 4 hours and try to power on or reset again If this does not work you might have to repair your player with Philips Device Manager see page 39 My player is full and I have less songs on my player than I expected Your player has a hard disk memory to store songs Check your model number to see the actual hard disk size You will be able to store more songs on your player if you use WMA formatted so...

Page 48: ...e where temperature is always between 20 and 45º C 4 to 113º F Battery life may be shortened in low temperature conditions Hearing safety Listen at a moderate volume Using the headphone at high volume can impair your hearing We recommend headphone no SHE9500 for this product Important for models supplied eadphones Philips guarantees that its audio players comply with the maximum sound power as det...

Page 49: ... the device to the Philips service centre and ONLY to simplify error detection and prevention The data stored shall be made available to user on user s first request Disposal of your old product Your product is designed and manufactured with high quality materials and components which can be recycled and reused When this crossed out wheeled bin symbol is attached to a product it means the product ...

Page 50: ...by turning the equipment off and on the user is encouraged to try to correct the interference by one or more of the following measures Relocate the receiving antenna Increase the separation between the equipment and receiver Connect the equipment into an outlet on a circuit different from that to which the receiver is connected Consult the dealer or an experienced radio TV technician for help Noti...

Page 51: ...tings Frequency response Signal to noise ratio Output Power RMS 50 dB Rock Pop Jazz Classical Dance Electronica Lounge RnB Hip Hop Spoken Word 20 16 000 Hz 82 dB 2 x 5 mW Audio Playback Play time 18 hours Compression format MP3 8 320 kbps and VBR WAV WMA 32 192 kbps Sample rates 8 11 025 16 22 050 32 44 1 48 kHz ID3 tag support Album title Genre title Track title and artist name Audio Capturing Bu...

Page 52: ...p www philips com Specifications are subject to change without notice Trademarks are the property of Koninklijke Philips Electronics N V or their respective owners 2005 Koninklijke Philips Electronics N V All rights reserved ...

Page 53: ...ch may disable your device s ability to copy display and or play Secure Content In the event of revocation Philips will attempt to make available software updates to restore some or all of your device s ability to transfer store access copy display and or play Secure Content However the abili ty to make such updates available does not rest solely with Philips Philips does not guarantee that after ...

Page 54: ...subject to change without notice Trademarks are the property of Koninklijke Philips Electronics N V or their respective owners 2005 Koninklijke Philips Electronics N V All rights reserved www philips com Printed in China ...

Reviews: