background image

19

English

Switching on/off

Switching to active mode

Press 

CD

TUNER

USB PC LINK

 or

AUX•GAME

.

Switching to Eco Power standby mode

Press 

B

.

ECO POWER button lights up.

The display screen will go blank.

Switching to standby mode (view clock)

Press and hold 

B

.

The clock is displayed.

While in the standby mode, pressing

CLOCK•TIMER

 button will switch the system

to the Eco Power standby mode.

Note:
– Before switching the system to the Eco Power
standby or standby mode, make sure the
demonstration mode has been deactivated.

Demonstration mode

If the demonstration mode is active, whenever
you switch the system to the Eco Power standby
or standby mode, it will show the various
features offered by the system.

To activate the demonstration

In the Eco Power standby/standby mode,
press and hold 

Ç

 on the main unit until “

DEMO

ON

” is displayed.

To deactivate the demonstration

Press and hold 

Ç

 on the main unit until

DEMO OFF

” is displayed.

Setting the clock

The clock can be set in either 12-hour or
24-hour mode (“

11

:

59 

PM

” or “

23

:

59

” for

example).

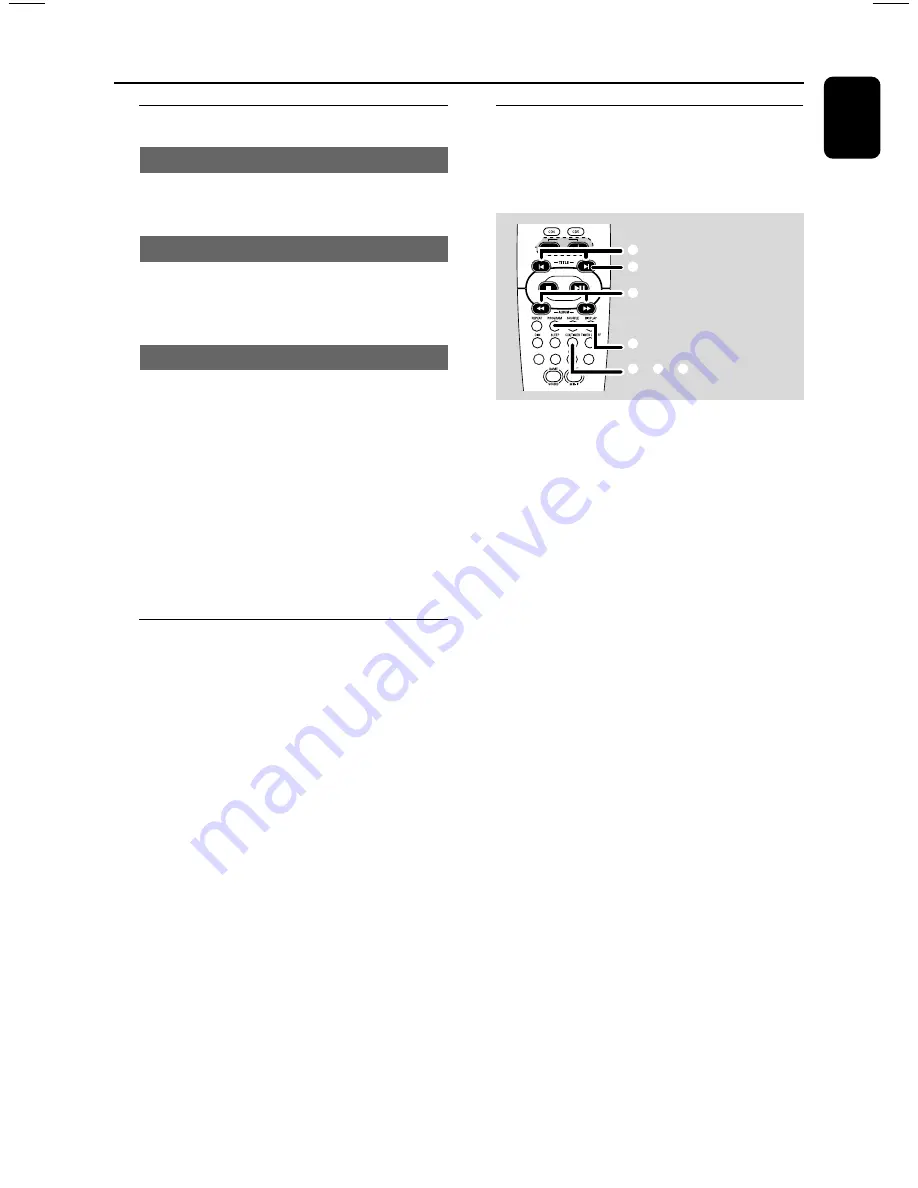
VOL

DSC

WOOX LEVEL

VAC

(00:00 

î

 12:00AM)

(

00

:00 

12

:00AM

)

(

00:

00 

12:

00

AM

)

1

2
4

5

3

2 6

1

Press and hold 

CLK/TIMER

 (or

CLOCK•TIMER

 on main unit) until “

SELECT

CLOCK OR TIMER

” is displayed.

2

Press 

ë

 to change the display to “

CLOCK

” and

press 

CLK / TIMER (CLOCK•TIMER)

 again

to confirm.

3

Press 

PROGRAM (PROG)

 repeatedly to

change between the 12-hour and 24-hour clock
mode.

4

Press 

à

 or 

á

 repeatedly to set the hour.

5

Press 

í

 or 

ë

 repeatedly to set the minute.

6

Press 

CLK / TIMER (CLOCK•TIMER)

 to

store the setting.

The clock will start working.

To view the clock time in any active

mode

Press

 CLK / TIMER (CLOCK•TIMER) once

.

The clock is displayed for a few seconds.

Notes:
– The clock setting will be erased when the
system is disconnected from the power supply.
– The system will exit the clock setting mode if no
button is pressed within 90 seconds.

Basic Operations

Summary of Contents for FWM779

Page 1: ...any questions about your new product We can guide you through Connections First time Setup or any of the Features We want you to start enjoying your new product right away CALL US BEFORE YOU CONSIDER RETURNING THE PRODUCT 1 800 531 0039 or Visit us on the web at www philips com FWM779 User manual Manuel d utilisation Manual del usuario Mini HiFi System ...

Page 2: ...owing two conditions This device may not cause harmful interference and This device must accept any interference received including interference that may cause undesired operation Tested To Comply With FCC Standards PHILIPS FWM779 Philips Consumer Electronics North America P O Box 14810 Knoxville TN 37914 1810 Phone no 1 800 531 0039 FOR HOME OR OFFICE USE Modifications not authorized by the manuf...

Page 3: ...3 AUX GAME VOL DSC WOOX LEVEL VAC USB PC LINK STANDBY ON MP3 7 7 MP3 1 2 3 P3 P2 P1 P4 ...

Page 4: ...which you qualify for as the owner of your model This bolt of lightning indi cates uninsulated material within your unit may cause an electrical shock For the safety of everyone in your household please do not remove product covering The exclamation point calls attention to features for which you should read the enclosed literature closely to prevent operating and maintenance problems WARNING TO R...

Page 5: ...e guarantees you ll receive all the information and special offers for which you qualify plus easy access to accessories from our convenient home shopping network And most importantly you can count on our uncompromising commitment to your total satisfaction All of this is our way of saying welcome and thanks for investing in a Philips product Sincerely Lawrence J Blanford President and Chief Execu...

Page 6: ...6 IMPORTANT SAFETY INSTRUCTIONS Class II equipment symbol This symbol indicates that the unit has a double insulation system Clean only with a piece of dry cloth materials ...

Page 7: ...7 English Français Español Index English 8 Français 34 Español 61 ...

Page 8: ...tching on off 19 Switching to active mode 19 Switching to Eco Power standby mode 19 Switching to standby mode view clock 19 Demonstration mode 19 Setting the clock 19 Dimming system s display screen 20 Volume control 20 Sound control 20 wOOx sound 20 Incredible Surround 20 Digital sound control 20 Virtual ambience control 20 Disc Operations Playable discs 21 Loading discs 21 Basic playback control...

Page 9: ...es such as lighted candles shall be placed on the apparatus Avoid condensation problem The lens may cloud over when the system is suddenly moved from cold to warm surroundings making it impossible to play a disc Leave the system in the warm environment until the moisture evaporates Do not block the vents In a cabinet allow about 10cm 4 inches of free space all around the system for adequate ventil...

Page 10: ...T PRESET 3 TITLE ë CD selects a track or selects a title from MP3 disc TUNER selects a preset radio station CLOCK sets the minutes USB PC LINK selects your desired playlist 8 STOP DEMO STOP Ç Exits an operation CD stops playback or clears a programme TUNER erases a preset radio station USB PC LINK stops playback only on the main unit Turns on off the demonstration mode 9 SEARCH TUNING ALBUM PLAYLI...

Page 11: ...based equaliser settings HALL CINEMA CONCERT CYBER or ARCADE PRESET and REVERB environment sound modes are only available when the optional software Philips Sound Agent 2 is activated during USB PC Link applicaion MASTERVOLUME VOL Adjusts the volume level Functional Overview PROG PROGRAM CD starts or confirms track programming TUNER starts automatic manual preset programming CLOCK selects 12 or 24...

Page 12: ...12 English Connections Game console OUT OUT AM Rear panel Front panel S S ...

Page 13: ...tem due to short circuit Do not connect more than one speaker to any one pair of speaker terminals Step 3 Connecting to PC Use the supplied USB cable to connect the system to your personal computer s USB port After installing the USB PC LINK application software onto your PC you can play your music collection via the system refer to USB PC Link Step 4 Connecting to game console IMPORTANT Gameport ...

Page 14: ...6 or AA following the indications inside the compartment 3 Close the cover Using the remote control to operate the system 1 Aim the remote control directly at the remote sensor iR on the main unit 2 Select the source you wish to control by pressing one of the source select keys on the remote control for example CD TUNER 3 Then select the desired function for example ÉÅ í ë CAUTION Remove batteries...

Page 15: ...ype of sound setting that best suits the game SPEED PUNCH BLAST or OFF 7 If you like to mix your game sound with your favourite music press MIX IT to select the desired music source CD TUNER USB PC LINK AUX or OFF CD MIX CD TUNER MIX TU USB PC LINK MIX USB AUX MIX AUX OFF MIX OFF 8 If necessary start to play your chosen mixer source 9 Play your favourite game To adjust the game console s volume le...

Page 16: ...tup exe 3 Select your desired language from the list 4 Select install Software 5 Connect the USB cable to the PC and Audio System and press the USB PC Link button on the Audio set or the remote control 6 Follow the instructions as prompted on the screen to correctly install the USB PC Link Driver Philips Sound Agent 2 and MusicMatch Jukebox software Notes Minimum OS requirement for Philips Sound A...

Page 17: ...You will be prompted to name the Playlist In the Name field type the name you d like to give this Playlist 4 Click the Save button Now you can play all the saved playlists with the audio system by pressing S or T buttons Details operation please refer to Connecting to USB PC Link Note It is not possible to create a playlist from the system s 5 CD changer If you encounter any problem using USB PC L...

Page 18: ...tem to enhance the quality of MP3 Music playback via USB PC Link 1 Philips Sound Agent 2 will be automatically launched if USB PC Link is selected 2 Press DSC PRESET or VAC REVERB to select different Preset or Reverb sound effect 3 For more details about using Philips Sound Agent 2 features on your PC please refer to the User Manual in the supplied CD ROM or the Help menu Notes Philips Sound Agent...

Page 19: ... deactivate the demonstration Press and hold Ç on the main unit until DEMO OFF is displayed Setting the clock The clock can be set in either 12 hour or 24 hour mode 11 59 PM or 23 59 for example VOL DSC WOOX LEVEL VAC 00 00 î 12 00AM 00 00 12 00AM 00 00 12 00AM 1 2 4 5 3 2 6 1 Press and hold CLK TIMER or CLOCK TIMER on main unit until SELECT CLOCK OR TIMER is displayed 2 Press ë to change the disp...

Page 20: ... 1 2 3 respectively or press wOOx LEVEL repeatedly on remote control to select wOOx 1 wOOx 2 wOOx 3 or wOOx OFF Some discs might be recorded in high modulation which causes a distortion at high volume If this occurs deactivate wOOx or reduce the volume Incredible Surround Incredible Surround magnifies the virtual distance between the front speakers for an incredibly wide enveloping stereo effect P...

Page 21: ... the first tray will automatically close before the second tray opens Basic playback controls Load discs page 3 P4 To play all discs on the disc trays Press É Å OR In the stop mode press CD to select a disc tray to begin then press É Å All the available discs will play once and then stop To play the selected disc only Press one of the CD 1 5 buttons on remote The selected disc will play once and t...

Page 22: ...ay modes before or during playback Repeat play 1 Press REPEAT on the remote control repeatedly to select A B C D E A to repeat playback of the current track B to repeat playback of the current disc C to repeat playback of all available discs not available for this model D to repeat playback of the current programmed track only if the programme mode is active E to repeat playback of all the program...

Page 23: ...tempt to program more than 99 tracks PROGRAM FULL is displayed 6 To start program play press É Å 7 To stop playback or to end programming press Ç once PROG stays and the programming mode remains active Notes If the total playing time has reached 100 minutes or one of the programmed tracks has a number greater than 30 is displayed instead of the total playing time The system will exit the programmi...

Page 24: ...t to start installation INSTALL TUNER is displayed All previously stored radio stations will be replaced Once completed the last tuned radio station will be played Tuner Operations Automatic presetting You can start the automatic presetting from a selected preset number 1 In the tuner mode press í or ë to select a preset number 2 Press and hold PROGRAM PROG until AUTO is displayed If a radio stati...

Page 25: ...t has been set icon remains on the display It indicates the timer is activated At the preset time the selected sound source will be played for 30 minutes before it switches to Eco Power standby mode if no button is being pressed within the time frame CD playing the first track of the last selected disc If the last selected disc tray is empty it will switch to the next available disc If all the dis...

Page 26: ...for example are available for selection Always refer to the owner s manual of the other equipment for complete connection and use details Timer Operations Other Connection Sleep timer setting The sleep timer enables the system to switch to the Eco Power standby mode automatically at a preset time 1 Press SLEEP repeatedly until it reaches the desired preset turn off time The selections are as follo...

Page 27: ...3 dB Signal to noise ratio 62 dBA Channel separation 35 dB 1 kHz Total harmonic distortion 0 3 1 kHz Specifications TUNER FM wave range 87 5 108 MHz AM wave range 530 1700 kHz Number of presets 40 Antenna FM 300 Ω wire AM Loop antenna SPEAKERS System 3 way Bass reflex Impedance 8 Ω Woofer 1 x 6 5 Tweeter 1 x 2 Ferro fluid cooled Dimensions w x h x d 348 x 322 x 245 mm 13 7 x 12 68 x 9 65 Inch Weig...

Page 28: ...P Check the connection between your PC and the system and the inital setup required see Connections and USB PC Link Make sure the connected PC is turned on Select the PRESET Neutral mode Select the REVERB No environment mode If the signal is too weak adjust the antenna or connect an external antenna for better reception Increase the distance between the system and yourTV or VCR Insert a disc Load ...

Page 29: ...orTUNER for example before pressing the function button É Å S T Reduce the distance between the remote control and the system Replace the battery Point the remote control directly toward the IR sensor Set the clock correctly PressTIMER ON OFF to switch on the timer Press and hold DEMO STOP on the main unit to switch off the demonstration mode Reboot the computer Problem Solution Refer to the FAQ F...

Page 30: ...the product the local Philips service organization will attempt to provide service although there may be a delay if the appropriate spare parts and technical manual s are not readily available MAKE SUREYOU KEEP Please keep your sales receipt or other document showing proof of purchase Attach it to this owner s manual and keep both nearby Also keep the original box and packing material in case you ...

Reviews: