background image

English

9

Preparations

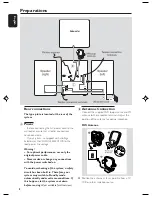
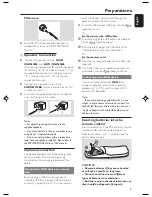
FM Antenna

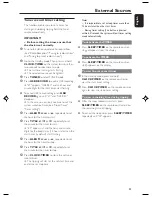
For better FM stereo reception, connect an
outdoor FM antenna to the FM ANTENNA
terminal.

C

Speakers Connection


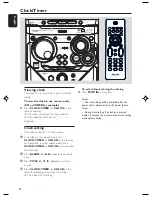
   Connect the speaker wires to 

HIGH

CHANNEL 

and 

 LOW CHANNEL

terminals, right speaker to "

R

" and left speaker to

"

L

", red wires to "

+

" and black wires to "

-

" of

the woofer connection terminals, gray wires to
"

+

" and blue wires to "

-

" of the tweeter

connection terminals.

Connect the subwoofer wires to the

SUBWOOFER

 terminals, purple wire to "

+

"

and black wire to "

-

".

Fully insert the stripped portion of the speaker
wire into the terminal as shown.

1


2

Notes:
– For optimal sound performance, use the
supplied speakers.
– Do not connect more than one speaker to any
one pair of +/- speaker terminals.
– Do not connect speakers with an impedance
lower than the speakers supplied.  Please refer to
the SPECIFICATIONS section of this manual.

Optional connection

The optional equipment and connecting cords

are not supplied.  Refer to the operating
instructions of the connected equipment for
details.

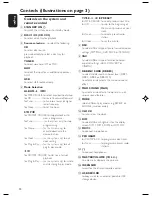
Connecting a USB device or memory
card

By connecting a USB mass storage device

(including USB flash memory, USB flash players
or memory cards) to the Hi-Fi system, you can

enjoy the device's stored music through the
powerful speakers of Hi-Fi system.

Insert the USB device's USB plug into the 
socket on the set.

Or

for the devices with USB cables:

1

Insert one plug of the USB cable (not supplied)
to the 

 socket on the set.

2

Insert the other plug of the USB cable to the
USB output terminal of the USB device.

Or

for the memory card:

1

Insert the memory card into a card reader (not
supplied).

2

Use a USB cable (not supplied) to connect the
card reader into the 

 socket on the set.

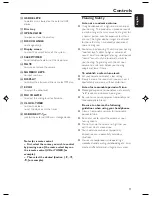
Connecting a non-USB device

Use a cinch cable to connect 

AUX

 to the

analogue audio out terminals of an external
equipment (TV, VCR, Laser Disc player, DVD
player or CD Recorder).

Note:
– If you are connecting equipment with a mono
output (a single audio out terminal), connect it to
the AUX left terminal.  Alternatively, you can use a
“single to double” cinch cable (the output sound
still remain mono).

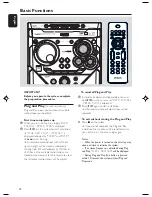
Inserting batteries into the
remote control

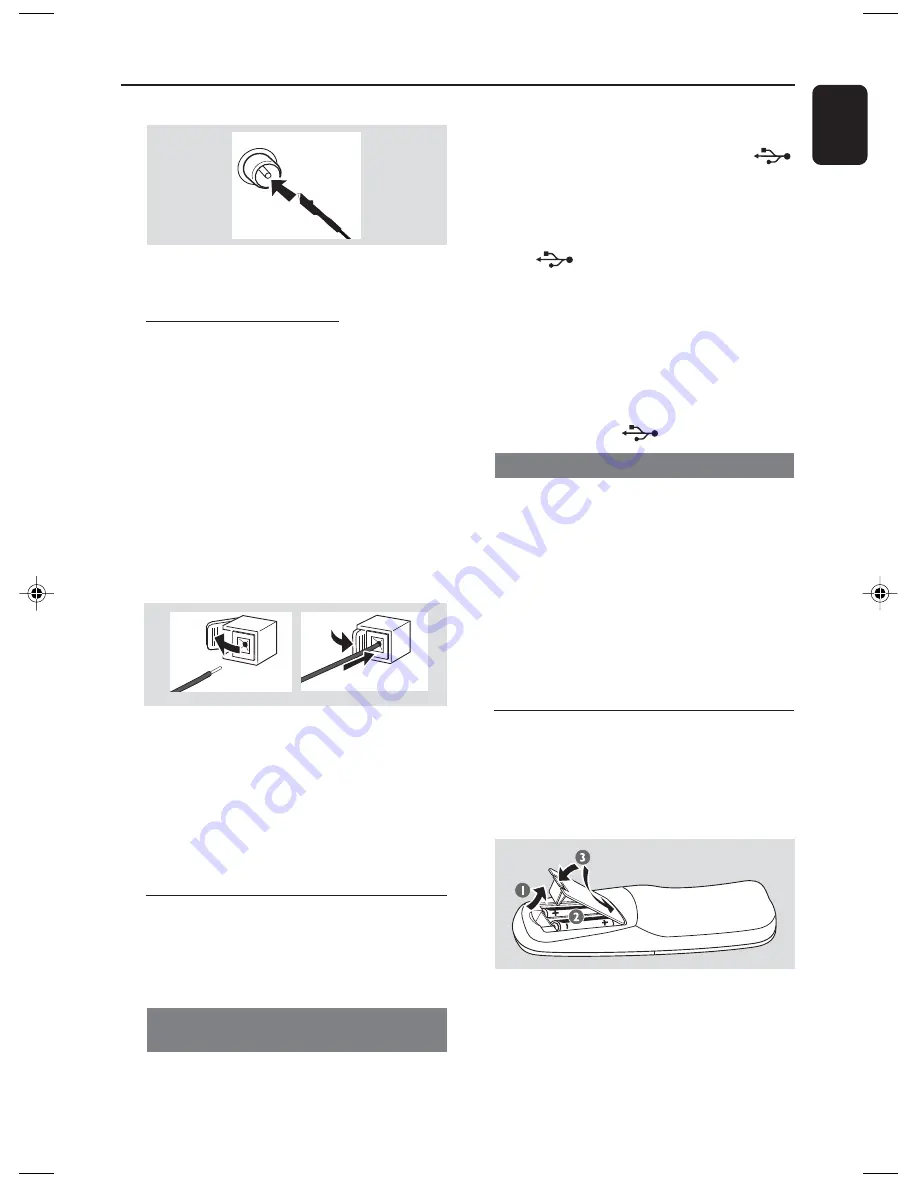
Insert two batteries (Type R03 or AAA) into the

remote control with the correct polarity as
indicated by the "+" and "-" symbols inside the
battery compartment.

CAUTION!
– Remove batteries if they are exhausted
or will not be used for a long time.
– Do not use old and new or different
types of batteries in combination.
– Batteries contain chemical substances, so
they should be disposed of properly.

pg001-pg028_FWM583-55-Eng

2007.7.6, 17:14

9

Summary of Contents for FWM583

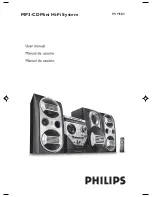
Page 1: ...FWM583 MP3 CD Mini Hi Fi System ...

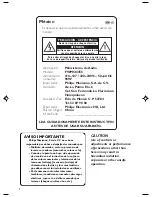
Page 2: ...e Serie ______________________________ LEA CUIDADOSAMENTE ESTE INSTRUCTIVO ANTES DE USAR SU APARATO CAUTION Use of controls or adjustments or performance of procedures other than herein may result in hazardous radiation exposure or other unsafe operation AVISO IMPORTANTE Philips Mexicana S A de C V no se hace responsable por daños o desperfectos causados por Maltrato descuido o mal uso presencia d...

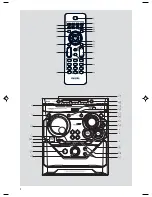
Page 3: ...3 3 9 0 4 5 1 3 7 4 8 6 T I T L E T I T L E 1 7 ª 3 8 4 6 2 5 º ...

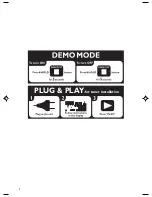
Page 4: ...4 1 PLUG PLAY for tuner installation ...

Page 5: ...5 English Português Español Index English 6 Português 52 Español 29 ...
Page 6: ...nd Karaoke 14 CD MP3 CD Operations Discs for playback 15 About MP3 disc 15 Loading discs 15 Playing discs 16 Replacing discs during playback 16 Selecting a desired track passage 16 Selecting a desired Album Title 16 Different play modes SHUFFLE and REPEAT 17 Programming the disc tracks 17 Erasing the programme 17 Radio Reception Tuning to radio stations 18 Storing preset radio stations 18 19 Autom...

Page 7: ... flat hard and stable surface Place the system in a location with adequate ventilation to prevent internal heat build up in your system Allow at least 30 cm 4 inches clearance from the rear and the top of the unit and 30 cm 2 inches from each side The ventilation should not be impeded by covering the ventilation openings with items such as newspapers table cloths curtains etc Do not expose the sys...

Page 8: ...ting of the system a safety circuit has been built in Therefore your system may switch to Standby mode automatically under extreme conditions If this happens let the system cool down before reusing it not available for all versions B Antennas Connection Connect the supplied MW loop antenna and FM antenna to the respective terminals Adjust the position of the antenna for optimal reception MW Antenn...

Page 9: ...the Hi Fi system you can enjoy the device s stored music through the powerful speakers of Hi Fi system Insert the USB device s USB plug into the socket on the set Or for the devices with USB cables 1 Insert one plug of the USB cable not supplied to the socket on the set 2 Insert the other plug of the USB cable to the USB output terminal of the USB device Or for the memory card 1 Insert the memory ...

Page 10: ...Plug Play on the system only to initiate and start plug play mode TITLE PRESET for MP3 CD USB to select previous next title for CD to skip to the beginning of the current previous or next track forTuner to select a preset radio station for Clock to set the minute 5 DSC to select different type of preset sound equaliser settings OPTIMAL JAZZ ROCK orTECHNO 6 VAC to select different type of ambience ...

Page 11: ...riods of time Prolonged exposure to sound even at normally safe levels can also cause hearing loss Be sure to use your equipment reasonably and take appropriate breaks Be sure to observe the following guidelines when using your headphones Listen at reasonable volumes for reasonable periods of time Be careful not to adjust the volume as your hearing adapts Do not turn up the volume so high that you...

Page 12: ...re stored or the memory for 40 presets are used the last preset radio station will be played To reinstall Plug and Play 1 In standby or demonstration mode press and holdÉÅon the system until AUTO INSTALL PRESS PLAY is displayed 2 PressÉÅ again to start installation All previously stored radio stations will be replaced To exit without storing the Plug and Play Press 9 on the system If you do not co...

Page 13: ...n the system In any other source mode Press STANDBY ON or B on the remote control The clock will appear on the display when the system is in standby mode Dim mode You can select the desired brightness for the display In any source mode press DIM on the remote control repeatedly to select DIM 1 DIM 2 DIM 3 or DIM OFF display mode DIM is shown except for DIM OFF mode Volume control Adjust MASTERVOLU...

Page 14: ...e level of the source with MASTERVOLUME control 4 Adjust the microphone volume with the microphone MICVOLUME control 5 Adjust the echo level with the ECHO control Note Keep the microphone away from the speakers to prevent howling Sound control For optimal sound listening select only one of the following navigation sound controls at a time MAX DSC or VAC MAX Sound MAX sound provides the best mixtur...

Page 15: ...itable CDRW discs MP3 CDs CD ROMs with MP3 tracks About MP3 disc Supported formats ISO9660 Joliet Multisession Max track number plus album is 255 Max nested directory is 8 levels The max album number is 32 The max MP3 program track number is 40 SupportedVBR bit rate Supported sampling frequencies for MP3 disc are 32 kHz 44 1 kHz 48 kHz Supported Bit rates of MP3 disc are 32 64 96 128 192 256 kbps ...

Page 16: ... will play once then stop To interrupt playback Press ÉÅ The current track time flashes To resume playback press ÉÅ again To stop playback Press STOP9 For MP3 CD During playback press DISPLAY to show the album and title name Replacing discs during playback 1 Press DISC CHANGE The disc tray will open without interrupting current playback 2 To change the inner disc press DISC CHANGE again CHANGING D...

Page 17: ... 2 3 to select a disc 3 Press PROGRAM to start programming PROG starts flashing 4 Press TITLE repeatedly to select the desired track For MP3 disc press ALBUM 5 6 and TITLE to select the desired album and title for programming 5 Press PROGRAM to store the track 6 To end programming press STOP9 once PROG stays and the programme mode remains active The total number of tracks programmed and the total ...

Page 18: ...set Programming Plug and Play setting refer to Basic Functions Plug and Play Or 1 Press TUNER to selectTUNER mode To begin automatic preset from a desired preset number Press TITLE PRESET to select the desired preset number If a radio station has been stored in one of the presets it will not be stored again under another preset number 2 Press and hold PROGRAM until AUTO is displayed PROG starts fl...

Page 19: ...he programme mode automatically Tuning to preset radio stations Once you ve programmed the radio stations press TITLE PRESET to select the desired preset number The preset number radio frequency and waveband are displayed Changing tuning grid not available for all versions In North and South America the frequency step between adjacent channels in the MW band is 10 kHz 9 kHz in some areas Changing ...

Page 20: ...orage device required a battery power source Please make sure you have a fresh battery in it or charge the USB device first and then plug it into the product again Supported Music type a This device only supports unprotected music with the following file extension mp3 wma b Music bought from on line music stores are not supported because they are secured by Digital Rights Management protection DRM...

Page 21: ... files end with mp3 and the file names ofWMA files end with wma For DRM protectedWMA files useWindows Media Player 10 or later for conversion Visit www microsoft com for details aboutWindows Media Player andWM DRM Windows Media Digital Rights Management 1 Check the USB device has been properly connected See Installation Connecting an additional appliance 2 Press USB to select USB source NO AUDIO a...

Page 22: ...ll once ALL and USB REC will start flashing on the display 4 At any moment simply press STOP9 to stop ripping Notes This function can also be combined with the programme function In this case selection of RIPPING ALL in DISC mode will record all programmed tracks from the starting point to the USB mass storage device It is impossible to rip from MIC IN Never unplug the USB mass storage device befo...

Page 23: ...t ET appears and the hour and minute digits for the sleep timer 12 hours later than the start timer by default start flashing 7 Press ALBUM 5 or 6 repeatedly to set the hour for the timer to stop 8 Press TITLE í or ë repeatedly to set the minute for the timer to stop 9 Press CLOCK TIMER to store the set tuner record timer The ripping will start at the set start time and end at the set stop time No...

Page 24: ...the remote control once In other source mode press CLOCK TIMER or CLOCK on the remote control twice 2 Press ALBUM 5 6 repeatedly to set the hour 3 Press TITLE repeatedly to set the minute 4 Press CLOCK TIMER or CLOCK on the remote control again to store the setting The clock starts working To exit without storing the setting Press STOP 9 on the system Notes The clock setting will be cancelled when...

Page 25: ... the preset time is reached and the selected disc tray is empty the next available disc will be selected If all the disc trays are not available Tuner will be selected automatically During timer setting if no button is pressed within 10 seconds the system will exit timer setting mode automatically To deactivate theTIMER Press SLEEP TIMER on the remote control The display will show OFF and TIMER wi...

Page 26: ...e 87 5 108 MHz MW wave range 9 kHz 531 1602 kHz MW wave range 10 kHz 530 1700 kHz Tuning grid 9 10 kHz Number of presets 40 Antenna FM 75 Ω wire MW Loop antenna USB PLAYER USB 12 Mb s V1 1 support MP3 and WMA files Number of albums folders maximum 99 Number of tracks titles maximum 400 SPEAKERS System 3 way double port bass reflex Impedance 3 Ω Woofer 2 x 13 cm Tweeter 1 x 5 cm Dimensions w x h x ...

Page 27: ...Use a finalized CD RW or a correct MP3 CD format disc Use a finalised CD RW or CD R Check if the number of folders exceeds 99 or the number of titles exceeds 400 Problem Solution Troubleshooting Maintenance Cleaning the Cabinet Use a soft cloth slightly moistened with a mild detergent solution Do not use a solution containing alcohol spirits ammonia or abrasives Cleaning Discs When a disc becomes ...

Page 28: ...em again Adjust the volume Disconnect the headphones Check that the speakers are connec ted correctly Check if the stripped speaker wire is clamped Make sure the MP3 CD was recorded within 32 256 kbps bit rate with sampling frequencies at 48 kHz 44 1 kHz or 32 kHz Check the speaker connections and location Select the source CD orTUNER for example before pressing the function button É Å Reduce the ...

Page 29: ...English Español Português Português Deutsch Nederlands Italiano Svenska Dansk Suomi Polski Printed in China CLASS 1 LASER PRODUCT FWM583 PDCC ZC 0726 Meet Philips at the Internet http www philips com ...

Reviews: