background image

40

English

USB Operations

USB playback

You can  play or view the data files (JPEG ,
MP3,WMA or DivX ). In the USB flash driver or
USB memory card reader. However, editing or
copying  the data file is not possible.


1


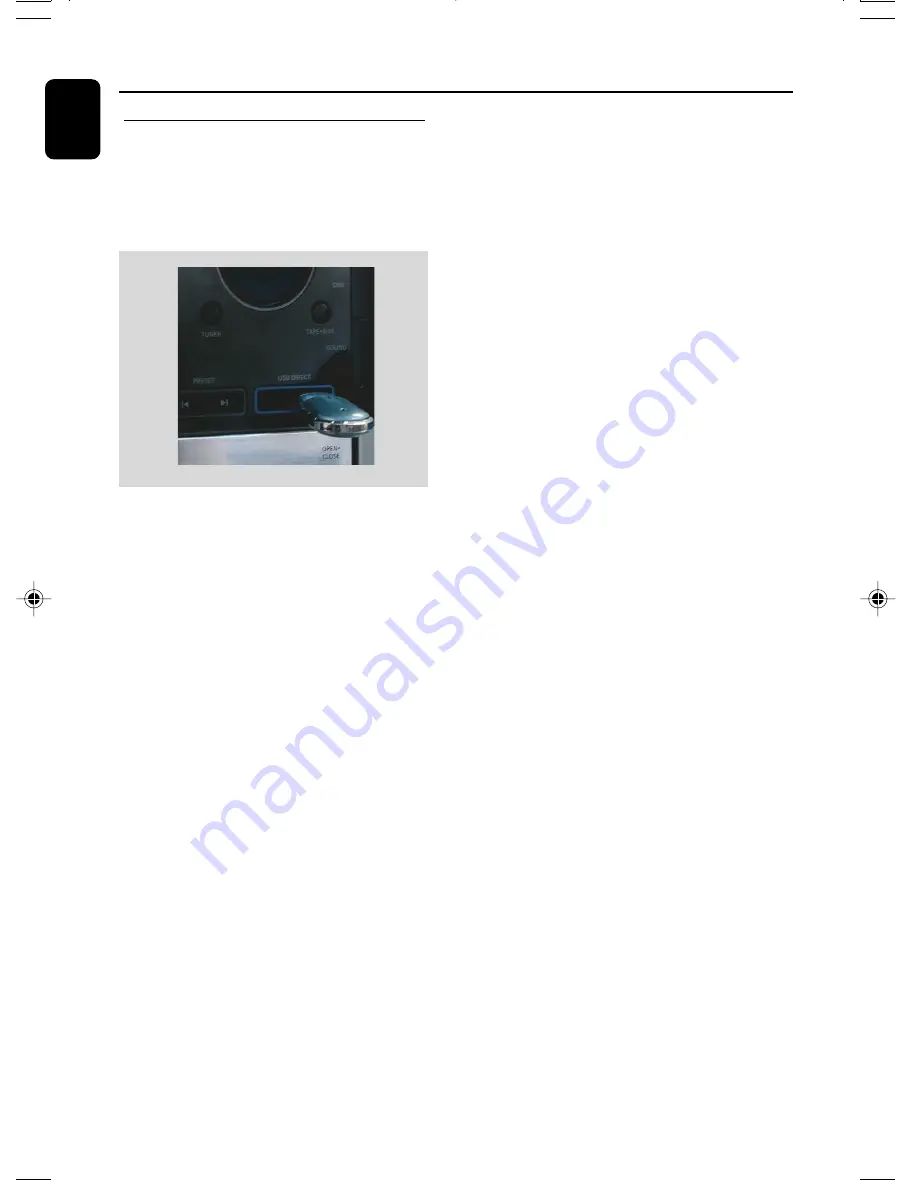
 Connect the USB flash driver / USB memory

card reader directly to the 

USB DIRECT

socket on this unit.

 2  

Press 

USB

 on the remote control (or press

USB

 key on the system ) to access the device

is detected.

   –  When using  multiple drives on a single card

reader, only one of the connected cards can be
accessed.

   –  The device numbers may vary with different

card readers.

  Select the file and  press 

OK 

to play .

      Helpful  Hints:
      –   When the USB devices does not fit into the

USB DIRECT, a USB extension cable is required.

      –  You can only read and playback the content

from the USB device.

      –  Copy-protected contents are not playable.

fwd872-98  UM  v1.0

2007.12.10, 17:27

40

Summary of Contents for FWD872

Page 1: ...DVD Mini HiFi System FWD872 User manual PHILIPS Register your product and get support at www philips com welcome ...

Page 2: ...dows Media is a trademark of Microsoft Corporation DivX Certified products DivX Certified and associated logos are trademarks of DivX Inc and are used under license This product incorporates copyright protection technology that is protected by method claims of certain U S patents and other intellectual property rights owned by Macrovision Corporation and other rights owners Use of this copyright p...

Page 3: ...3 ...

Page 4: ...4 English ...

Page 5: ...T AND MAY CAUSE ARTIFACTSTO BE DISPLAYED INTHE PICTURE IN CASE OF 525 OR 625 PROGRESSIVE SCAN PICTURE PROBLEMS IT IS RECOMMENDEDTHATTHE USER SWITCHTHE CONNECTINTOTHE STANDARD DEFINITION OUTPUT IFTHERE ARE QUESTIONS REGARDING OURTV SET COMPATIBILITY WITHTHIS MODEL 525p AND 625p DVD PLAYER PLEASE CONTACT OUR CUSTOMER SERVICE CENTER ...

Page 6: ...18 19 Step 3 Setting language preference 19 Disc Operations Playing discs 20 Using the disc menu 20 Basic playback controls 20 Skipping to another title track chapter Fast search Continuing playback from the last stop point Selecting various modes 21 22 Repeat play Shuffle play mode Repeating a section within a chapter track Programming favorite tracks 22 Playing in slow motion mode 22 Special DVD...

Page 7: ...ation 33 Changing tuning grid 33 Tape Operation Recording Tape playback 34 General information on recording 34 Preparation for recording 35 Disc synchro recording 35 AUX Operations Listening to an external source 36 Clock Timer Operations Setting the clock 37 Viewing the clock 37 Setting wake up timer 37 Viewing the timer 37 Setting sleep timer 37 Sound andVolume Controls Sound control 38 Selectin...

Page 8: ...em s speakers Night mode Lets you compress the dynamic range reducing the difference in loudness between different sounds in Dolby Digital mode Parental control rating level Lets you set a rating level so that your children cannot watch a DVD that has a rating higher than you set Sleep timer Enables the system to switch to standby mode automatically at a preset time Progressive Scan Provides high ...

Page 9: ...AC power plug from the wall sockets Where the mains plug is used as the disconnect device the disconnet device shall readily operable Environmental information Any unnecessary packaging has been omitted We have tried to make the packaging easy to separate into three materials cardboard box polystyrene foam buffer and polyethylene bags protective foam sheet Your system consists of materials which c...

Page 10: ...ripped portion of the speaker wire into the terminal as shown Connect the subwoofer using subwoofer cable to the SUBWOOFER OUT jack on the DVD Mini Hi Fi System to active input jack Notes For optimal sound performance use the supplied speakers Do not connect more than one speaker to any one pair of speaker terminals Subwoofer must be active subwoofer Do not connect speakers with an impedance lower...

Page 11: ...ough SYSTEM MENU Connections Step 3 ConnectingTV set IMPORTANT You only need to make one video connection from the following options according to the capabilities of yourTV system S Video or ComponentVideo connection provides higher picture quality These options must be available on your TV set Connect the system directly to theTV set Using Video In jack CVBS Use the composite video cable yellow t...

Page 12: ...ed not supplied to connect AUX IN L R jacks to the HEADPHONE jacks on theTV set With a diameter 3 5mm stereo jack Using an accessory RF modulator IMPORTANT If yourTV set only has a single Antenna In jack or labeled as 75 ohm or RF In you will need a RF modulator in order to view the DVD playback viaTV See your electronics retailer or contact Philips for details on RF modulator availability and ope...

Page 13: ...TV set VCR or other radiation sources to prevent unwanted interference Step 5 Connecting the power cord After everything is connected properly plug in the AC power cord to the power outlet Never make or change any connection with the power switched on On the DVD Mini Hi Fi System AUTO INSTALL PRESS PLAY may appear on the display panel Press 2 on the front panel to search and store all available ra...

Page 14: ...ect the system s VIDEO jack to theVIDEO IN jack on theVCR 4 Connect the system s LINE OUT R L jacks to the AUDIO IN jacks on theVCR This will allow you to make analog stereo two channel right and left recording To view DVD playback while recording You must connect the system to yourTV system using the S VIDEO as shown above or the Component Pr PbY video connection Step 7 Connecting digital audio e...

Page 15: ...n 5 RECORD to start recording on tape deck 6 SEARCH TUNING 1 for DISC USB to search backward forward forTUNER to tune to a lower or higher radio frequency for CLOCK to set the minute 7 38 PLAY PAUSE for DISC USB to start or interrupt playback forTAPE to start or interrupt playback for PLUG PLAY on the system only to initiate plug play mode 8 7 STOP for DISC USB to stop playback or to clear a progr...

Page 16: ...he disc 1 7 AUDIO to select the audio channel 8 O P in Disc USB mode press to skip to the previous next chapter track inTuner mode to select a preset radio station number 9 PLAY PAUSE 2 to start or interrupt disc USB tape playback to resume playback from last stop point 0 SOUND to select various sound effects DBB Dynamic Bass Boost to select the desired DBB level DBB 1 DBB 2 DBB3 or DBB OFF Numeri...

Page 17: ...power cord and reconnect it to the wall socket the demonstration will remain off until you activate it again Functional Overview RECORD to start recording on tape deck VOL adjust the volume level SURROUND No function in FWD872 model STOP 7 to stop playing the disc USB tape to delete a preset radio station 24 MUTE to interrupt or resume sound output 25 MAX To activate or deactivate MAX sound ZOOM t...

Page 18: ...d and new or different types of batteries in combination Batteries contain chemical substances so they should be disposed of properly Step 2 Setting theTV set IMPORTANT Make sure you have completed all the necessary connections 1 Press DISC key on the front panel or press DISC on the remote control 2 Turn on theTV set and set to the correctVideo In channel You should see the blue Philips DVD backg...

Page 19: ...ns shown on theTV to confirm the selection if any If a blank distorted screen appears please wait for 15 seconds for the auto recovery To remove the menu Press SYSTEM MENU Step 3 Setting language preference You can select your preferred language settings so that this DVD Mini Hi Fi System will automatically switch to the language for you whenever you load a disc If the language selected is not ava...

Page 20: ...Make sure the disc label is facing up For double sided discs load the side you want to play facing up Disc Operations 4 Press OPEN CLOSE to close the disc tray LOADING will be displayed Some discs can play automatically For discs with Table Of Contents a menu may appear on the TV screen When the menu is displayed press 1 5 4 keys to highlight your selection and press OK to confirm To select a play...

Page 21: ...mal play press 38 Continuing playback from the last stop point In Pre stop mode and before the disc is removed press 38 to resume playback from where you have stopped To cancel the resume mode Press 7 again or go into STANDBY mode or press OPEN CLOSE key Note Resume information will be erased if you have changed the disc opened the disc tray changed source or disconnected the system from the power...

Page 22: ... next programming page 3 Once complete select Start on the screen and press OK to play the program 4 To stop playback press 7 once 5 To exit the programming mode select Exit in the menu and press OK Or press PROGRAM on the remote control to exit the programming mode For MP3 JPEG WMA 1 Press 5 4 to select a track picture on the disc menu then press PROGRAM to add the track picture to playlist AddTo...

Page 23: ...or sound MONO LEFT p MONO RIGHT p MIX MONO p STEREO Note If your desired language is not set in the disc you cannot select the language via this function Searching for a particular passage 1 Press 1 or on the remote control to select fast reverse search or fast forward search respectively 2 Press 1 or on the remote control repeatedly to select the required search speed forward 2X p 4X p 8X p 16X p...

Page 24: ... you to view the picture from different angles Angle selection is determined by the disc format 1 Press DISPLAY OSD to display the disc message 2 Use 5 4 to highlight Angle and press OK 3 Use numeric keys 0 9 to select a desired angle Playback changes to the selected angle Playback control PBC PBC allows you to playVideo CD interactively following the menu on the display Press DISC MENU to toggle ...

Page 25: ... types of scan effect for selection The selected scan effect will be displayed on theTV screen Kodak Picture disc 1 Load a Kodak Picture disc The disc reading time may exceed 30 seconds due to complexity of the directory file configuration 2 During playback press 9 12 thumbnail pictures will appear on theTV screen example for picture disc menu 3 Press I2 or 3I to view the previous next page if ava...

Page 26: ...as different audio tracks you can press AUDIO on the remote control to change the audio stream Use 1 keys on the remote control to perform fast reverse forward search Press GOTO and use numeric keys 0 9 to enter your choice to playback Key in the time where playback should start To access or remove the menu Press DISC MENU on the remote control again Helpful Hints Subtitle files with the following...

Page 27: ...ess SYSTEM MENU The setup menu will appear on theTV screen 2 Use 1 keys to selelect one of the setup menu options and press OK Multi 3 Press 5 4 1 on the remote control to navigate in the menu 4 Press OK to confirm your selection Removing the menu Press SYSTEM MENU again Note When the disc is under playing preference page can t be entered you need to press STOP button twice then press SYSTEM MENU ...

Page 28: ...ide screen viewing A wide picture will display on the whole TV screen with a portion automatically cut off 4 3 Letter Box Select this if you have a conventionalTV set and your DVD is formatted for wide screen viewing Black bars appear on the upper and lower portions of theTV screen 16 9 Wide Screen Select this if you have a wide screenTV set you must also set your wide screenTV to full size 4 3 Le...

Page 29: ...o the previous menu There will be no picture on yourTV at this state until you have turned on the progressive scan mode on your TV Setting the screen saver If Screen Saver set to On the screen saver will be activated when you leave the system in stop or pause mode for 5 minutes The default setting is On DivX R VOD Code Philips provide you the DivX R VOD Video On Demand registration code that allow...

Page 30: ... enter your six digit code The password supplied by default is 000000 If you forget the six digit code press 136900 to set password Go to Password and enter your new code Then enter the same code again to confirm 4 Press SYSTEM MENU again to remove the menu Night mode turning on off Off Select this when you want to enjoy the surround sound with its full dynamic range On Select this to level out th...

Page 31: ...entral Europe Display central Europe fonts 3 Cyrillic Display cyrillic fonts Default If RESET is selected all the items in the setup menu will be reset to default setting except Parental Setting and Password DVD Menu Operations Restricting playback by setting parental level Some DVDs may have a parental level assigned to the complete disc or to certain scenes on the disc This feature lets you set ...

Page 32: ...ature you can install all the available tuner station automatically with one touch of button When AUTO INSTALL PRESS PLAY appears Press 38 on the system This until starts searching from the FM band followed by the MW band All the available radio stations with strong signal will be strored automatically When all the available radio stations are stored or the memory for 40 presets are used the first...

Page 33: ...d 00 00 00 will display 4 Press O P or numeric keys 0 9 to select the desired preset number 5 After selecting an address number press PROGRAM again to store the radio station Repeat steps 3 5 to store other preset radio stations Note If you attempt to store more than 40 preset radio stations FULL will be displayed This until exits presetting mode if no button is pressed with 20 seconds Selecting a...

Page 34: ...layback Press 7 Rewinding or forwarding fast when playback is stopped 1 Press 1 or on the front panel 2 Press 7 when you reach the desired passage General information on recording If you don t intend to record via the microphone unplug it to avoid unwanted recording source For recording only use tape of IEC type I normal tape The recording level is set automatically regardless of the position of t...

Page 35: ...start recording To stop recording Press 9 on the system Disc synchro recording 1 Press DISC to select the disc mode You can record programmed tracks in the order you want 2 Press RECORD to start recording REC will flash but the first 7 seconds of the start passage will not be recorded Selecting another track during recording 1 Press 2 2 Press O or P to select another track 3 Press 2 to resume reco...

Page 36: ...stem 2 Press TAPE AUX once or twice on the system or on the remote control to select AUX 3 To avoid noise distortion turn down the volume on your external device 4 Press the PLAY key on the connected device to start playback 5 To adjust the sound and volume use the sound controls on your external device and the FWD872 Notes You are advised not to listen to and record from the same source simultane...

Page 37: ...s to enter timer setting mode The source and timer digits will be light on the display panel 2 Press DISC USB TUNER TAPE AUX to select the desired source Before setting timer make sure the music source has been prepared DISC load the disc s USB insert a USB driver TUNER tune to the desired radio station TAPE Insert a recorded tape 3 Press repeatedly to set the hour 4 Press à á repeatedly to set th...

Page 38: ...ss MAX SOUND on the system or MAX button on the remote control to select MAX ON to achieve optimal sound When MAX SOUND is activated MAX icon will blink and MAX ON will appear on the display for 3 seconds Press MAX SOUND on the system or MAX button again to select MAX OFF to achieve optimal sound When MAX SOUND is deactivated MAX OFF will appear on the display for 3 seconds MAX icon will turn off ...

Page 39: ...3 WMA Music bought from on line music stores are not supported because they are secured by Digital Rights Management protection DRM File name extensions that end with the following are not supported wav m4a m4p mp4 aac and etc No Direct connection can be made from Computer USB port to the micro system even you have mp3 files in your computer Using a USB device By inserting a USB device to the Hi F...

Page 40: ...nit 2 Press USB on the remote control or press USB key on the system to access the device is detected When using multiple drives on a single card reader only one of the connected cards can be accessed The device numbers may vary with different card readers 3 Select the file and press OK to play Helpful Hints When the USB devices does not fit into the USB DIRECT a USB extension cable is required Yo...

Page 41: ...c This feature allows you to turn microphone on off Mic Volume This feature allows you to increase decrease microphone volume range from 00 20 Echo Level This feature allows you to add echo while singing or talking through a microphone Key This feature allows you to change the key tone when you play in DISC USB mode Score There are three levels of Scoring difficulty for Basic Intermediate Advance ...

Page 42: ...TV Before connecting the microphone set the Mic Volume to the minimum level to prevent howling 2 Press DISC or USB TAPE AUX to select the source to be mixed and start playback 3 Adjust the volume of the source through VOLUME control 4 Adjust the microphone volume through Mic Volume control please refer to Page 42 KARAOKE setup Notes Keep the microphone away from the speakers to prevent howling ...

Page 43: ...EG 1 Video DAC 12 Bits Signal System PAL NTSC Video Format 4 3 16 9 Video S N 56 dB minimum CompositeVideo Output 1 0Vp p 75 Ω S Video Output Y 700mVp p 75 Ω C 300mVp p 75 Ω Audio DAC 24 Bits 96 kHz Frequency Response 4 Hz 20 kHz 44 1kHz 4 Hz 22 kHz 48kHz 4 Hz 44 kHz 96kHz MAIN UNIT Power Supply Rating 110 127V 220 240V 50 60HZ Power Consumption Active 100 W ECO 1 W Dimensions w h d 191 411 304 mm...

Page 44: ...ntil the moisture condensed at the lens has cleared Replace or clean the disc see Maintenance Use a readable disc or correctly recorded format MP3 CD Select the appropriate video input mode on the TV set Check if theTV set is switched on Check the video connection Check if the system is securely connected Sometimes a slight picture distortion may appear This is not a malfunction Clean the disc Con...

Page 45: ... of KARAOKE setup is 0 If the system is in pause slow motion or fast forward reverse mode press 2 to resume the normal play mode Make sure the MP3 CD was recorded within 32 256 kbps bit rate with sampling frequencies at 48 kHz 44 1 kHz or 32 kHz If the signal is too weak adjust the antenna or connect an external antenna for better reception Increase the distance between the System and yourTV set o...

Page 46: ...nt VIDEO OUT jack Jack on the back of the DVD System that sends video toTV Analog Sound that has not been turned into numbers Analog sound varies while digital sound has specific numerical values These jacks send audio through two channels the left and right Aspect ratio The ratio of vertical and horizontal sizes of a displayed image The horizontal vs vertical ratio of conventionalTVs is 4 3 and t...

Page 47: ...English Printed in China CLASS 1 LASER PRODUCT FWD872 PDCC JS JW 0749 Meet Philips at the Internet http www philips com ...

Reviews: