background image

29

English

3140 115 30041

Before setting the timer, make sure the music
source has been prepared.

VCD

 – Load the disc(s). To start from a specific

track, make a programme (refer to “CD/VCD/
MP3-CD Operation - Programming the disc
tracks”).

TUNER

 – tune to the desired radio station.

TAPE

 – load the prerecorded tape into tape

deck 2.

3

Press

à

 or 

á

  on the system repeatedly to set

the hour for the timer to start.

4

Press

í

 or 

ë

 on the system repeatedly to set

the minute for the timer to start.

5

Press 

CLOCK•TIMER

 to store the start time.

"

TIMER ON

" will be displayed and followed

by the set timer "

XX

:

XX

" and then the selected

source.

TIMER


 will remain on the display.

At the preset time, the selected source will play.

To exit without storing the setting

Press 

Ç

on the system.

Clock/Timer

To deactivate the TIMER

1

Press and hold 

CLOCK•TIMER

 for more than

two seconds

.

2

Press 

Ç

on the system to cancel the timer.

The display will show "

CANCEL

" and 

TIMER


will disappear from the display.

To activate the TIMER 

(for the same preset

time and source)

1

Press and hold 

CLOCK•TIMER

 for more than

two seconds

.

2

Press 

CLOCK•TIMER

 again to store the start

time.

The last set timer information will be shown

for a few seconds and 

TIMER


  will appear on

the display.

Notes:
– If the source selected is VCD, playback will begin
with the first track of the last selected disc or other
trays if disc is empty. If all the disc trays are empty,
TUNER will be selected instead.
– During timer setting, if no button is pressed
within 90 seconds, the system will exit timer setting
mode automatically.

Listening to External Sources

1

Connect the audio out terminals of the external
equipment (TV, VCR, Laser Disc player, DVD
player or CD Recorder) to the AUX/CDR IN
terminals of your system.

External Sources

2

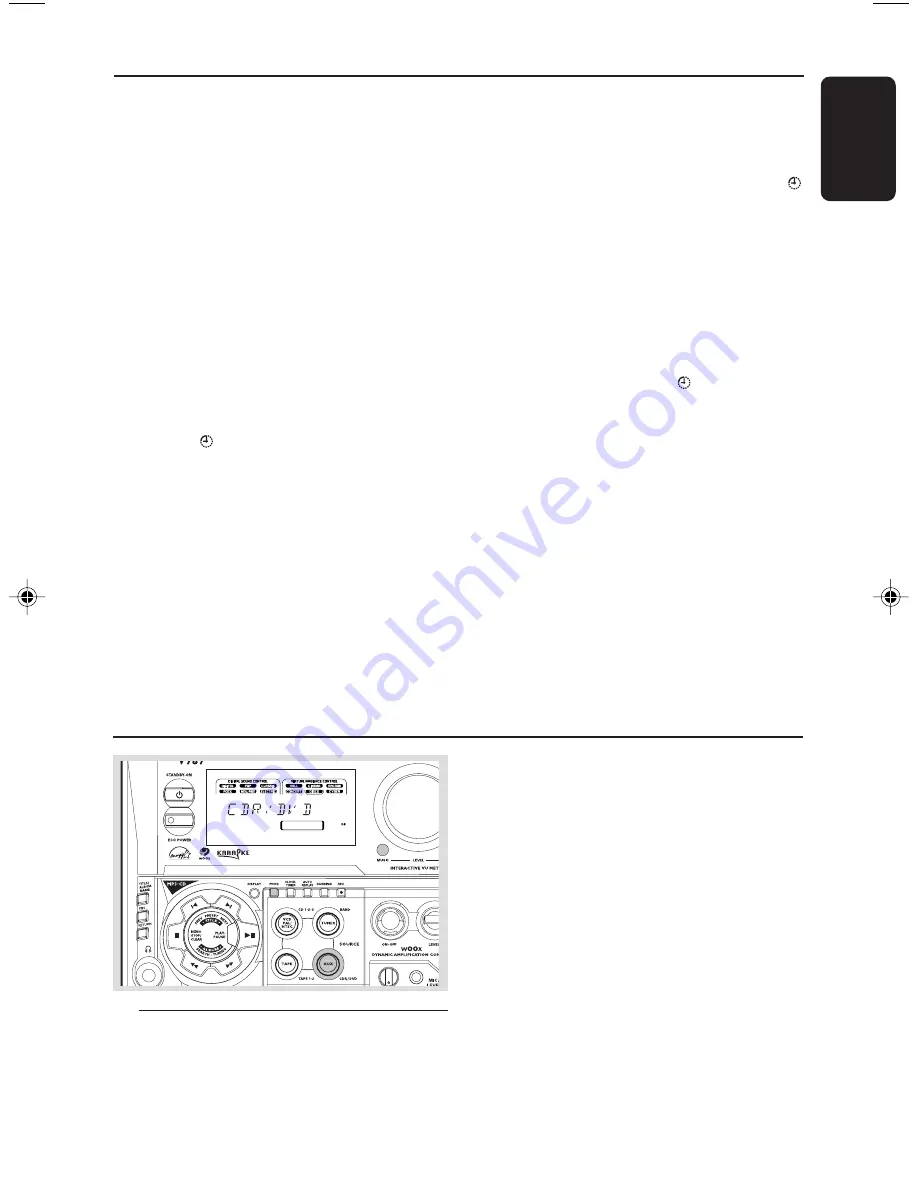
Press 

AUX

 (CDR/DVD) repeatedly to select

CDR/DVD mode or normal AUX mode.

"

CDR

/

DVD

" or "

AUX

" will be displayed.

If the sound from the external source is
distorted, select CDR/DVD mode for listening.

Notes:
– You are advised not to listen to and record from
the same source simultaneously.
– All the navigation sound control features (DSC or
VAC for example) are available for selection.
– Refer to the operating instructions for the
connected equipment for details.

For Recording, please refer to “Tape
Operation/Recording”.

Summary of Contents for FW-V787

Page 1: ...1 Mini Hi Fi System FW V787 FW V787 ...

Page 2: ...optimum disc playability This is an important parameter for CD players other than CD Audio and especially for theVideo CD applications because any loss of data from the disc will at best cause disturbances in the reproduced picture and at worst can cause the player to lose track so that disc playing fails Presenting Super Error Correction To ensure consistently good results when playing Video CD d...

Page 3: ...3 3 1 2 3 4 5 6 7 8 9 0 ...

Page 4: ...4 ...

Page 5: ...u Bahasa Indonesia English 6 Index 33 Bahasa Melayu 61 Bahasa Indonesia 89 CAUTION Use of controls or adjustments or performance of procedures other than herein may result in hazardous radiation exposure or other unsafe operation ...

Page 6: ...lect a desired track passage 18 Programming the disc tracks 18 19 Repeat 19 Title Album Name 19 VIDEO CD Adjusting the TV System 20 OSD On Screen Display 20 Playing aVideo CD with PBC 20 Return 21 Digest 21 A B Repeat 21 Zoom 21 Resume 22 Slow 22 Vocal 22 Key Control 22 Echo 22 Radio Reception Storing Preset Radio Stations 23 24 Tuning to Preset Radio Stations 24 Erasing a Preset Radio Station 24 ...

Page 7: ...ltage indication beside the voltage selector of your system is identical with the voltage of your local power supply If not please consult your dealer Place the system on a flat hard and stable surface Place the system in a location with adequate ventilation to prevent internal heat build up in your system Allow at least 10 cm 4 inches clearance from the rear and the top of the unit and 5 cm 2 inc...

Page 8: ...tically under extreme conditions If this happens let the system cool down before reusing it not available for all versions B Antennas Connection Connect the supplied AM loop antenna and FM antenna to the respective terminals Adjust the position of the antenna for optimal reception AM Antenna Position the antenna as far as possible from aTV VCR or other radiation source FM Antenna For better FM ste...

Page 9: ...inal at the rear of the system to theTV orVCR VIDEO IN for viewing or recording Note To avoid magnetic interference with the picture on yourTV do not position the front speakers too close to theTV E Connecting other equipment to your system Connect the audio left and right OUT terminals of a TV VCR Laser Disc player DVD player or CD Recorder to the AUX CDR IN terminals Note If you are connecting e...

Page 10: ...ither AUTO PLAY or ONCE mode only DUBBING to dub a tape REC to start recording on tape deck 2 SOUND NAVIGATION to select the desired sound feature DSC or VAC JOG CONTROL to select the desired sound effect for the selected sound feature DSC DIGITAL ROCK POP NEWAGE CLASSIC or ELECTRIC VAC HALL CONCERT CINEMA DISCO ARCADE or CYBER INCREDIBLE SURROUND IS to activate or deactivate the surround sound ef...

Page 11: ...mode SEARCH TUNING à á ALBUM for MP3 CD only to select previous next Album forVCD only to move the zoomed picture to the left or right for CD VCD to search backward forward forTUNER to tune to a lower or higher radio frequency forTAPE to rewind or fast forward for CLOCK on the system only to set the hour DEMO STOP CLEAR Ç for CD VCD MP3 CD to stop playback or to clear a programme forTUNER on the s...

Page 12: ...o continue playback again from where you have stopped forVCD with PBC switched off º KEY CONTROL I È i to change theVCD key tone level to suit your vocal range I to decrease the key tone level È to restore the key tone level to original setting i to increase the key tone level ECHO to adjust theVCD echo level for karaoke after inserted the microphone SLOWÖ to watch theVCD at a slower speed Control...

Page 13: ...be replaced To exit without storing the Plug and Play Press Çon the system Notes When the power is turned on the disc tray may open and close to initialise the system If you do not complete Plug and Play installation Plug and Play will be reinitiated the next time you turn on the power If no stereo frequency is detected during Plug and Play CHECK ANTENNA will be displayed During Plug and Play if n...

Page 14: ...lay screen will go blank The low power ECO POWER LED will be lighted Note If you have not deactivated the demonstration it will resume five seconds after the system switches to Eco Power Standby or Standby mode Power Saving Automatic Standby As a power saving feature the system will automatically switch to Standby mode if you do not press any buttons within 30 minutes after a disc or tape has stop...

Page 15: ...your type of music 1 Press DSC DSC button lights up 2 Adjust the JOG CONTROL or press DSC on the remote control repeatedly to select the desired Digital Sound Control effect DIGITAL ROCK POP NEWAGE CLASSIC or ELECTRIC The selected DSC will be highlighted Note For a neutral sound effect select CLASSIC VAC Virtual Ambience Control TheVAC feature enables you to adjust the system to select a type of e...

Page 16: ...exception Multi systemTV Discs for Playback This system can playback all digital audio CD video CD MP3 CD format discs finalised digital audio CD Recordable CDR discs and finalised digital audio CD Rewritable CDRW discs Support following MP3 CD formats IS09660 format Max Title Album name 30 characters Max Title number plus Album is 255 Max nested directory is 8 levels The max Album number is 32 Th...

Page 17: ...d first title number A01 T001 will be displayed Notes Load the discs with the label side facing up To ensure good system performance wait until the disc tray completely reads the disc s before proceeding For MP3 CD the disc reading time may exceed 10 seconds due to the large number of songs compiled into one disc Disc Playback a disc is loaded in the disc tray the current selected disc tray is emp...

Page 18: ...nd T represents TRACK XX or XXX is the current selected Album orTrack number CD VCD MP3 CD Operation Programming the disc tracks Programming tracks is possible when playback is stopped Up to 99 tracks can be stored in the memory in any order 1 Load the desired discs on the disc tray refer to Loading Discs 2 Press the VCD CD 1 2 3 button to select the disc tray Programming can only be done on the s...

Page 19: ...to repeat the entire disc RPT appears on the display In programme playback REPEAT TRACK to repeat the current programmed track REPEAT PROGRAM to repeat all programmed tracks RPT and PROG will appear on the display The current track disc programme will now be played repeatedly until you press Ç 2 To resume normal playback press REPEAT until the REPEAT OFF mode is displayed RPT will disappear from t...

Page 20: ... choice TheVCD starts playing of the selected sequence automatically Note If a menu consists of more than one page press to go through the pages Switching off PBC In stop mode press PBC PBC OFF will be displayed Notes Programme mode is not available whenever PBC mode is switched on The menu structure depends on the information stored on theVCD Please refer to the information supplied with the disc...

Page 21: ...4 4 4 4 on the remote control to select EXIT DIGEST MENU A B Repeat This feature is also applicable to audio CD except for MP3 CD To play a certain scene or passage of the disc repeatedly 1 Press A B on the remote control during playback to mark the start of the chosen scene or passage SET A appears on the display 2 Press A B again to mark the end of the chosen scene or passage SET B appears on th...

Page 22: ...recorded disc STEREOVOCAL LEFT RIGHT fade out the original vocal for special recorded Karaoke disc only with the ECHO mode switched on MONO LEFT RIGHT select the language on a bilingualVCD Ensure that Echo mode is switched on when press VOCAL to fade out the original vocal during STEREOVOCAL LEFT RIGHT mode CD VCD MP3 CD Operation Key Control I È i This feature allows you to change the key tone of...

Page 23: ...e stored automatically The system will stop searching when all the available radio stations are stored or when the memory for 40 preset radio stations is used The last preset radio station will then be played when completed To stop storing the automatic preset Press PROG or Ç on the system Note If no preset number is selected automatic preset will begin from preset 1 and all your former presets wi...

Page 24: ... all other preset radio stations in the band with higher numbers are also decreased by one Repeat steps 1 2 to erase other preset radio stations For Recording please refer to Tape Operation Recording Radio Reception ChangingTuning Grid In some countries the frequency step between adjacent channels in the MW band is 10 kHz 9 kHz in some areas The preset frequency step in the factory is 9 kHz Changi...

Page 25: ...t playback To stop playback Press Ç To change the playback mode Press AUTO REPLAY repeatedly to select the different playback modes AUTO REPLAY å or ONCE will appear on the display AUTO REPLAY the tape will rewind automatically at the end of playback and replay again It will replay up to a maximum of 20 times or until you press Ç ONCE the tape will playback the selected side once and then stop To ...

Page 26: ...th full spool to the left 3 Prepare the source to be recorded VCD load the disc s TUNER tune to the desired radio station TAPE load the prerecorded tape into tape deck 1 with the full spool to the left AUX connect external equipment When recording is in progress starts flashing It is not possible to listen to another sources except when dubbing tapes It is not possible to activate the timer functi...

Page 27: ...at the procedure To stop dubbing Press Ç Notes Dubbing of tapes is possible only from tape deck 1 to tape deck 2 To ensure good dubbing use tapes of the same length You can listen to another source while dubbing Microphone Mixing Connect a microphone not supplied to the system allowing you to sing along with the music source 1 Connect a microphone to the MIC jack Before connecting the microphone s...

Page 28: ...etting The clock will start working To exit without storing the setting Press Çon the system Notes The clock setting will be cancelled when the power cord is disconnected or if a power failure occurs During clock setting if no button is pressed within 90 seconds the system will exit clock setting mode automatically Timer Setting The system can switch on toVCD TUNER or TAPE 2 mode automatically at ...

Page 29: ...nd hold CLOCK TIMER for more than two seconds 2 Press CLOCK TIMER again to store the start time The last set timer information will be shown for a few seconds and TIMER will appear on the display Notes If the source selected isVCD playback will begin with the first track of the last selected disc or other trays if disc is empty If all the disc trays are empty TUNER will be selected instead During ...

Page 30: ...10 kHz Number of presets 40 Antenna FM 75 Ω wire AM Loop antenna TAPE PLAYER Frequency response Normal tape type I 80 10000 Hz 8 dB Signal to noise ratio Normal tape type I 48 dBA Wow and flutter 0 4 DIN SPEAKERS Front left right System 3 way Bass reflex system with front firing wOOx Impedance 6 Ω wOOx 1 x 6 5 front firing wOOx driver Woofer 1 x 6 5 Tweeter 1 x 2 PolydomeTweeter 1 x 1 Dimensions w...

Page 31: ...ISC CHANGE twice to select a non MP3 disc tray Maintenance Cleaning the Cabinet Use a soft cloth slightly moistened with a mild detergent solution Do not use a solution containing alcohol spirits ammonia or abrasives Cleaning Discs When a disc becomes dirty clean it with a cleaning cloth Wipe the disc from the centre out Do not wipe in circular motion Do not use solvents such as benzine thinner co...

Page 32: ...ed Make sure the MP3 CD was recorded within 32 256 kbps bit rate with sampling frequencies at 48 kHz 44 1 kHz or 32 kHz The left and right sound outputs are Check the speaker connections and location reversed The remote control does not function Select the source VCD orTUNER for example properly before pressing the function button É í ë Reduce the distance between the remote control and the system...

Reviews: