background image

E

n

g

lis

h

Disc Operations 

(continued)

Playing a JPeG photo disc 
(slide show) 

Before you start ... 

Turn on your TV to the correct Video In 
channel. See ‘Finding the correct viewing 
channel’ for details.

  Load a photo CD (Kodak Picture CD/

JPEG).

 The picture menu appears on the TV. 

 For Kodak disc, the slide show begins 

automatically. 
Press 

PLaY/PaUSe 

u


to start the 

slide-show playback.

During playback:

  Press 

PLaY/PaUSe 

u

 to pause or 

resume playback.

  Press 

PreV

í


/


NeXt

ë

 to play 

another file in the folder.

Helpful Hints:
–  It may require longer time to display the 
disc content due to the large number of 
songs/pictures compiled into one disc.

Supported file format:

–  The file extension has to be ‘*.JPG’ 
and not ‘*.JPEG’.
–  This unit can only display digital camera 
pictures according to the JPEG-EXIF 
format, typically used by almost all digital 
cameras. It cannot display Motion JPEG, 
or pictures in formats other than JPEG, 
or sound clips associated with pictures.

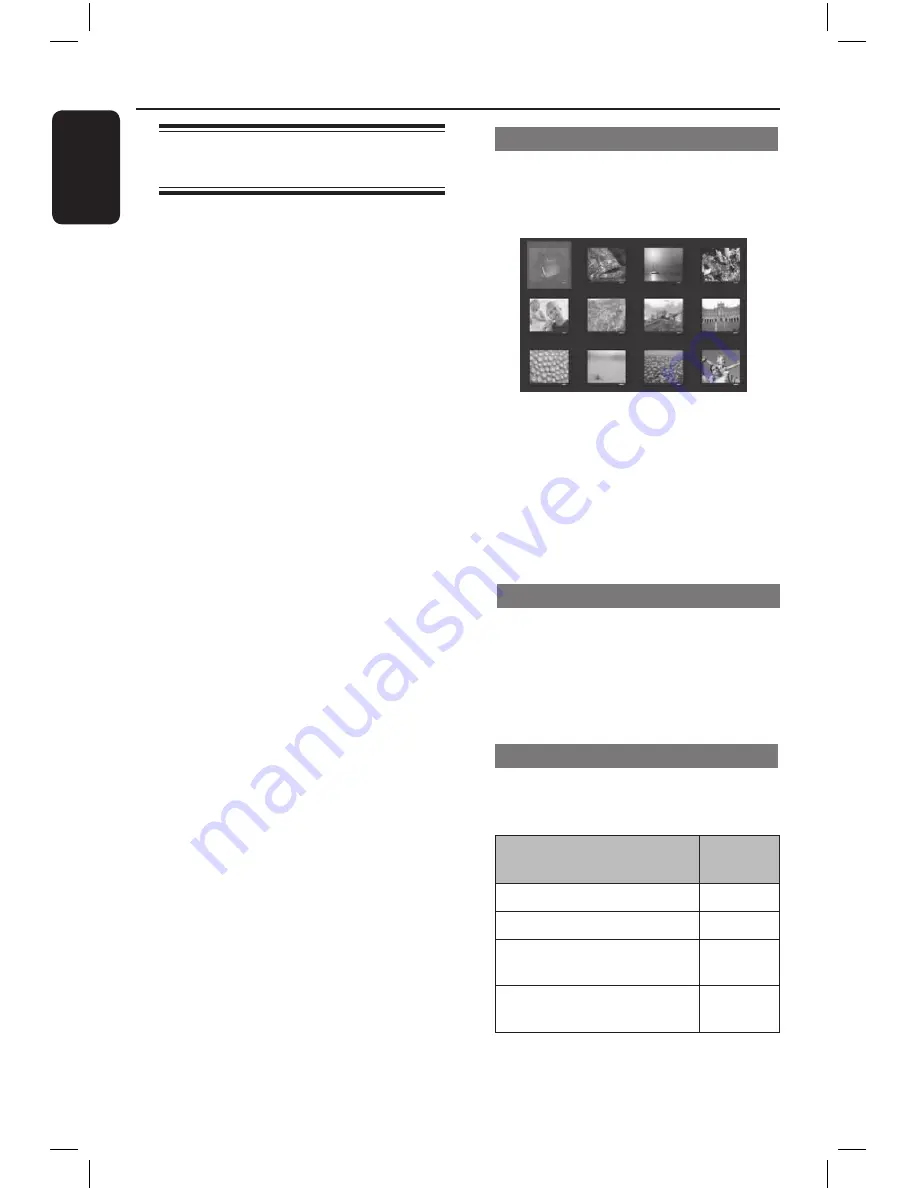
Preview function 

A

 During playback, press 

DISPLaY

.

 1 thumbnail pictures will be displayed 

on the TV.  

B

 Press 

PreV

í


/


NeXt

ë

 to display 

pictures on the previous/next page.

C

 Use 

 

 keys to select one of the 

pictures and press 

OK

 to start playback.

D

 Press 

DISC MeNU

 to return to Picture 

CD menu.

zooming 

A

 During playback, press 

zOOM


repeatedly to select a magnification level.

B

 Use 

 

 keys to pan through the 

enlarged image.

flip/rotate picture

  During playback, use 

 

 keys to 

rotate/flip the picture on the TV.

Action

Remote

control 

flip the picture vertically.

flip the picture horizontally.

rotate the picture counter-
clockwise.

 

rotate the picture 
clockwise.

 

1dvp6620_eu_eng.indd   30

2008-08-06   2:21:24 PM

Summary of Contents for DVP6620

Page 1: ...duct and get support at www philips com welcome EN DVDVideo Player 6 FR Lecteur de DVD 52 ES Reproductor de vídeo DVD 98 DE DVD Videoplayer 144 NL DVD videospeler 190 DVP6620 1dvp6620_eu_eng indd 1 2008 08 06 2 21 17 PM ...

Page 2: ...er make certain that the cord grip is clamped over the sheath of the lead not simply over the two wires Copyright in the U K Recording and playback of material may require consent See Copyright Act 1956 and The Performer s Protection Acts 1958 to 1972 ATTENTION For Customer Use Read carefully the information located at the bottom or rear of your DVD Video Player and enter below the Serial No Retai...

Page 3: ...åling Bemærk Netafbryderen er sekundært indkoblet og ofbryder ikke strømmen fra nettet Den indbyggede netdel er derfor tilsluttet til lysnettet så længe netstikket sidder i stikkontakten S Klass 1 laseraparat Varning Om apparaten används på annat sätt än i denna bruksanvisning specificerats kan användaren utsättas för osynlig laserstrålning som överskrider gränsen för laserklass 1 Observera Stömbr...

Page 4: ...RE QUESTIONS REGARDING OUR TV SET COMPATIBILITY WITH THIS MODEL 525p AND 625p DVD PLAYER PLEASE CONTACT OUR CUSTOMER SERVICE CENTER Enregistrez votre produit et obtenez de l assistance sur le site www philips com welcome Registre su producto y obtenga asistencia en www philips com welcome Registrieren Sie Ihr Produkt und holen Sie sich Unterstützung unter www philips com welcome Voor registratie v...

Page 5: ...his device NOTE Pictures shown maybe different between countries CAUTION WARNING LOCATION ON THE BACKPLATE OF THE SET NEVER MAKE OR CHANGE CONNECTIONS WITH THE POWER SWITCHED ON Manufactured under license from Dolby Laboratories Dolby and the double D symbol are trademarks of Dolby Laboratories Windows Media and the Windows logo are trademarks or registered trademarks of Microsoft Corporation in t...

Page 6: ...Connections 17 Connecting to an Analogue Stereo System 17 Connecting to a Digital AV Amplifier Receiver 17 Basic Setup Getting Started 18 20 Finding the correct viewing channel 18 Setting language preferences 18 19 On screen display OSD language 18 Audio Subtitle and Disc Menu language for DVD playback 19 Setting up Progressive Scan feature 20 Disc Playback Disc Operations 21 32 Playable discs 21 ...

Page 7: ...to disc slide show 30 Preview function 30 Zooming 30 Flip Rotate picture 30 Playing a MP3 WMA disc 31 Playing music and photo files simultaneously 32 Setup Options Setup Menu Options 33 42 Accessing the setup menu 33 General Setup Page 34 Audio Setup Page 35 37 Video Setup Page 38 40 Preference Page 41 42 Others Software upgrade 43 Installing the latest software 43 Troubleshooting 44 47 Glossary 4...

Page 8: ...his unit must not be exposed to dripping or splashing Never place any object or items that can damage this unit e g liquid filled objects lighted candles Accessories supplied 1 remote control with batteries 1 scart convertor 1 audio video cables yellow white red Note The 3 in 1 audio video cable is specially designed for this unit To purchase or replace the cable kindly quote part number 41 UH1500...

Page 9: ...off to normal standby mode b PLAY PAUSE u Starts pauses playback c STOPÇ Stops playback d IR Sensor Point the remote control towards this sensor e OPEN CLOSEç Opens closes the disc compartment f Disc compartment 3 5 2 1 6 4 1dvp6620_eu_eng indd 9 2008 08 06 2 21 19 PM ...

Page 10: ...d search d SETUP Enters or exits the disc setup menu e PREVí NEXTë Skips to the previous or next title chapter track Press and hold this button for fast backward or fast forward f MUTE Mutes or restores the volume g Numeric keypad 0 9 Selects a track or title number of the disc h AUDIO Selects an audio language or channel i REPEAT Selects various repeat modes turn off repeat mode REPEAT A B Repeat...

Page 11: ...ayback control mode k OK Confirms an entry or selection l RETURN TITLE Returns to the previous menu or shows title menu m STOP Ç Stops playback n PLAY PAUSE u Starts or pauses playback o SUBTITLE Selects a DVD subtitle language p ZOOM Zoom the picture on the TV 10 12 13 16 14 15 11 1dvp6620_eu_eng indd 11 2008 08 06 2 21 19 PM ...

Page 12: ...te Never place any objects between the remote control and this unit while operating E Select the desired function for example PLAY PAUSE u CAUTION Remove batteries if they are exhausted or if the remote control is not to be used for a long time Never mix batteries old and new or carbon and alkaline etc Batteries contain chemical substances they should be disposed of properly PLAY PAUSE SETUP TITLE...

Page 13: ...essive feature setup Audio Video Step 1 Connecting to television This connection enables you to view the video playback from this unit You only need to choose one of the options below to make the video connection For a standard TV follow option 1 For a progressive scan TV follow option 2 For a HDMI TV follow option 3 Option 1 Using CompositeVideo sockets CVBS A Connect the audio video cables suppl...

Page 14: ...a HDMI compatible device e g HDMI TV HDCP compliant DVI TV Note For HDCP compliant or DVI TV you need a HDMI DVI adaptor cable not supplied to connect the DVI input socket from your TV to the HDMI OUT socket on this unit Helpful Hint The HDMI DVI cable has only video output capability An audio connection is required for audio output see Optional Connections for details Basic Connections continued ...

Page 15: ... into position Option 2 Mounting on the wall CAUTION Risk of personal injury and damage to the unit Allow only qualified persons to mount the unit Note Mounting accessories not supplied A Mark the wall for screw hole positions where you intend to mount this unit then drill the screw holes B Insert the rubber wall plugs and screws into the holes C Hook this unit firmly onto the screws and lock into...

Page 16: ...rd into the power outlet Never make or change any connections with the power turned on Helpful Hint Refer to the type plate at the rear or bottom of the product for identification and supply ratings Basic Connections continued COMPONENT VIDEO OUT DIGITAL OUT 1dvp6620_eu_eng indd 16 2008 08 06 2 21 21 PM ...

Page 17: ...s Optional Connections Connecting to a Digital AV Amplifier Receiver You can connect this unit to an AV amplifier receiver in order to enjoy quality sound A Connect a coaxial cable not supplied from the COAXIAL DIGITAL OUT socket on this unit to the digital coaxial input socket of the connected device B For video connection see Basic Connections Step 1 Connecting to television for details Helpful ...

Page 18: ...m or receiver turn it on and select the appropriate input source for this unit output Refer to the device user manual for detail Getting Started Setting language preferences The language options are different depending on your country or region It may not correspond to the illustrations shown on the user manual On screen display OSD language Select this to change the language of the On screen disp...

Page 19: ... Menu French Parental Spanish PBC Portuguese Mp3 Jpeg Nav Polish Password Italian Preference Page Audio Select this to change disc sound track language Subtitle Select this to change the subtitle language Disc Menu Select this to change the language of the disc menu Getting Started continued D Use keys to select a language and press OK to confirm If the language you want is not in the list then se...

Page 20: ... HD JPEG HDMI Video Setup On Off Video Setup Page E Read the notification message on the TV and confirm your action by selecting the OK in the menu and press OK There will be no picture on your TV at this state until you have turned on the progressive scan mode on your TV F Turn on your TV progressive scan mode refer to your TVs user manual A message appears on the TV G Confirm your action by sele...

Page 21: ...fied Q pel accurate motion compensation Global Motion Compensation GMC playback Region codes for DVD discs DVD discs and players are designed with regional restrictions Before playing a disc make sure the disc is for the same region as your unit The region code for this unit is indicated at the rear panel Region U S A and Canada regions U K and Europe regions Asia Pacific Taiwan Korea Australia Ne...

Page 22: ...ed on this unit Some discs cannot be played on this unit due to the configuration and characteristics of the disc or due to the condition of recording and authoring software that was used Disc Operations continued Basic playback controls Pausing playback l During playback press PLAY PAUSE u To resume playback press PLAY PAUSE u Selecting another track chapter title l Press PREVí NEXTë or use the n...

Page 23: ...varies depending on the disc type l While playing a disc press REPEAT on the remote control repeatedly to choose a repeat play mode DVD Chapter repeat current chapter Title repeat current title All repeat entire disc Shuffle random playback Off exit repeat mode VCD SVCD CD Track repeat current track All repeat entire disc Shuffle random playback not applicable for CD Off exit repeat mode JPEG WMA ...

Page 24: ...l then press OK to start playback To access or exit the menu l Press DISC MENU on the remote control Repeating a specific section A B A While playing a disc press REPEAT A B at the start point B Press REPEAT A B again to end the section The section will now repeat continuously C Press REPEAT A B again to resume normal playback Helpful Hint The marked section for repeat playback is only possible wi...

Page 25: ... works only on DVDs with multiple subtitle languages You can change to your desired language during playback l Press SUBTITLE repeatedly to select different subtitle languages Playback Control VCD SVCD Playback Control PBC playback allows you to play Video CDs or SVCDs interactively following the menu on the display For VCDs with PBC feature version 2 0 only and SVCDs l Press DISC MENU to turn on ...

Page 26: ...b Off Bitrate 61 Total Elapsed 0 48 59 MENU B Use keys to view the information and press OK to access C Use the numeric keypad 0 9 to input the number time or use keys to make the selection D Press OK to confirm Playback changes to the selected operation Selecting title chapter track This option allows you to skip to a specific title chapter track in the current disc A Move to Title Chapter or Tra...

Page 27: ...press B Use the numeric keypad 0 9 to input a valid number Playback changes to the selected angle Disc Operations continued Preview function VCD SVCD DVD This function allows you to preview the contents of a VCD SVCD DVD disc A Move to Preview in the display menu and press The preview menu appears DVD Select Digest Type Title Digest Chapter Digest Title Interval Chapter Interval Select Digest Type...

Page 28: ...epeatedly to toggle between different input options Display Descriptions Disc Go To Time search within the disc Track Go To Time search within a track Select Track Select a track number B Use the numeric keypad 0 9 to enter the time where playback should start minutes seconds Playback skips to the selected time Disc Operations continued 1dvp6620_eu_eng indd 28 2008 08 06 2 21 23 PM ...

Page 29: ...h the following file name extensions srt smi sub ssa txt are supported but do not appear on the file navigation menu The subtitle file name sub has to be saved under the same file name as the movie avi in the same folder Advance features of the DivX Ultra Features Descriptions XSUB subtitles allow multiple language subtitles selection for movie Interactive video menus provide easy access and contr...

Page 30: ...nly display digital camera pictures according to the JPEG EXIF format typically used by almost all digital cameras It cannot display Motion JPEG or pictures in formats other than JPEG or sound clips associated with pictures Preview function A During playback press DISPLAY 12 thumbnail pictures will be displayed on the TV B Press PREVí NEXTë to display pictures on the previous next page C Use keys ...

Page 31: ...nues through to the end of the folder During playback l Press PREVí NEXTë to playback another file in the current folder l Press repeatedly to fast backward forward search on the file l To select another folder from current disc use keys to navigate back to the root menu D To stop playback press STOP x Helpful Hints You can set to display or skip the folders when you load a MP3 JPEG disc Press SET...

Page 32: ...ss OK to start playback C During MP3 WMA playback use keys to select a JPEG file from the disc menu and press OK Slideshow begins and continues till the end of the photo folder or albbum D To stop simultaneous playback press STOP x twice Helpful Hints Some files on Kodak or JPEG disc may be distorted during playback due to the configuration and characteristics of the disc During simultaneous playb...

Page 33: ... in the following pages If the option in the menu is grayed out that means the setting is not available or cannot be changed in the current state E To exit press SETUP Setup Menu Options General Setup Page Disc Lock OSD Language Sleep Lip Sync Volume DivX R VOD Code See General Setup Page on this chapter Analogue Output Digital Audio Setup Audio Setup Page HDMI Audio Setup Sound Mode CD Upsampling...

Page 34: ...this unit to standby mode automatically Off Turn off the sleep mode This feature allows you to adjust the audio delay times if the video playback is slower than the audio output streams hence resulting in lip sync Access the lip sync setup menu Use tu keys to set the delay times 00 200 ms for the audio output and press OK to exit This setting allows you to adjust the volume level Access the volume...

Page 35: ...put stereo audio through two speakers V SURR For virtual surround sound effects This setting is only required if you have connected the audio output of this unit to an amplifier receiver using the digital output socket Digital Output Off Disable digital audio output Select this if you are using the analogue audio sockets to connect this unit to a TV or Stereo system All The connected device suppor...

Page 36: ...etting is only required if you are using the HDMI OUT socket to connect your TV or other display device On Enable audio output through HDMI connection Off Disable HDMI audio output In this case an alternative audio connection is required from this unit to your TV Select the type of preset digital sound effect that can match the disc s content or optimize the sound of the musical style you are play...

Page 37: ... the sampling rate of the CDs to twice as high as the original rate 176 4 kHz X4 Convert the sampling rate of the CDs to four times as high as the original rate Note CD upsampling is only possible when playback the music CD in stereo mode This mode optimizes playback of sound at low volume High volume outputs will be softened and low volume outputs will be enhanced to an audible level This feature...

Page 38: ...splay with black bars on the top and bottom 16 9 For wide screen TV frame ratio 16 9 Before enabling the progressive scan feature you must ensure that your TV can accept progressive signals a progressive scan TV is required and that you have connected this unit to your TV using the Y Pb Pr See Getting Started Setting up Progressive Scan feature for details On Turn on progressive scan mode Read the...

Page 39: ... setting that best suits your personal preference and press OK to confirm For an average setting select 0 HD JPEG allows you to enjoy untouched and uncompressed pictures at it s original resolution This feature is only applicable if you have connected this unit to a HDMI compatible TV device On Display high definition picture Off Display standard picture Note This feature is only available for JPE...

Page 40: ...it for 5 seconds for auto recovery or use the composite yellow video cable to connect this unit and your TV Turn on your TV to the correct input channel for the composite video and adjust the resolution setting to 480p 576p Wide Screen Format Select a suitable screen display Note This feature is only available if you have selected 16 9 in TV Display setup 4 3 Pillar Box Display the 4 3 picture dis...

Page 41: ... your six digit password and press OK Notes The ratings are country dependent 1 is considered material that is least offensive and 8 is most offensive To disable parental controls and allow all discs to play select 8 Some DVDs are not encoded with a rating though the movie rating may be printed on the disc cover The rating level feature does not prohibit playback of such discs VCD SVCD and CD have...

Page 42: ...orget your existing password enter 136900 3 Enter the new six digit password at New Password 4 Enter the new six digit password again at Confirm PWD 5 Press OK to confirm and exit Select the font type that supports the recorded DivX subtitle Standard Display a standard list of Roman subtitle fonts provided by this unit Central Europe Display a list of central Europe fonts For the rest of the Europ...

Page 43: ...on available at the Philips website A Press OPEN CLOSE çto open the disc compartment B Press numeric keypad 55 on the remote control C Write down the file name D Go to www philips com support to check the upgrade instruction and the latest software version using this file name available for this unit E Refer to the upgrade instruction for more information Note Never unplug or turn off this unit du...

Page 44: ...ck the video connection Ensure that the disc is compatible with this unit Sometimes a small amount of picture distortion may appear This is not a malfunction The disc is dirty Clean the disc Check the audio connections to the connected audio device Make sure that the connected audio device is turned on to the correct input source Set the digital output setting correctly based on the device you con...

Page 45: ...ng inwards The DVD R DVD RW CD R must be finalised Make sure the disc is not scratched or warped Check if the disc is defective by trying another disc The disc is of a different region code You may need to enter the password in order to unlock the disc for playback Moisture may have condensed inside this unit Remove the disc and leave this unit turned on for about an hour There is a technical prob...

Page 46: ... controlled DVD Audio sources from the HDMI connection Make sure that the audio output setting is not turned off See Setup Menu Options Audio Setup Page HDMI Audio Setup for details HDMI connection can only be made to HDMI equipped devices with HDCP High Bandwidth Digital Content Protection If you wish to connect to a DVI connector equipped with HDCP you need a separate adaptor DVI to HDMI Make su...

Page 47: ... VCD SVCD CD audio MP3 WMA and DivX discs only Other digital audio formats such as liquid audio RM RealMedia WAV or non audio files like doc txt pdf are not supported Try to play the problem DivX files on a computer If they do not work the source file appears to be corrupted Try to download the file again from a different source or if you have created the file yourself save it with the correct set...

Page 48: ...rks Inc that can shrink digital video to sizes small enough to be transported over the internet while maintaining high visual quality Dolby Digital A surround sound system developed by Dolby Laboratories containing up to six channels of digital audio front left and right surround left and right centre and subwoofer HDMI High Definition Multimedia Interface HDMI is a high speed digital interface th...

Page 49: ...ry TV system It offers higher picture resolution and quality Region code A system allowing discs to be played only in the region designated This unit will only play discs that have compatible region codes You can find the region code of your unit by looking at the product label Some discs are compatible with more than one region or ALL regions Title The longest section of a movie or music feature ...

Page 50: ...annel sound AUDIO PERFORMANCE DA Converter 24 bit 192 kHz DVD fs 96 kHz 4 Hz 44 kHz fs 48 kHz 4 Hz 22 kHz SVCD fs 48 kHz 4 Hz 22 kHz fs 44 1kHz 4 Hz 20 kHz CD VCD fs 44 1kHz 4 Hz 20 kHz Signal Noise 1kHz 90 dB Dynamic range 1kHz 80 dB Crosstalk 1kHz 70 dB Distortion noise 1kHz 65 dB MPEG MP3 MPEG Audio L3 CONNECTIONS Y Pb Pr Output Cinch 3x Video Output cum Audio Output L R 3 5mm socket 1x Digital...

Page 51: ...51 1dvp6620_eu_eng indd 51 2008 08 06 2 21 27 PM ...

Reviews: