background image

05_8239 210 98882

16

Disc Operations

IMPORTANT!
– Depending on the DVD or VIDEO
CD, some operations may be
different or restricted.
– Do not push on the disc tray or
put any objects other than disc on
the disc tray.  Doing so may cause
the disc player malfunction.

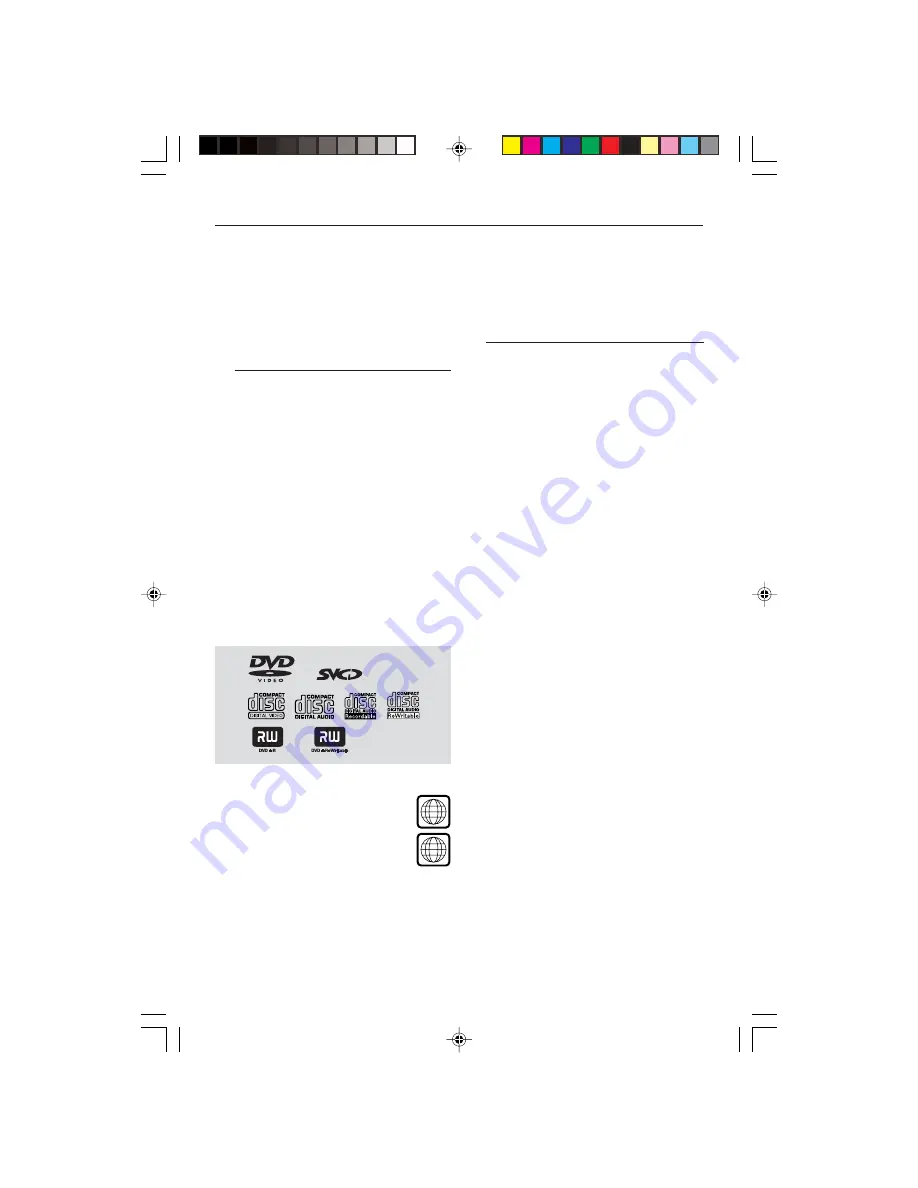
Playable Discs

Your DVD Player will play:

– Digital Versatile Discs (DVDs)
– Video CDs (VCDs)
– Super Video CDs (SVCDs)
– Digital Versatile Discs + Recordable

(DVD+R)

– Digital Versatile Discs + Rewritable

(DVD+RW)

– Compact Discs (CDs)
– MP3 disc on CD-R(W):

– Maximum 30 characters display.
– Supported sampling frequencies :

32 kHz, 44.1 kHz, 48 kHz

– Supported Bit-rates : 32~256 kbps

variable bitrates

– Picture (JPEG) files on CD-R(W):

– JPEG/ISO 9660 format.

Region Codes

DVDs must be labelled for 

ALL

regions or 

Region 2 

in order to

play on this DVD system.  You
cannot play discs that are labelled
for other regions.

Helpful Hint:

If you are having trouble playing a

certain disc, remove the disc and try a
different one.  Improper formatted disc will
not play on this DVD Player.

ALL

2

IMPORTANT!
If the inhibit icon (

ø

) appears on the

TV screen when a button is pressed,
it means the function is not available
on the current disc or at the current
time.

Playing discs

1

Connect the power cords of the DVD
Player and TV (and any optional stereo or
AV receiver) to a power outlet.

2

Turn on the TV power and set to the
correct Video In channel.  (See page 13
“Setting up the TV”).

3

Press 

STANDBY-ON 

on the DVD Player

front panel.

You should see the blue Philips DVD

background screen on the TV.

4

Press 

OPEN•CLOSE 

0

 button to open

the disc tray and load in a disc, then press
the same button again to close the disc
tray.

Make sure the label side is facing up.

For double-sided discs, load the side you
want to play facing up.

5

Playback will start automatically
(depending on the disc type).

If a disc menu appears on the TV, see

“Using the Disc Menu”.

If the disc is locked by parental control,

you must enter your four-digit password.
(See page 28).

6

At any time, simply press 

STOP 

to stop

playback.

01-32 DVP520_051

19/03/2004, 11:48 AM

16

Summary of Contents for DVP520

Page 1: ...05_8239 210 98882 1 DVDVIDEO PLAYER DVP520 DVP520 01 32 DVP520_051 19 03 2004 11 48 AM 1 ...

Page 2: ...utral N brown live L As these colours may not correspond with the colour markings identifying the terminals in your plug proceed as follows Connect the blue wire to the terminal marked N or coloured black Connect the brown wire to the terminal marked L or coloured red Do not connect either wire to the earth terminal in the plug marked E or e or coloured green or green and yellow Before replacing t...

Page 3: ...ässä käyttöohjeessa mainitulla tavalla saattaa altistaa käyttäjän turvallisuusluokan 1 ylittävälle näkymättömälle lasersäteilylle Oikeus muutoksiin varataan Laite ei saa olla alttiina tippu ja roiskevedelle Huom Toiminnanvalitsin on kytketty toisiopuolelle eikä se kytke laitetta irti sähköverkosta Sisäänrakennettu verkko osa on kytkettynä sähköverkkoon aina silloin kun pistoke on pistorasiassa CAU...

Page 4: ...nformation for future reference Model No DVP520 Serial No _______________ Environmental Information All unnecessary packaging has been omitted The packaging has been made easy to separate into three materials cardboard box polystyrene foam buffer and polyethylene bags protective foam sheet Your DVD player consists of materials which can be recycled and reused if disassembled by a specialised compa...

Page 5: ...Using the Disc Menu 17 Basic playback controls 17 19 Pausing playback 17 Selecting track chapter 17 Resuming playback from the last stopped point 17 Zoom 18 Repeat 18 Repeat A B 18 Slow Motion 18 Forward Reverse Searching 18 Time Search 19 Special disc features 19 20 Playing aTitle 19 Camera Angle 19 Changing the Audio Language 19 Subtitles 19 Preview 20 Playing MP3 JPEG Picture CD 20 21 General O...

Page 6: ...m environment until the moisture evaporates PREVIEW PREVIEW MUTE MUTE Do not block the vents Do not operate the DVD Player in an enclosed cabinet allow about 10 cm 4 inches of free space all around the player for adequate ventilation 10 cm 4 inches 10 cm 4 inches 10 cm 4 inches DVD Home Cinema System PHILIPS Care of the cabinet Use a soft cloth slightly moistened with a mild detergent solution Do ...

Page 7: ...on the TV cable not supplied Helpful Hint Ensure that the TV indication on SCART cable is connected to theTV set and DVD indication on SCART cable is connected to the DVD Player L VIDEO OUT S VIDEO OUT COAXIAL TV OUT R DIGITALOUT AUDIOOUT AUDIO IN S VIDEO IN VIDEO IN TV IN AUDIO IN S VIDEO IN VIDEO IN TV IN 2 1 Using CompositeVideo jacks CVBS 1 Use the composite video cable yellow to connect the D...

Page 8: ...ing AUDIO IN jacks on the TV cable not supplied IMPORTANT If yourTV only has a single Antenna In jack or labeled as 75 ohm or RF In you will need an RF modulator in order to view the DVD playback on theTV See your electronics retailer or contact Philips for details on RF modulator availability and operations Using an accessory RF modulator 1 Use the composite video cable yellow to connect the DVD ...

Page 9: ...EO IN After everything is connected properly plug in the AC power cord to the power outlet Never make or change any connections with the power switched on When no disc is loaded press STANDBY ON on the DVD Player front panel NO DISC may appear on the display panel EN CLOSE STOP PLAY PAUSE Connecting the power cord NO DISC 01 32 DVP520_051 19 03 2004 11 48 AM 9 ...

Page 10: ...eiver L VIDEO OUT S VIDEO OUT COAXIAL TV OUT MAINS R DIGITALOUT AUDIOOUT AUDIO IN COAXIAL AV Receiver Receiver has a PCM Dolby Digital or MPEG2 decoder 1 Select one of the video connections VIDEO IN S VIDEO IN or SCART jack TV IN depending on the options available on yourTV 2 Connect the COAXIAL jack of the DVD Player to the corresponding Digital Audio In jack on your Receiver cable not supplied 3...

Page 11: ...OSE Open Close the disc tray 2 PLAY PAUSE To start or interrupt playback 9 STOP To stop playback IR Sensor Point the remote control towards this sensor Display Shows the current status of the DVD Player L VIDEO OUT S VIDEO OUT COAXIAL TV OUT MAINS R DIGITALOUT AUDIOOUT Mains AC Power Cord Connect to a standard AC outlet S Video Out Connect to S Video input of aTV Video Out CVBS Connect to CVBSVide...

Page 12: ...y frame by frame playback REPEAT Selects various repeat modes REPEAT A B Repeats playback a specific section on a disc PREVIEW To preview the content of a track or whole disc MUTE Disables or enables sound output POWER B To switch the DVD player to standby mode or ON 0 9 numerical key pad Selects numbered items in a menu DISPLAY Displays information onTV screen during playback SYSTEM MENU Access o...

Page 13: ...hould be disposed properly Step 2 Setting up theTV IMPORTANT Make sure you have completed all the necessary connections See pages 7 8 ConnectingTV 1 Turn on the TV and set to the correct video in channel You should see the blue Philips DVD background screen on the TV Usually these channels are between the lowest and highest channels and may be called FRONT A V IN orVIDEO See your TV manual for mor...

Page 14: ...er for a DVD disc to play on this Player the colour system of the Disc theTV and the DVD Player should match Video Setup Page Set TV Standard TV Type PAL TV Display NTSC Closed Captions Multi Angle Mark Smart Picture Picture Setting Helpful Hint Before changing the currentTV Type setting ensure that yourTV supports the selectedTVType system Follow the instructions that appears on theTV screen If t...

Page 15: ... MENU or select Exit Setup Menu and then press OK Setting the Audio Subtitle and Disc menu language Preference Page Set Preference To English Audio English Subtitle Chinese Disc Menu Japanese Parental French Password German Default Spanish Dutch Italian 1 Press STOP twice then press SYSTEM MENU 2 Press 1 2 to select Preference Page 3 Press 3 4 to highlight the following in the Preference Page Audi...

Page 16: ...try a different one Improper formatted disc will not play on this DVD Player ALL 2 IMPORTANT If the inhibit icon ø appears on the TV screen when a button is pressed it means the function is not available on the current disc or at the current time Playing discs 1 Connect the power cords of the DVD Player and TV and any optional stereo or AV receiver to a power outlet 2 Turn on the TV power and set ...

Page 17: ...back pressing RETURN TITLE will return to the menu screen if PBC is on Basic playback controls Unless otherwise stated all operations described are based on the use of Remote Control Pausing playback DVD VCD CD MP3 1 During playback press PAUSE Playback will pause and sound will be muted 2 Press PAUSE again to select the next picture frame 3 To return to normal playback press PLAY B Selecting trac...

Page 18: ...n A and B can be set only within the same chapter track The section will now repeat continuously 3 To exit the sequence press REPEAT A B Zoom DVD VCD JPEG Zooming allows you to enlarge or reduce the video image during playback 1 Press ZOOM repeatedly to increase and decrease the playback video image 2 Press 1 2 3 4 to pan across the TV screen Forward Reverse Searching DVD VCD CD 1 Press 1 2 during...

Page 19: ...f the current title chapter For SuperVCD orVCD Total Single Remain displays the remaining time of the current total single track Total Single Elapsed displays the elapsed time of the current total single track 5 Press the DISPLAY key to confirm Playback starts from the selected time on the disc Disc Operations Special disc features Playing aTitle DVD 1 Press DISC MENU The disc title menu appears o...

Page 20: ...ess OK Playback will start automatically on the selected track For CDDA Musical CD Press PREVIEW to listen to the first 10 seconds of each sound track in the disc DVD example Video CD example Playing MP3 JPEG Picture CD IMPORTANT You have to turn on your TV and set to the correctVideo In channel See page 13 Setting up theTV General Operation 1 Load an MP3 JPEG Picture CD disc The data disc menu ap...

Page 21: ...y all files in the selected folder repeatedly SHUFFLE play all files in the selected folder in random order FOLDER play all files in the selected folder Special JPEG features Preview Function JPEG This function shows the content of the current folder or the whole disc 1 Press PREVIEW during playback Thumbnails of 12 pictures appears on the TV screen example for 12 thumbnail pictures display 2 Pres...

Page 22: ...n the System Menu Options are described in Getting Started Program not for Picture CD MP3 To select favourite tracks chapters playback in preferred sequence Program Chapter 01 12 START NEXT Exit 1 12 2 01 3 4 5 6 7 8 9 10 05 1 Use the numerical keypad 0 9 to direct input the tracks or chapters single track number with digit 0 in front for example 05 2 Move the cursor by pressing 3 4 1 2 to select ...

Page 23: ...ubmenu by pressing 2 3 Move the cursor by pressing the 34 keys to highlight the selected item Digital Audio Page Setup SPDIF Digital Output SPDIF Off LPCM Output All PCM Only Digital Output Set the Digital output according to your optional audio equipment connection SPDIF Off Turns off the SPDIF output All If you have connected your DIGITAL AUDIO OUT to a multi channel decoder receiver PCM Only On...

Page 24: ... Right mono sound will send output signals to Right speaker L Mono Left mono sound will send output signals to Left speaker and Right speaker System Menu Options R Mono Right mono sound will send output signals to Left speaker and Right speaker Mix Mono Left and Right mixed mono sound will send output signals to Left and Right speakers Dynamic To optimise the dynamic sound output high volume outpu...

Page 25: ...Bathroom Cave Arena Church Reverb Mode Reverb mode provides a virtual surround sound experience using just two speakers Off Concert Living Room Hall Bathroom Cave Arena and Church Helpful Hint Reverb mode will be activated when Downmix is set to off TV Display Set the aspect ratio of the DVD Player according to the TV you have connected 1 Press 34 to highlight TV Display 2 Enter its submenu by pre...

Page 26: ... 34 keys to highlight the selected item Picture Setting Setup Low Sharpness High Brightness 00 Medium Contrast 00 Low Sharpness You can personalise your picture colour by adjusting sharpness brightness or contrast High Choose high to make the picture s edge sharper Medium Choose medium to get a standard picture Low Choose low to make the picture s edge softer Brightness Contrast Choose a positive ...

Page 27: ...enu by pressing 2 3 Use 34 to highlight a rating level for the disc inserted DVDs that are rated above the level you selected will not play unless you enter your four digit password and choose a higher level rating To disable Parental controls and have all Discs play choose Off Parental cont d Helpful Hint Some DVDs are not encoded with a rating though the movie rating may be printed on the Disc c...

Page 28: ...cond time to confirm The new 4 digit code will be take effect 7 Press OK to exit Helpful Hints If the password has been changed the parental and disc lock code will also be changed The default password 1009 is always active even the password has been changed Default Setting the Default function will reset all options and your personal settings to the factory defaults and all your personal settings...

Page 29: ...r 24 bit 192kHz DVD fs 96 kHz 4Hz 44kHz fs 48 kHz 4Hz 22kHz SVCD fs 48 kHz 4Hz 22kHz fs 44 1kHz 4Hz 20kHz CD VCD fs 44 1kHz 4Hz 20kHz Signal Noise 1kHz 90 dB Dynamic range 1kHz 80 dB Crosstalk 1kHz 80 dB Distortion noise 1kHz 80 dB MPEG MP3 MPEG Audio L3 CONNECTIONS Scart Output Euroconnector S Video Output Mini DIN 4 pins Video Output Cinch yellow Audio Output L R Cinch white red Digital Output 1...

Page 30: ...le with the DVD Player Ensure that the DVD Player sTVType is set to match that of the Disc and yourTV No sound or distorted sound Adjust the volume Ensure to select stereo output on your disc except multichannel Check that the speakers are connected correctly Ensure that the DTS disc also supports Dolby Digital output No audio at digital output Check the digital connections Check if your receiver ...

Page 31: ...ayer unplug the AC cord from the AC outlet for 5 10 seconds Player does not respond to some Operations may not be permitted by the disc operating commands during playback Refer to the instructions of the disc jacket DVD Player cannot read Use a commonly available cleaning CD DVD to CDs DVDs clean the lens before sending the DVD Player for repair Menu items cannot be selected Press STOP twice befor...

Page 32: ...Expert Group which features small decrease in image quality in spite of its high compression ratio MP3 A file format with a sound data compression system MP3 is the abbreviation of Motion Picture Experts Group 1 or MPEG 1 Audio Layer 3 By using MP3 format one CD R or CD RW can contain about 10 times as much data volume as a regular CD can Multichannel DVD is specified to have each sound track cons...

Page 33: ...9 Latina 7665 Latvian 7686 Letzeburgesch 7666 Limburgan Limburger 7673 Lingala 7678 Lithuanian 7684 Luxembourgish 7666 Macedonian 7775 Malagasy 7771 Magyar 7285 Malayalam 7776 Maltese 7784 Manx 7186 Maori 7773 Marathi 7782 Marshallese 7772 Moldavian 7779 Mongolian 7778 Nauru 7865 Navaho Navajo 7886 Ndebele North 7868 Ndebele South 7882 Ndonga 7871 Nederlands 7876 Nepali 7869 Norsk 7879 Northern Sa...

Page 34: ...622 Paris Cédex 13 FRANCE Phone 0825 889 789 PHILIPS ELECTRONICS IRELAND LIMITED Consumer Information Center Newstead Clonskeagh DUBLIN 14 Phone 01 7640292 PHILIPS CONSUMER ELECTRONICS Servizio Consumatori Via Casati 23 20052 Monza Milano ITALY Phone 800 820026 PHILIPS MÁRKASZERVIZ Kinizsi U 30 36 Budapest 1092 HUNGARY Phone 01 2164428 PHILIPS PORTUGUESA S A Consumer Information Center Rua Dr Antó...

Reviews: