background image

9

EN

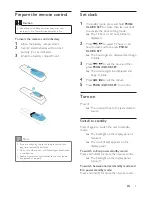
Prepare the remote control

Caution


Risk of explosion! Keep batteries away from heat, 

sunshine, or fire. Never discard batteries in fire.

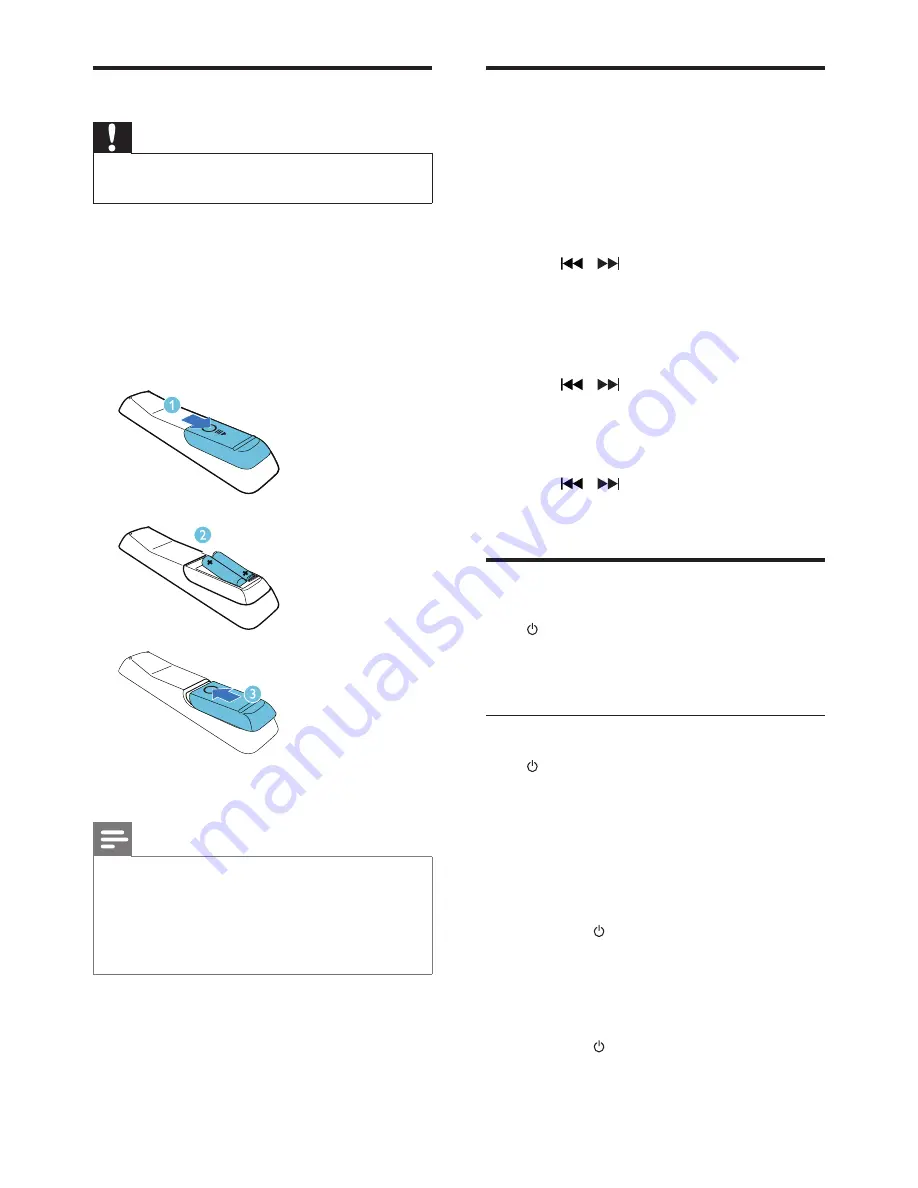
To insert the remote control battery: 

Open the battery compartment.

Insert 2 AAA batteries with correct 

polarity (+/-) as indicated.

Close the battery compartment.


Note


If you are not going to use the remote control for a 

long time, remove the batteries.


Do not use old and new or different types of batteries 

in combination. 


Batteries contain chemical substances, so they should 

be disposed of properly.

Set clock

In standby mode, press and hold 

PROG/

CLOCK SET

 for more than two seconds 

to activate the clock setting mode.


»

The 12 hour or 24 hour format is 

displayed.

Press   /   to select 12 hour or 24 

hour format, and then press 

PROG/

CLOCK SET

.


»

The hour digits are displayed and begin 

to blink.

Press   /   to set the hour, and then 

press 

PROG/CLOCK SET

.


»

The minute digits are displayed and 

begin to blink.

Press   /   to set the minute.

Press 

PROG/CLOCK SET

 to confirm.

Turn on

Press  .


»

The unit switches to the last selected 

source.

Switch to standby

Press   again to switch the unit to standby 

mode.


»

The backlight on the display panel is 

reduced.


»

The clock (if set) appears on the 

display panel.

To switch to Eco power standby mode:

Press and hold   for more than two seconds.


»

The backlight on the display panel 

turns off.

To switch between normal standby mode and 

Eco power standby mode:

Press and hold   for more than two seconds.

Summary of Contents for DTM5096

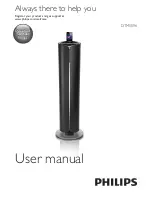
Page 1: ...www philips com welcome User manual Always there to help you Register your product and get support at DTM5096 Question Contact Philips ...

Page 2: ......
Page 3: ...ay 15 Stop play 15 Skip to a track 15 Search within a track 15 Repeat and shuffle play 15 Program tracks 15 Display ID3 information 15 6 Listen to the radio 16 Tune to a radio station 16 Program radio stations 16 Select a preset radio station 16 Display play information 16 7 Adjust sound 17 Adjust volume 17 Select a preset sound effect 17 Enhance bass 17 Immerse music over a wider spot 17 Mute sou...

Page 4: ...insert any objects other than discs into the disc compartment Do not insert warped or cracked discs into the disc compartment Remove the discs from the disc compartment if you are not using the product for an extended period of time Only use microfiber cloth to clean the product Care of the environment Your product is designed and manufactured with high quality materials and components which can b...

Page 5: ...nd So after prolonged listening what sounds normal can actually be loud and harmful to your hearing To guard against this set your volume to a safe level before your hearing adapts and leave it there To establish a safe volume level Set your volume control at a low setting Slowly increase the sound until you can hear it comfortably and clearly without distortion Listen for reasonable periods of ti...

Page 6: ...ement of copyrights and constitute a criminal offence This equipment should not be used for such purposes Windows Media and the Windows logo are trademarks or registered trademarks of Microsoft Corporation in the United States and or other countries Made for iPod Made for iPhone and Made for iPad mean that an electronic accessory has been designed to connect specifically to iPod iPhone or iPad res...

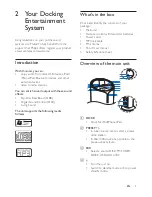
Page 7: ... Boost DBB Digital Sound Control DSC Living Sound The unit supports the following media formats What s in the box Check and identify the contents of your package Main unit Remote control with two AAA batteries Power cords MP3 link cable FM antenna Short User manual Safety Notice sheet Overview of the main unit a DOCK Dock for iPod iPhone iPad b PRESET In tuner source tap to select a preset radio s...

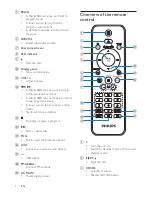
Page 8: ...t track In Disc USB Dock source tap and hold to search within a track In tuner source tap to tune to a radio station Tap to set clock and timer m Stop play or erase a program n Start or pause play o PULL Pull to open the protective panel p AUX Connect an external audio device q USB socket r FM AERIAL Connect FM antenna s AC MAIN Power supply socket Overview of the remote control a Turn the unit on...

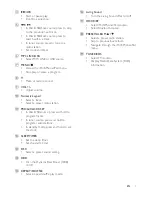
Page 9: ... k PROG CLOCK SET In Disc USB source press and hold to program tracks In tuner source press and hold to program radio stations In standby mode press and hold to set the clock l SLEEP TIMER Set the sleep timer Set the alarm timer m DSC Select a preset sound setting n DBB Turn the Dynamic Bass Boost DBB on off o REPEAT SHUFFLE Select repeat shuffle play mode p Living Sound Turn the Living Sound effe...

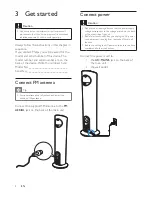
Page 10: ...o ___________________________ Connect FM antenna Tip For optimal reception fully extend and adjust the position of the antenna Connect the supplied FM antenna to the FM AERIAL jack on the back of the main unit Connect power Caution Risk of product damage Ensure that the power supply voltage corresponds to the voltage printed on the back or the underside of the unit Risk of electric shock When you ...

Page 11: ...nds to activate the clock setting mode The 12 hour or 24 hour format is displayed 2 Press to select 12 hour or 24 hour format and then press PROG CLOCK SET The hour digits are displayed and begin to blink 3 Press to set the hour and then press PROG CLOCK SET The minute digits are displayed and begin to blink 4 Press to set the minute 5 Press PROG CLOCK SET to confirm Turn on Press The unit switche...

Page 12: ...10 EN Note If no button is pressed over 15 minutes in standby mode this device goes to Eco power standby mode automatically ...

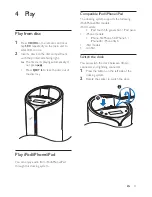
Page 13: ...Play iPod iPhone iPad You can enjoy audio from iPod iPhone iPad through this docking system Compatible iPod iPhone iPad The docking system supports the following iPod iPhone iPad models iPod models iPod touch 5th generation iPod nano iPhone models iPhone 5S iPhone 5C iPhone 5 iPhone4S iPhone 3GS iPad models All iPad Switch the dock You can switch the dock between 30 pin connector and lightning con...

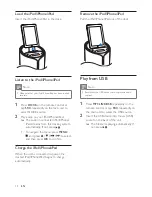
Page 14: ...ot press To navigate the menu press MENU and press to select and then press OK to confirm Charge the iPod iPhone iPad When the unit is connected to power the docked iPod iPhone iPad begins to charge automatically Remove the iPod iPhone iPad Pull the iPod iPhone iPad out of the dock Play from USB Note Ensure that the USB device contains playable audio content 1 Press MP3 LINK USB repeatedly on the ...

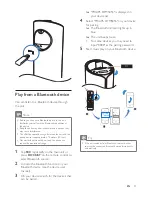
Page 15: ...p SRC repeatedly on the main unit or press DOCK BT on the remote control to select Bluetooth source 2 Activate the Bluetooth function on your Bluetooth device see the device user manual 3 On your device search for the devices that can be paired PHILIPS DTM5096 is displayed in your device list 4 Select PHILIPS DTM5096 on your device for pairing The Bluetooth indicator lights up in blue The unit bee...

Page 16: ...Bluetooth devices which were connected with the unit previously You can erase the Bluetooth connection information 1 Press to turn on the unit 2 Tap and hold on the main unit for more than 8 seconds The unit beeps once after erasing completes The unit restarts automatically ...

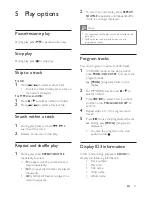
Page 17: ... 2 To return to normal play press REPEAT SHUFFLE repeatedly until repeat shuffle mode is no longer displayed Note The repeat and shuffle play cannot be activated at the same time Shuffle play cannot be selected when you play programmed tracks Program tracks You can program a maximum of 20 tracks 1 In CD USB mode at the stop position press PROG CLOCK SET to activate the program mode PROG program bl...

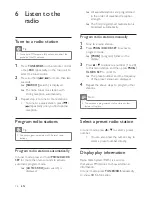
Page 18: ...to search is displayed All available stations are programmed in the order of waveband reception strength The first programmed radio station is broadcast automatically Program radio stations manually 1 Tune to a radio station 2 Press PROG CLOCK SET to activate program mode PROG program blinks on the display 3 Press to allocate a number 1 to 20 to this radio station and then press PROG CLOCK SET to ...

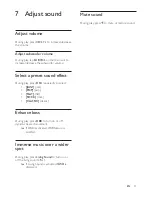
Page 19: ...ect During play press DSC repeatedly to select JAZZ jazz POP pop FLAT flat ROCK rock CLASSIC classic Enhance bass During play press DBB to turn on or off dynamic bass enhancement If DBB is activated DBB feature is enabled Immerse music over a wider spot During play press Living Sound to turn on or off the living sound effect If Living Sound is activated is displayed Mute sound During play press to...

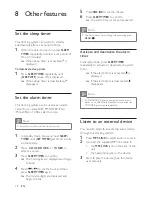
Page 20: ...igits are displayed and begin to blink 4 Press to set the hour and then press SLEEP TIMER again The minute digits are displayed and begin to blink 5 Press to set the minute 6 Press SLEEP TIMER to confirm The alarm timer is set and activated Note To exit the alarm timer setting without storing press MENU Activate and deactivate the alarm timer In standby mode press SLEEP TIMER repeatedly to activat...

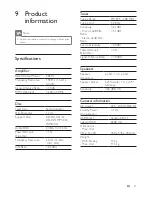
Page 21: ...equency Response 60 Hz 16 kHz 44 1 kHz S N Ratio 65 dBA Tuner Tuning Range FM 87 5 108 MHz Tuning grid 50 KHz Sensitivity Mono 26dB S N Ratio Stereo 46dB S N Ratio 22 dBf 51 dBf Search Selectivity 30 dBf Total Harmonic Distortion 3 Signal to Noise Ratio 70 dBA Speakers Speaker Impedance 6 ohm 3 x 6 ohm Speaker Driver 5 25 woofer 3 x 2 75 full range Sensitivity 82 dB m W General information AC powe...

Page 22: ...aximum 999 ID3 tag v2 0 or later File name in Unicode UTF8 maximum length 128 bytes Unsupported formats Empty albums an empty album is an album that does not contain MP3 WMA files and will not be shown in the display Unsupported file formats are skipped For example Word documents doc or MP3 files with extension dlf are ignored and not played AAC WAV PCM audio files DRM protected WMA files wav m4a ...

Page 23: ...n button first select the correct source with the remote control instead of the main unit Reduce the distance between the remote control and the unit Insert the batteries with its polarities signs aligned as indicated Replace the batteries Aim the remote control directly at the sensor on the front of the unit No disc detected Insert a disc Check if the disc is inserted upside down Wait until the m...

Page 24: ... reception is poor Move the mobile phone closer to the unit or remove any obstacle between the mobile phone and the unit Some mobile phones may connect and disconnect constantly when you make or end calls This does not indicate any malfunction of the unit For some mobile phones the Bluetooth connection may be deactivated automatically as a power saving feature This does not indicate any malfunctio...

Page 25: ...tice 2013 WOOX Innovations Limited All rights reserved Philips and the Philips Shield Emblem are registered trademarks of Koninklijke Philips N V and are used by WOOX Innovations Limited under license from Koninklijke Philips N V DTM5096_12_UM_V2 0 ...

Reviews: