background image

3

English

EN

Contents

 ;(%##

<

Safety 4
Notice 5

2 =(:(:"#(

3

Introduction 7
What's in the box 

7

Overview of the main unit 

8

Overview of the remote control 

9

 4>

Place the product 

11

Connect speakers 

11

Connect the FM antenna 

11

Connect power 

12

Install/replace the remote control 

batteries 12

< ?###

Turn on 

13

Set the clock 

13

Select a source 

14

 +"

<

Play a disc 

14

Play from a USB storage device 

14

Control play 

15

Program tracks 

15

@ *#8:/

@

Compatible iPod/iPhone models 

16

Enjoy audio through the dock 

16

Charge your iPod/iPhone 

17

Unload your iPod/iPhone 

17

3 A##B

)

Tune to an FM radio station 

18

Program radio stations automatically 

18

Program radio stations manually 

18

Tune to a preset radio station 

18

Display RDS information 

19

) *#8#%:

&

Play a tape 

19

Record from different sources 

20

& D6#

2

Adjust volume level 

20

Adjust bass level 

20

Adjust treble level 

20

Use automatic loudness control 

20

Mute sound 

20

 F#8>#

2

Set alarm timer 

21

Set sleep timer 

21

Route audio from other devices 

21

Listen through headphone 

22

 +:#>(#

22


USB playability information 

23

Supported MP3 disc formats 

23

RDS program types 

23

Maintenance 24

2 G98#5

2

DCM3120_12_UM_01_V2.1.indb   3

3/31/2012   10:01:13 AM

Summary of Contents for DCM3120

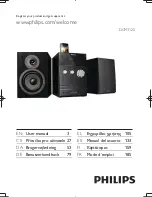
Page 1: ...Register your product and get support at www philips com welcome EL ES FI FR EN CS 0 1 23 DA 4 5 1 6 5 DE 4 7 8 9 8 3 DCM3120 ...

Page 2: ...joy audio through the dock 16 Charge your iPod iPhone 17 Unload your iPod iPhone 17 3 A B Tune to an FM radio station 18 Program radio stations automatically 18 Program radio stations manually 18 Tune to a preset radio station 18 Display RDS information 19 8 Play a tape 19 Record from different sources 20 D 6 2 Adjust volume level 20 Adjust bass level 20 Adjust treble level 20 Use automatic loudne...

Page 3: ...ct the product to the power outlet if the voltage is different Never expose the remote control or batteries to rain water sunshine or excessive heat Avoid force coming onto power plugs I 6 5 8 K Visible and invisible laser radiation when open Avoid exposure to beam Do not touch the disc optical lens inside the disc compartment Never place the product or any objects on power cords or on other elect...

Page 4: ...ean Directive 2006 66 EC which cannot be disposed with normal household waste Please inform yourself about the local rules on separate collection of batteries because correct disposal helps to prevent negative consequences for the environmental and human health P 1 All unnecessary packaging has been omitted We have tried to make the packaging easy to separate into three materials cardboard box pol...

Page 5: ...ence This equipment should not be used for such purposes 2012 Koninklijke Philips Electronics N V notice Trademarks are the property of Koninklijke Philips Electronics N V or their respective owners Philips reserves the right to change products at any time without being obliged to adjust earlier supplies accordingly Note The type plate is located on the back of the system ...

Page 6: ...D Files mp3 wma Audio tapes USB storage device Compatibility USB 1 1 Class support MSC Mass Storage Class File system FAT12 FAT16 FAT32 Maximum number of albums folders 99 Maximum level of directory 8 iPhone and iPod models iPhone 4S iPhone 4 iPhone 3GS iPhone 3G iPhone iPod touch 1st 2nd 3rd and 4th generation iPod nano 1st 2nd 3rd 4th 5th and 6th generation iPod classic iPod with video iPod with...

Page 7: ...ne iPod b G c Turn on the system Switch the system to eco power standby mode or normal standby mode a m n o p b d e f g h i j k l c d 4DHH Rotate to increase or decrease the bass level e GIP4AP Rotate to increase or decrease the treble level ...

Page 8: ...n a track Tune to a radio station h V Skip to the previous or next album Select a preset radio station i HF IOP Press repeatedly to select a source j Connect to a headphone with 3 5 mm connector k XA Y Connect to the audio output socket usually the headphone socket of an external device l ZBU m ZFA P Rotate to increase or decrease the volume level n Start pause or resume play o Eject or close the ...

Page 9: ...me level i Y Enter the track number to select a track directly Enter the sequence number to select a preset radio station j IF Program audio tracks Program radio stations k AF UYPHH Enable or disable the feature of automatic loudness control l 4DHH Activate the adjustment of bass level m GIP4AP Activate the adjustment of treble level n IP PDGVIDYUF Select a play mode normal play repeat o Start pau...

Page 10: ...se the supplied speakers only Connect speakers with the same or higher impedance only Refer to H J for details Connect the speaker cable plugs to the H PD PI F G sockets the left one to the A VAX socket the right one to the I VIX socket O 8 B Note For optimal reception fully extend the antenna and adjust its position or connect an outdoor antenna This product does not support MW medium wave radio ...

Page 11: ...you have completed all other connections Connect the AC power cord to the DO D YH_ socket on the back panel and the wall outlet V 8 control batteries Open the battery compartment 2 Insert 2 AAA batteries with correct polarity as indicated Close the battery compartment ...

Page 12: ...to the normal standby mode Press to switch this product between the working mode and a standby mode Note When an iPod iPhone is connected this product does not switch to the eco power standby mode H 8 Note During setting if no action is made within 90 seconds the system exits clock setting without saving earlier operations In normal standby mode press and hold OAFO U H AD to activate clock setting...

Page 13: ...edly to switch the source to 2 Press to eject the disc tray Load a disc with the printed side facing up Press again to close disc compartment Play starts automatically after a few seconds If play does not start automatically Press to start play H4 5 1 are copied onto a supported USB storage device Flash drive Memory card reader HDD hard disc drive This product can detect only a portable HDD with U...

Page 14: ...when no less than one album exits Enter the number of a track to play it IP PDG IDYUF Select an available play mode repeat the current track repeat all tracks repeat the current album play tracks randomly play tracks in sequence is unavailable for programmed tracks 5 Note You can program a maximum of 20 tracks During programming if no operation is made within 20 seconds the system returns to stop ...

Page 15: ...rack 3 Repeat steps 3 to 6 to program more tracks Press to start play Erase the program G 8 5 S Press twice Switch to another souce 8 You can enjoy audio from iPod iPhone through this system Note No audio output from the headphone socket in this situation O 9 V 8 models This system supports the following iPod and iPhone models iPhone 4S iPhone 4 iPhone 3GS iPhone 3G iPhone iPod touch 1st 2nd 3rd a...

Page 16: ...he playlist of iPod iPhone Navigate through the playlist of iPod iPhone V Skip to the previous next track Press and hold to rewind or search forward fast O8 5 V 8 Once the iPod iPhone is docked and recognized the charging starts V 8 Note Risk of damage to the dock or your iPod iPhone Do not twist or shake your iPod iPhone during unloading Pull the iPod iPhone out of the dock 2 Flip down to the lid...

Page 17: ... hold IF until blinks All available stations are programmed in the order of waveband reception strength broadcast automatically Program radio stations manually Note You can program a maximum of 20 preset radio stations To overwrite a programmed radio station store another one with its sequence number Tune to a radio station 2 Press IF to activate programming ff XX indicates the sequence number bli...

Page 18: ...ze clock with an RDS station that transmits time signals See H 8 2 Tune to an RDS radio station that transmits time signals The system reads RDS time automatically Note The accuracy of the clock depends on the RDS radio station 8 recorder You can use this system to play audio tapes and record from different sources to a tape Play a tape Press HF IOP repeatedly to switch the source to 2 Press to op...

Page 19: ...s are applicable to all supported media D 6 1 1 On the remote control press ZFA VX repeatedly On the main unit rotate ZFA P clockwise or anti clockwise D 6 9 1 On the remote control press 4DHH to enable bass adjustment and then press ZFA VX repeatedly On the main unit rotate 4DHH clockwise or anti clockwise D 6 9 1 On the remote control press GIP4AP to enable treble adjustment and then press ZFA V...

Page 20: ...ource To use iPod iPhone playlist as the alarm source create a playlist named Press HAPP G PI The hour digits blink Press V repeatedly to set the hour and then press HAPP G PI to The minute digits blink Press V to set the minute and then press HAPP G PI ff XX indicates the volume level of alarm blinks 6 Press ZFA VX to set the alarm volume and then press HAPP G PI is displayed To deactivate the al...

Page 21: ...audio output from the headphone socket when you listen to the docked iPod iPhone Listen through the speakers instead P M 3 K N I L P M 3 K N I L Note Product information is subject to change without prior notice H J D J Maximum output power 2 X 30 W RMS Frequency Response 40 Hz 20 kHz Signal to Noise Ratio H Aux Input 1V RMS 20 kOhm Disc Laser type Semiconductor Disc diameter 12 cm 8 cm Support di...

Page 22: ...ariable bitrate WMA v9 or earlier Directory nesting up to a maximum of 8 levels Number of albums folders maximum 99 ID3 tag v2 0 or later File name in Unicode UTF8 maximum length 16 bytes M Empty albums an album that does not example Word documents doc or MP3 not played J J _ m4p mp4 aac H ISO9660 Joliet _ Maximum album number 99 Supported sampling frequencies 32 kHz 44 1 kHz 48 kHz Supported bitr...

Page 23: ...ty clean it with a cleaning cloth Wipe the disc from the centre out Do not use solvents such as benzene thinner commercially available cleaners or antistatic spray intended for analogue records Clean the disc lens After prolonged use dirt or dust may accumulate at the disc lens To ensure good play quality clean the disc lens with Philips CD lens cleaner or any commercially available cleaner Follow...

Page 24: ...se from the system Reconnect the AC power plug and then turn on the system again With a power saving feature the system switches off automatically 15 minutes after the system stays inactivity Remote control does not work Before you press any function button select the correct source with the remote control instead of the main unit Reduce the distance between the remote control and the main unit In...

Page 25: ...EN Problem Solution Timer does not work Set the clock correctly Switch on the timer Clock timer setting is erased Power has been interrupted or the AC power cord has been disconnected Reset the clock timer ...

Page 26: ...H 96 8 5 L 8 Ï 2 2 6 8 P Y Z D 58 1 UO 2 Ð 2Ð ÐZ2 ...

Reviews: